Running Node-RED on Enapter Gateway
What Is Node-RED?
Node-RED is an open-source flow-based development tool for visual programming of event-driven applications. It is built on top of Node.js and provides a browser-based flow editor that allows developers to wire together devices, APIs, and online services in a visual way. Node-RED is very helpful for converting, amendment of different protocols or different services.
This guide will cover some applications of Node-RED:
- Translation of Zigbee2MQTT MQTT Protocol to HTTP
Requirements
- Enapter Gateway version 2.x.x
- Enapter Gateway IP address in Local Area Network, in this example — 192.168.123.10
Setting Up Node-RED Using Docker Container
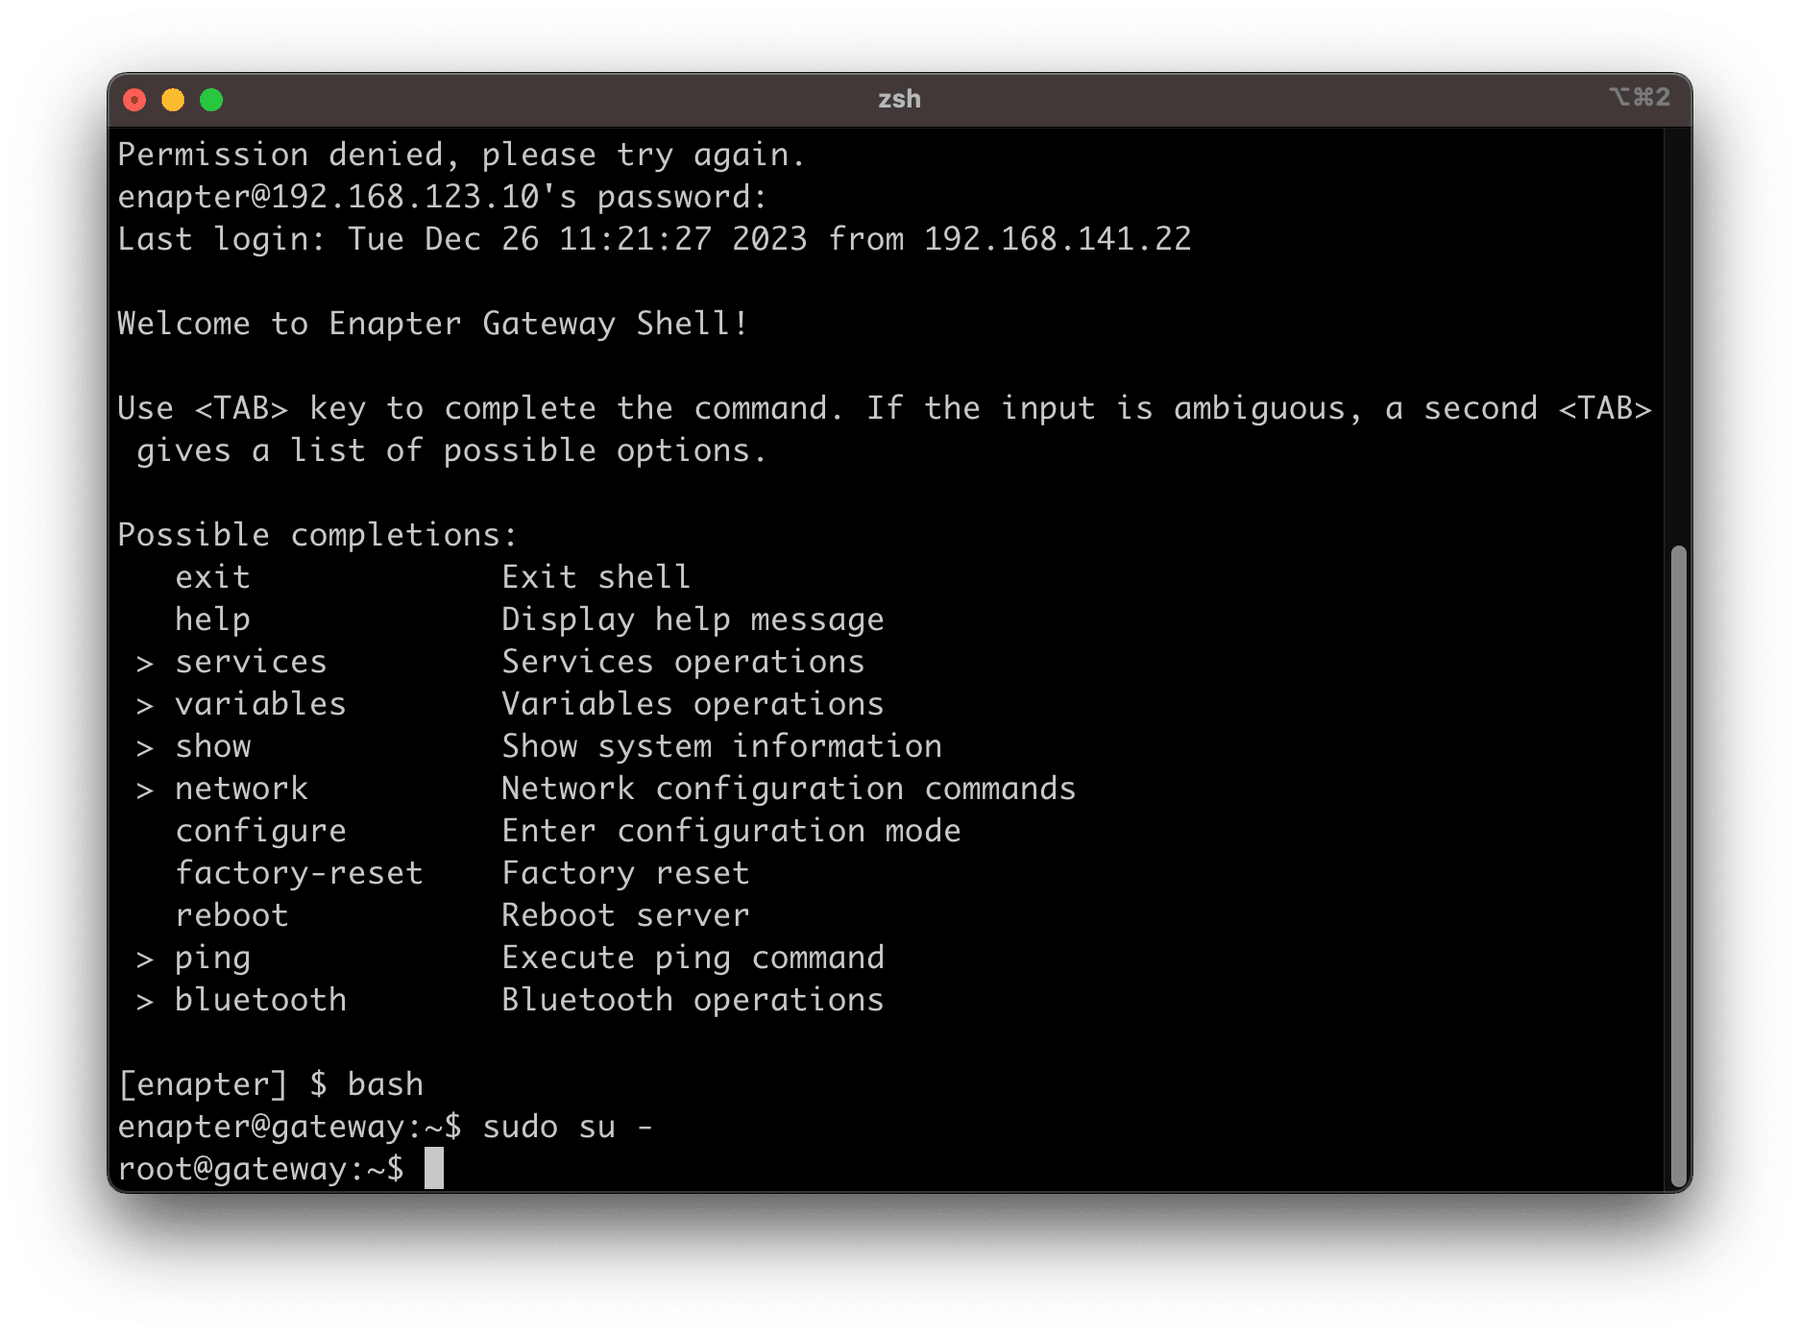
Connect to the Gateway Terminal either over SSH or Cloud. Switch to the shell
using the bash command, and then switch to root with the
sudo su -
command.
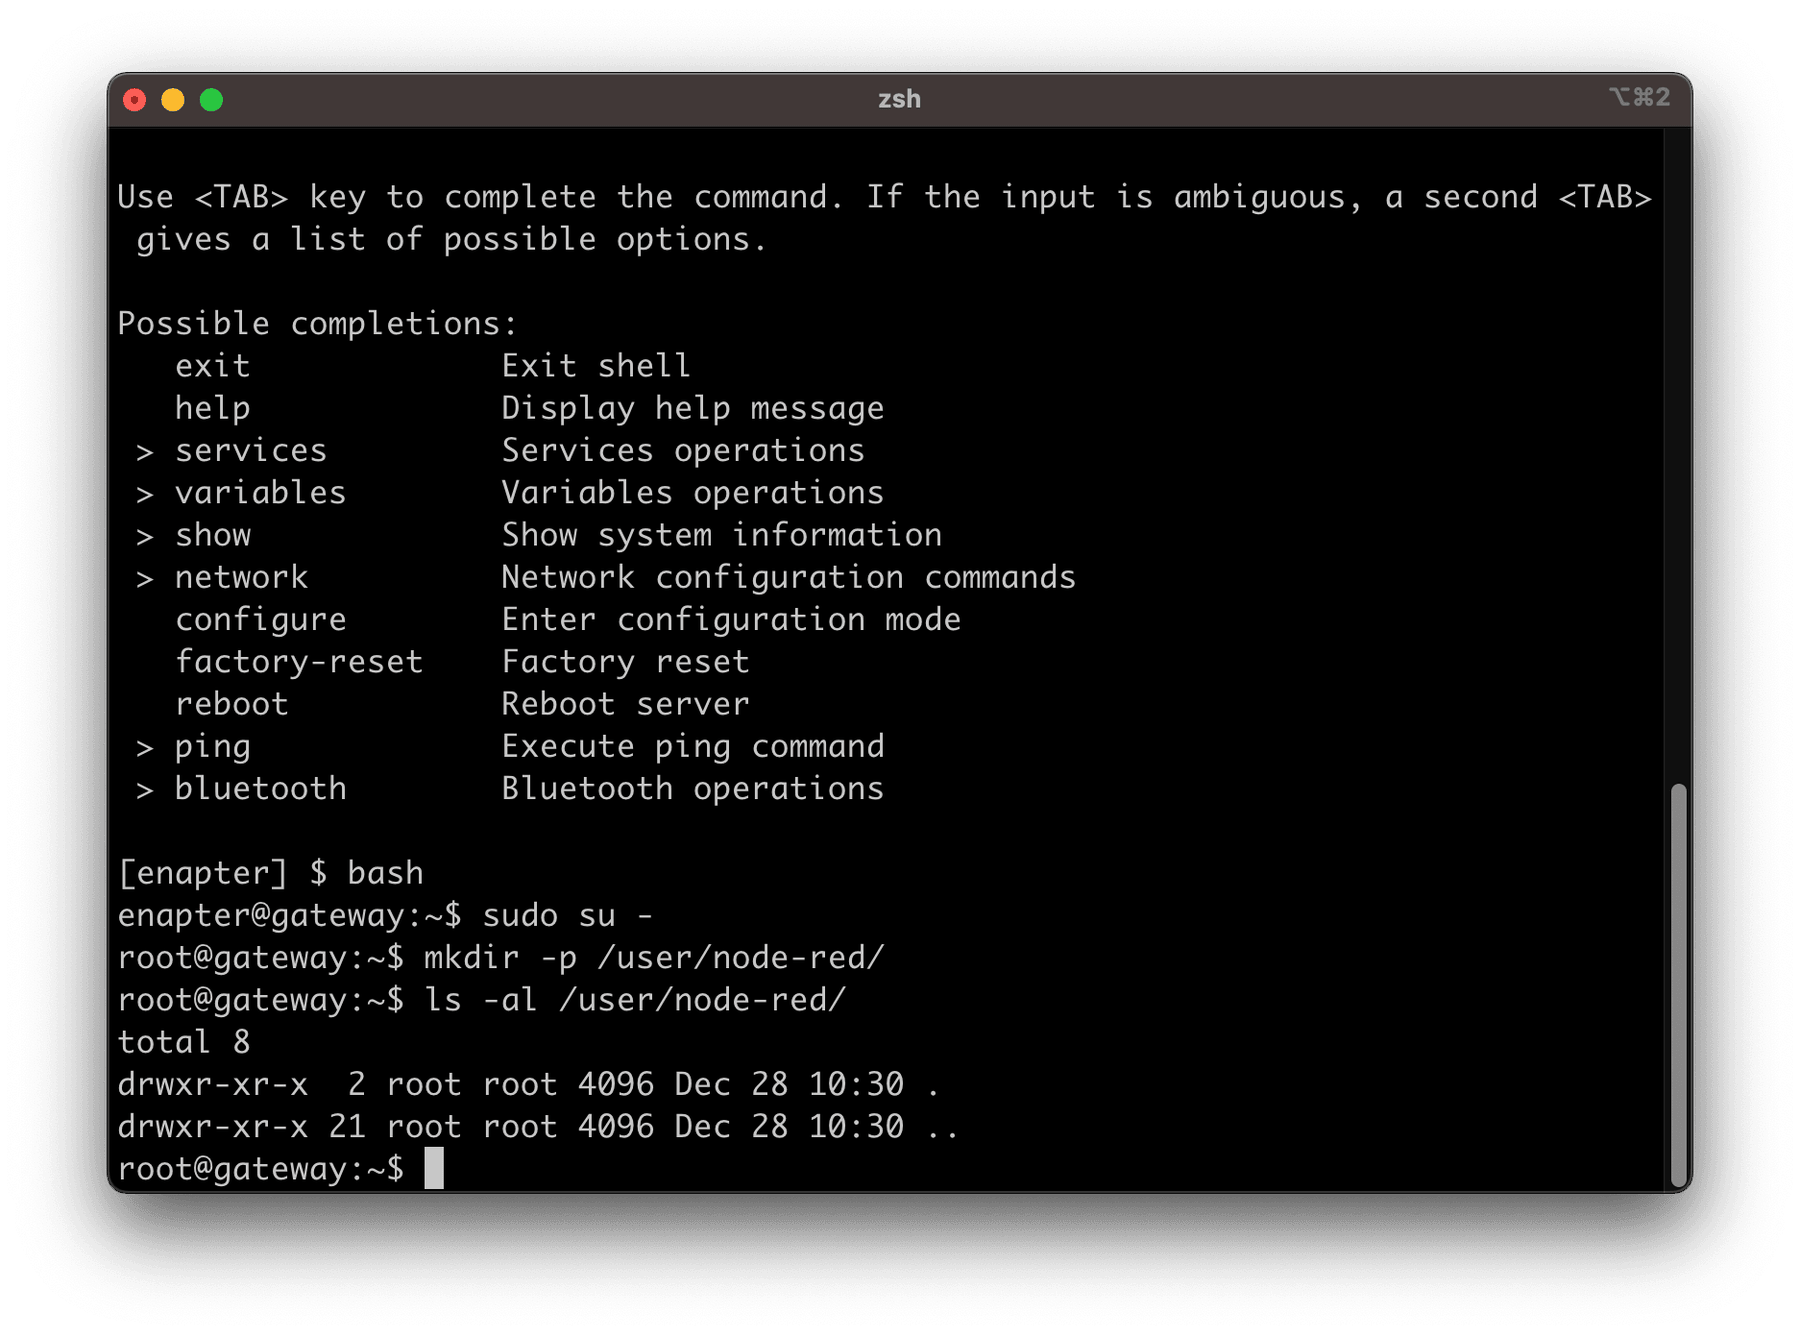
Create Node-RED data directory: mkdir -p /user/node-red/.
Open /user/etc/docker-compose/docker-compose.yml with nano editor and put the following configuration under services section.
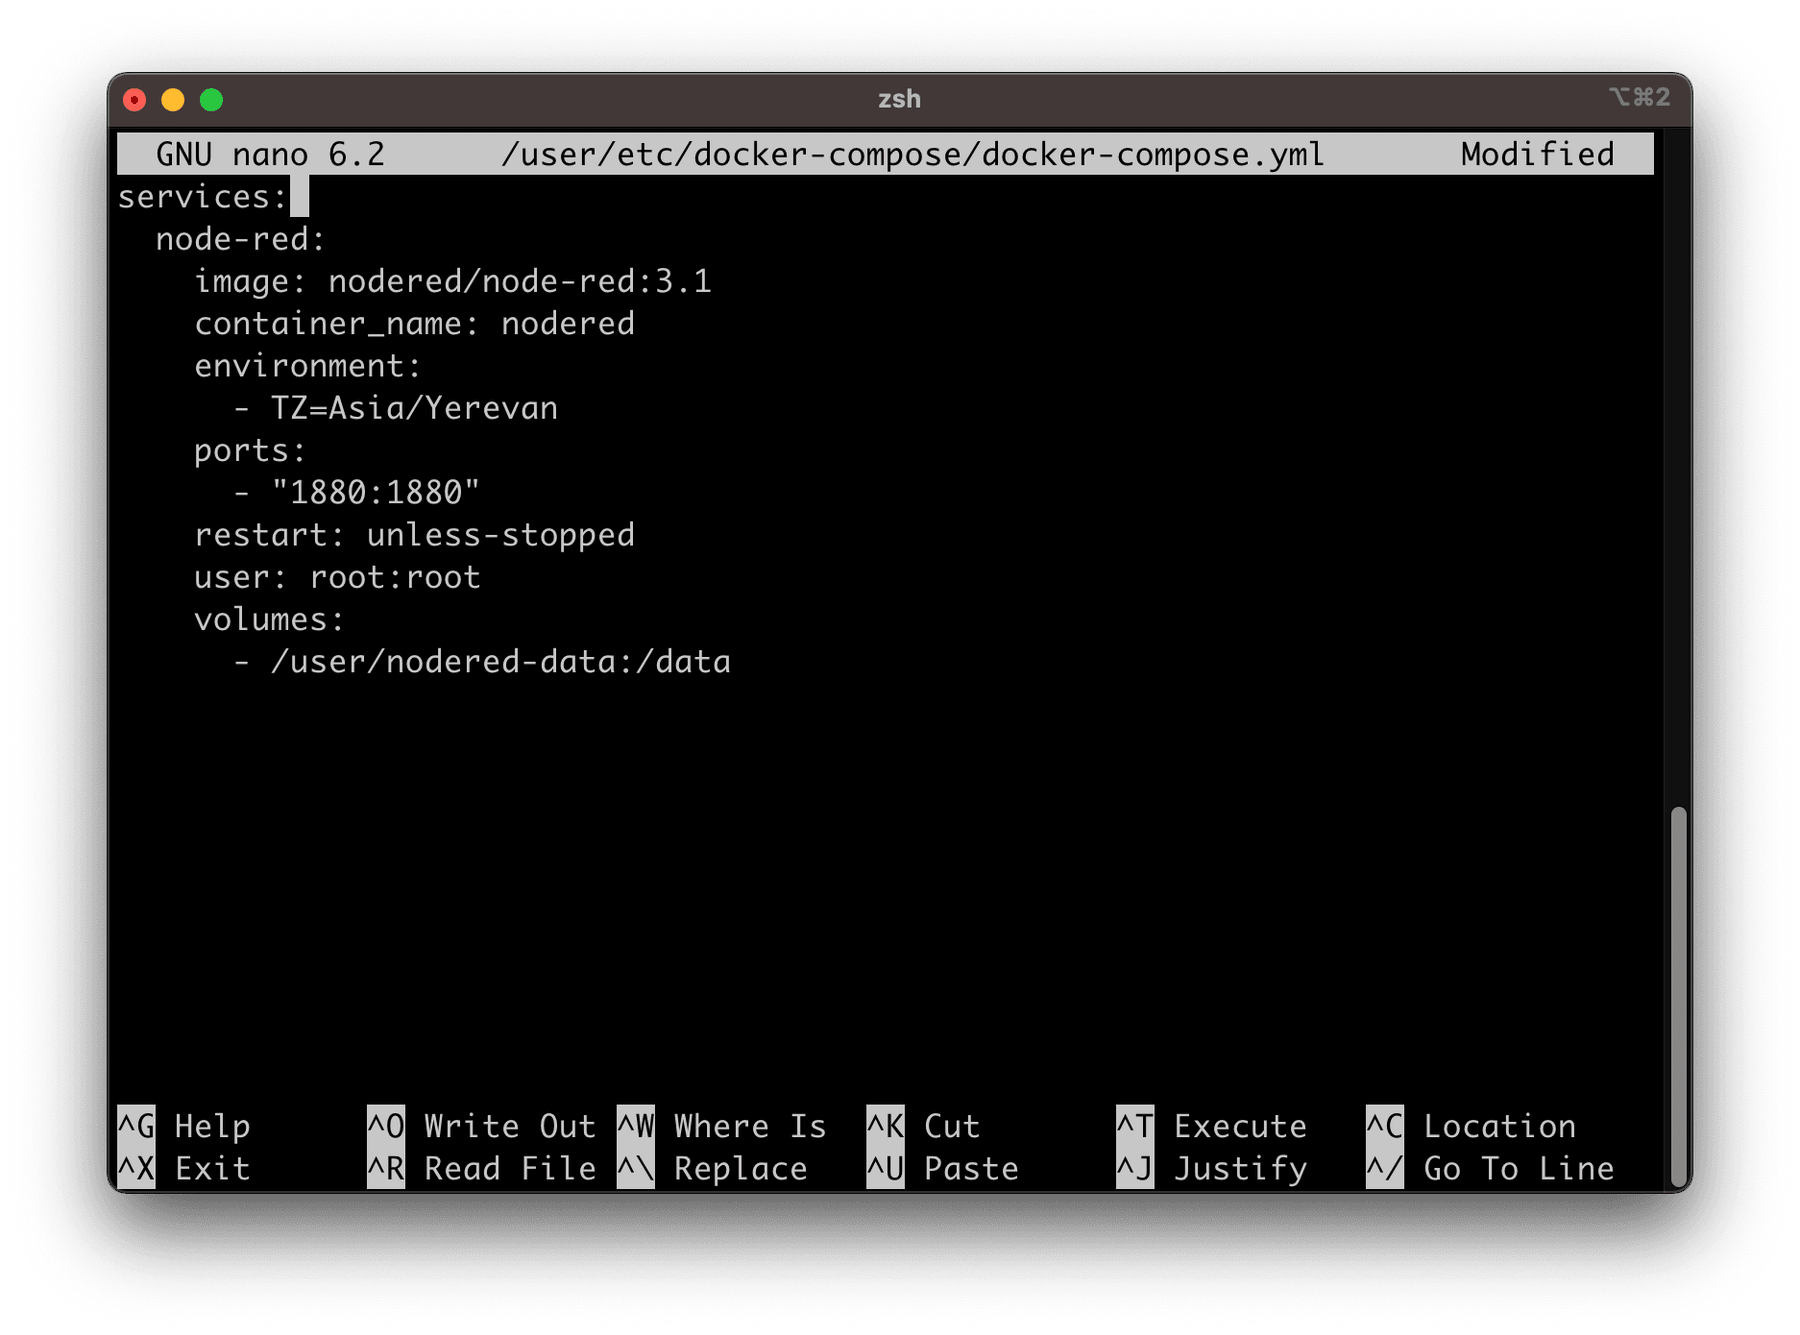
services:
  node-red:
    image: nodered/node-red:3.1
    container_name: nodered
    environment:
      - TZ=Asia/Yerevan
    ports:
      - "1880:1880"
    restart: unless-stopped
    user: root:root
    volumes:
      - /user/nodered-data:/data
Press CTRL+X to exit, save your configuration and restart docker compose with systemctl restart enapter-docker-compose command.
If everything was done correctly, you will be able to connect to the Node-RED web interface using the URL http://YOUR_GATEWAY_IP:1880.
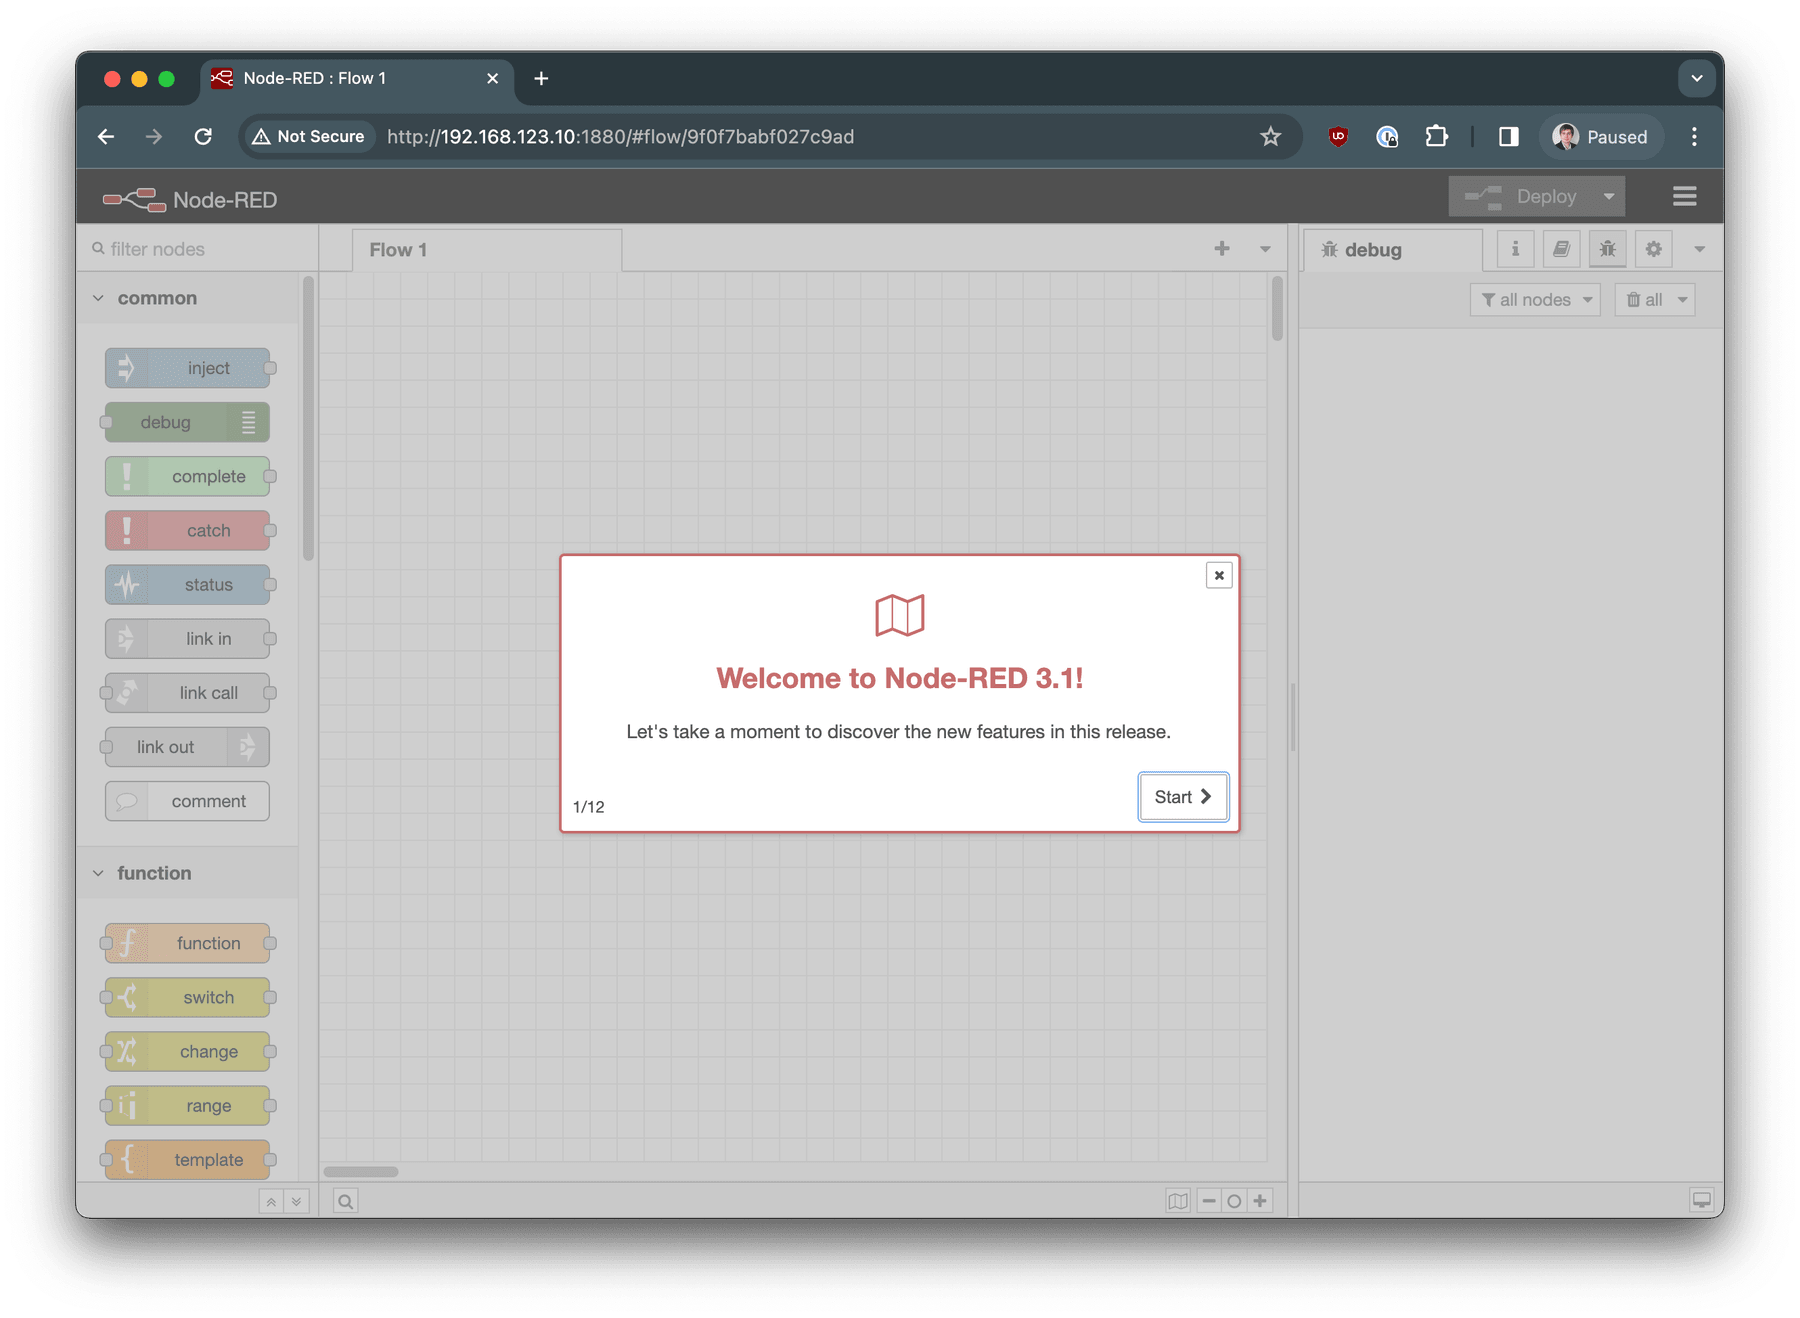
The Node-RED is installed and ready for use!
Translation of Zigbee2MQTT MQTT Protocol to HTTP
At the time of writing this guide, virtual UCM doesn't support direct connection using the MQTT protocol. Therefore, to work with MQTT, for example, in the case of using Zigbee2MQTT, an MQTT to HTTP translation is required for the integration of such devices into Enapter Cloud.
Luckily, Node-RED is perfect for this task!
Requirements
To set up translation, you will require having:
- Enapter Gateway version 2.x.x
- Configured Zigbee2MQTT software
To set up translation, you require to know the following:
- Zigbee2MQTT base topic. In our example it will be
zigbee2mqtt. - Enapter Gateway Public MQTT username. In our example it will be
mqtt. - Enapter Gateway Public MQTT password. In our example it will be
password. - At least one Zigbee device
Friendly name. We will useLiving Room Climatein this example.
Setting UP Node-RED Flow
In Node-RED, a flow is a visual representation of a sequence of actions or processes. It's the core building block used in the Node-RED editor to create event-driven applications. A flow consists of nodes that perform specific tasks and wires that connect these nodes to define the flow of data between them.
Open Node-RED Web interface at `http://YOUR_GATEWAY_IP:1880. Click on Menu -> Import
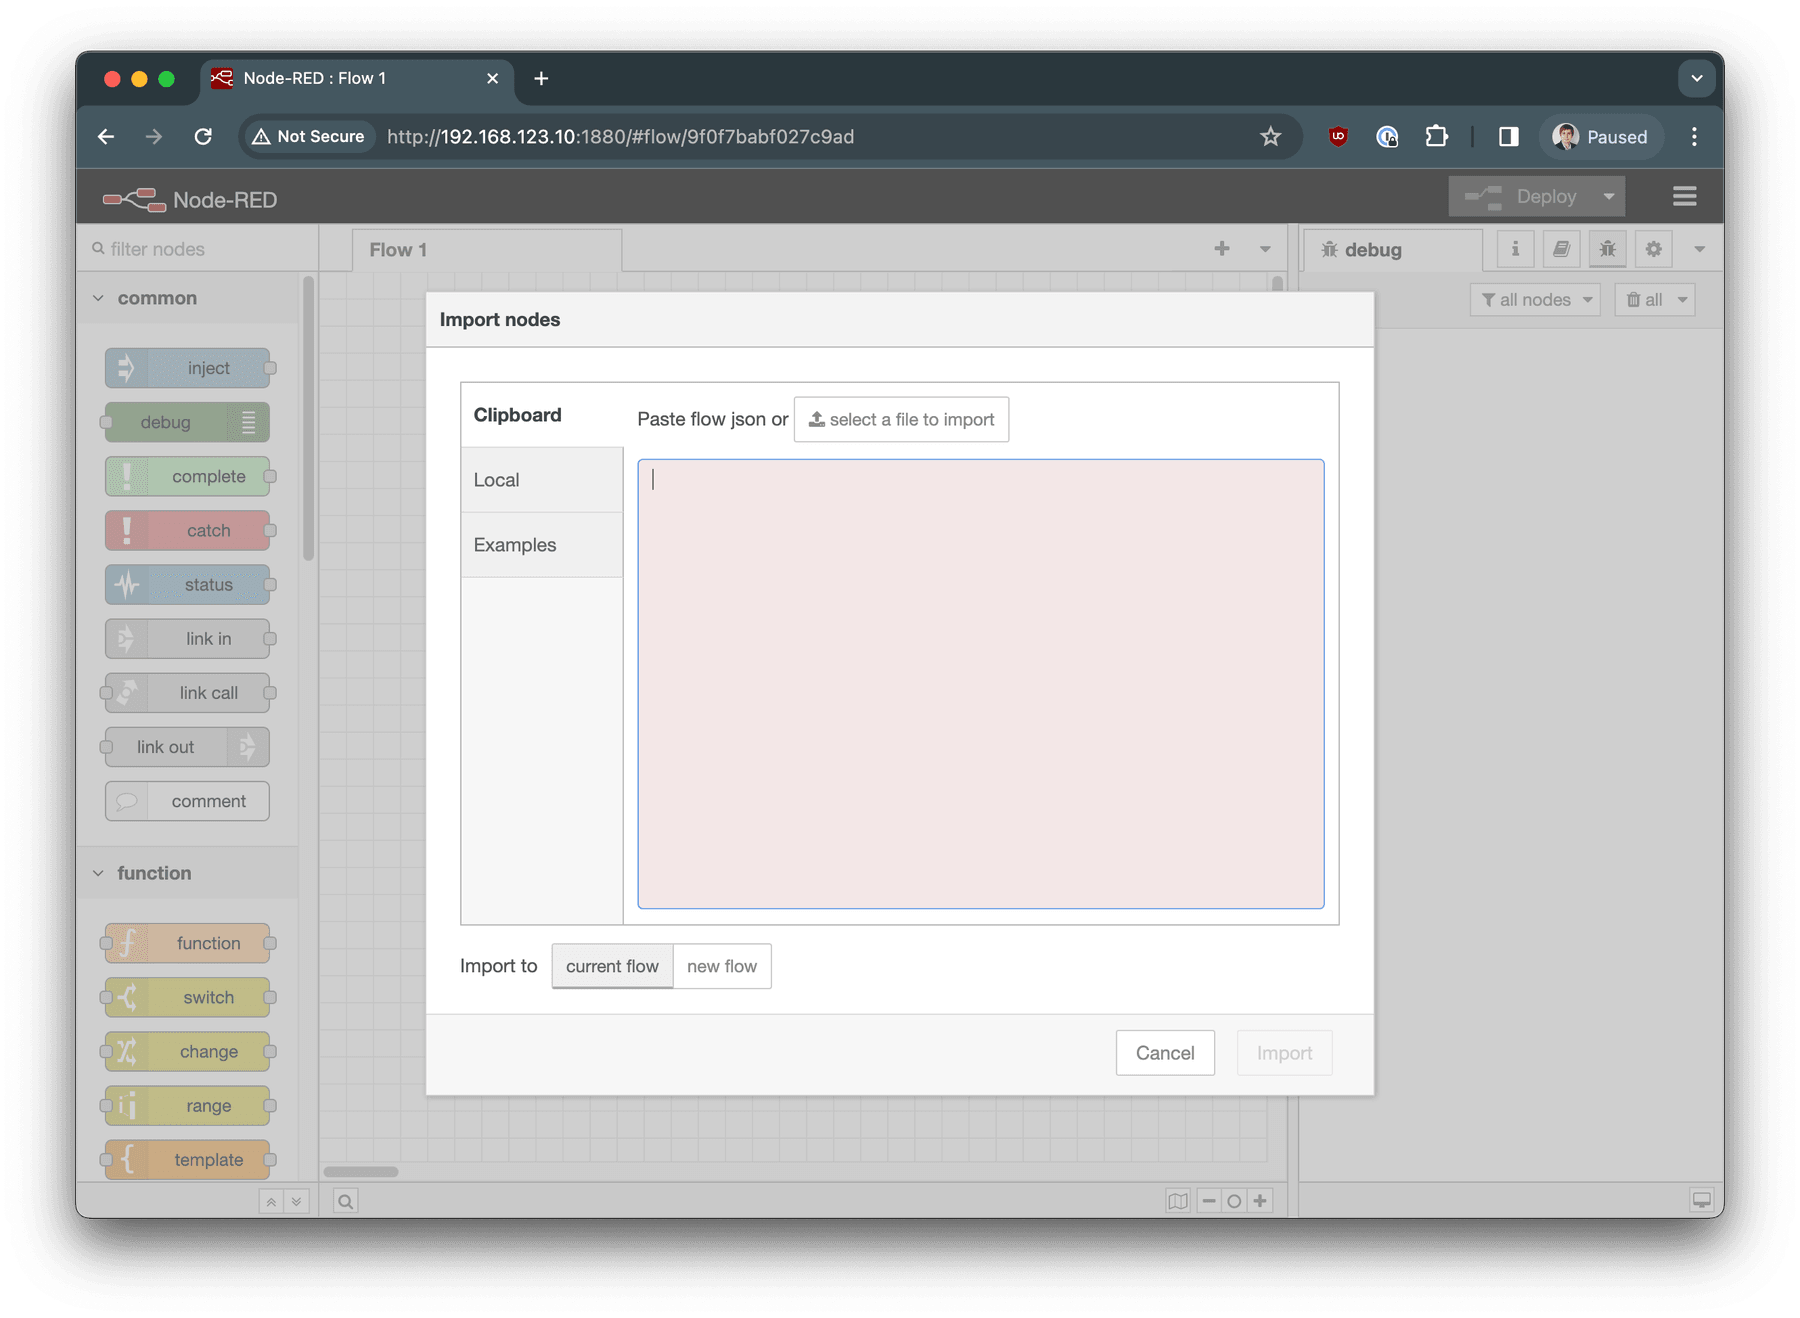
Copy and paste the JSON configuration below and press Import button.
[
  {
    "id": "d6582bdba1670443",
    "type": "tab",
    "label": "Zigbee2MQTT HTTP API",
    "disabled": false,
    "info": "",
    "env": []
  },
  {
    "id": "860dd4ce0709cb68",
    "type": "mqtt in",
    "z": "d6582bdba1670443",
    "name": "Connection to Zigbee2MQTT",
    "topic": "zigbee2mqtt/+",
    "qos": "2",
    "datatype": "utf8",
    "broker": "ec4fd85471d86387",
    "nl": false,
    "rap": true,
    "rh": 0,
    "inputs": 0,
    "x": 160,
    "y": 40,
    "wires": [["13fee8ea81ce27c5", "4ef9a256ada441aa"]]
  },
  {
    "id": "13fee8ea81ce27c5",
    "type": "debug",
    "z": "d6582bdba1670443",
    "name": "debug msg object",
    "active": true,
    "tosidebar": true,
    "console": false,
    "tostatus": false,
    "complete": "true",
    "targetType": "full",
    "statusVal": "",
    "statusType": "auto",
    "x": 510,
    "y": 40,
    "wires": []
  },
  {
    "id": "56d54b820ee3959a",
    "type": "function",
    "z": "d6582bdba1670443",
    "name": "Lookup Device Data",
    "func": "// default response message is empty object\n// we'll use it if we don't have a data or device\n// name is not provided\nmsg.payload = \"{}\"\n\nconst device_name = msg.req.query[\"device\"];\n\nif (device_name != null && device_name != \"\") {\n    const device_name_key = \"device-\" + device_name.replace(/\\s/g, \"_\");\n    const device_telemetry = flow.get(device_name_key);\n    \n    if (device_telemetry != null && device_telemetry != \"\") {\n        msg.payload = device_telemetry\n    }\n}\n\nreturn msg;",
    "outputs": 1,
    "timeout": "",
    "noerr": 0,
    "initialize": "",
    "finalize": "",
    "libs": [],
    "x": 380,
    "y": 200,
    "wires": [["cfe268da996ec193"]]
  },
  {
    "id": "486a47da3b33483b",
    "type": "http in",
    "z": "d6582bdba1670443",
    "name": "[GET] /zigbee",
    "url": "/zigbee",
    "method": "get",
    "upload": false,
    "swaggerDoc": "",
    "x": 110,
    "y": 200,
    "wires": [["56d54b820ee3959a"]]
  },
  {
    "id": "cfe268da996ec193",
    "type": "http response",
    "z": "d6582bdba1670443",
    "name": "HTTP Response",
    "statusCode": "200",
    "headers": {},
    "x": 600,
    "y": 200,
    "wires": []
  },
  {
    "id": "4ef9a256ada441aa",
    "type": "function",
    "z": "d6582bdba1670443",
    "name": "Save Device Data",
    "func": "const device_name_regexp = new RegExp(\"zigbee2mqtt/([^/]+)\");\n\nconst matches = msg.topic.match(device_name_regexp);\nconst device_name = matches[1]\n\nif (device_name != null && device_name != \"\") {\n    const data = msg.payload;\n    const device_name_key = \"device-\" + device_name.replace(/\\s/g, \"_\");\n    \n    flow.set(device_name_key, data);\n}\n\nreturn msg;",
    "outputs": 1,
    "timeout": "",
    "noerr": 0,
    "initialize": "",
    "finalize": "",
    "libs": [],
    "x": 510,
    "y": 100,
    "wires": [[]]
  },
  {
    "id": "ec4fd85471d86387",
    "type": "mqtt-broker",
    "name": "Enapter GW Public MQTT",
    "broker": "10.88.0.1",
    "port": "9883",
    "clientid": "",
    "autoConnect": true,
    "usetls": false,
    "protocolVersion": "4",
    "keepalive": "60",
    "cleansession": true,
    "autoUnsubscribe": true,
    "birthTopic": "",
    "birthQos": "0",
    "birthRetain": "false",
    "birthPayload": "",
    "birthMsg": {},
    "closeTopic": "",
    "closeQos": "0",
    "closeRetain": "false",
    "closePayload": "",
    "closeMsg": {},
    "willTopic": "",
    "willQos": "0",
    "willRetain": "false",
    "willPayload": "",
    "willMsg": {},
    "userProps": "",
    "sessionExpiry": ""
  }
]
You will get Zigbee2MQTT HTTP API flow imported. Click on Zigbee2MQTT HTTP API tab to open it.
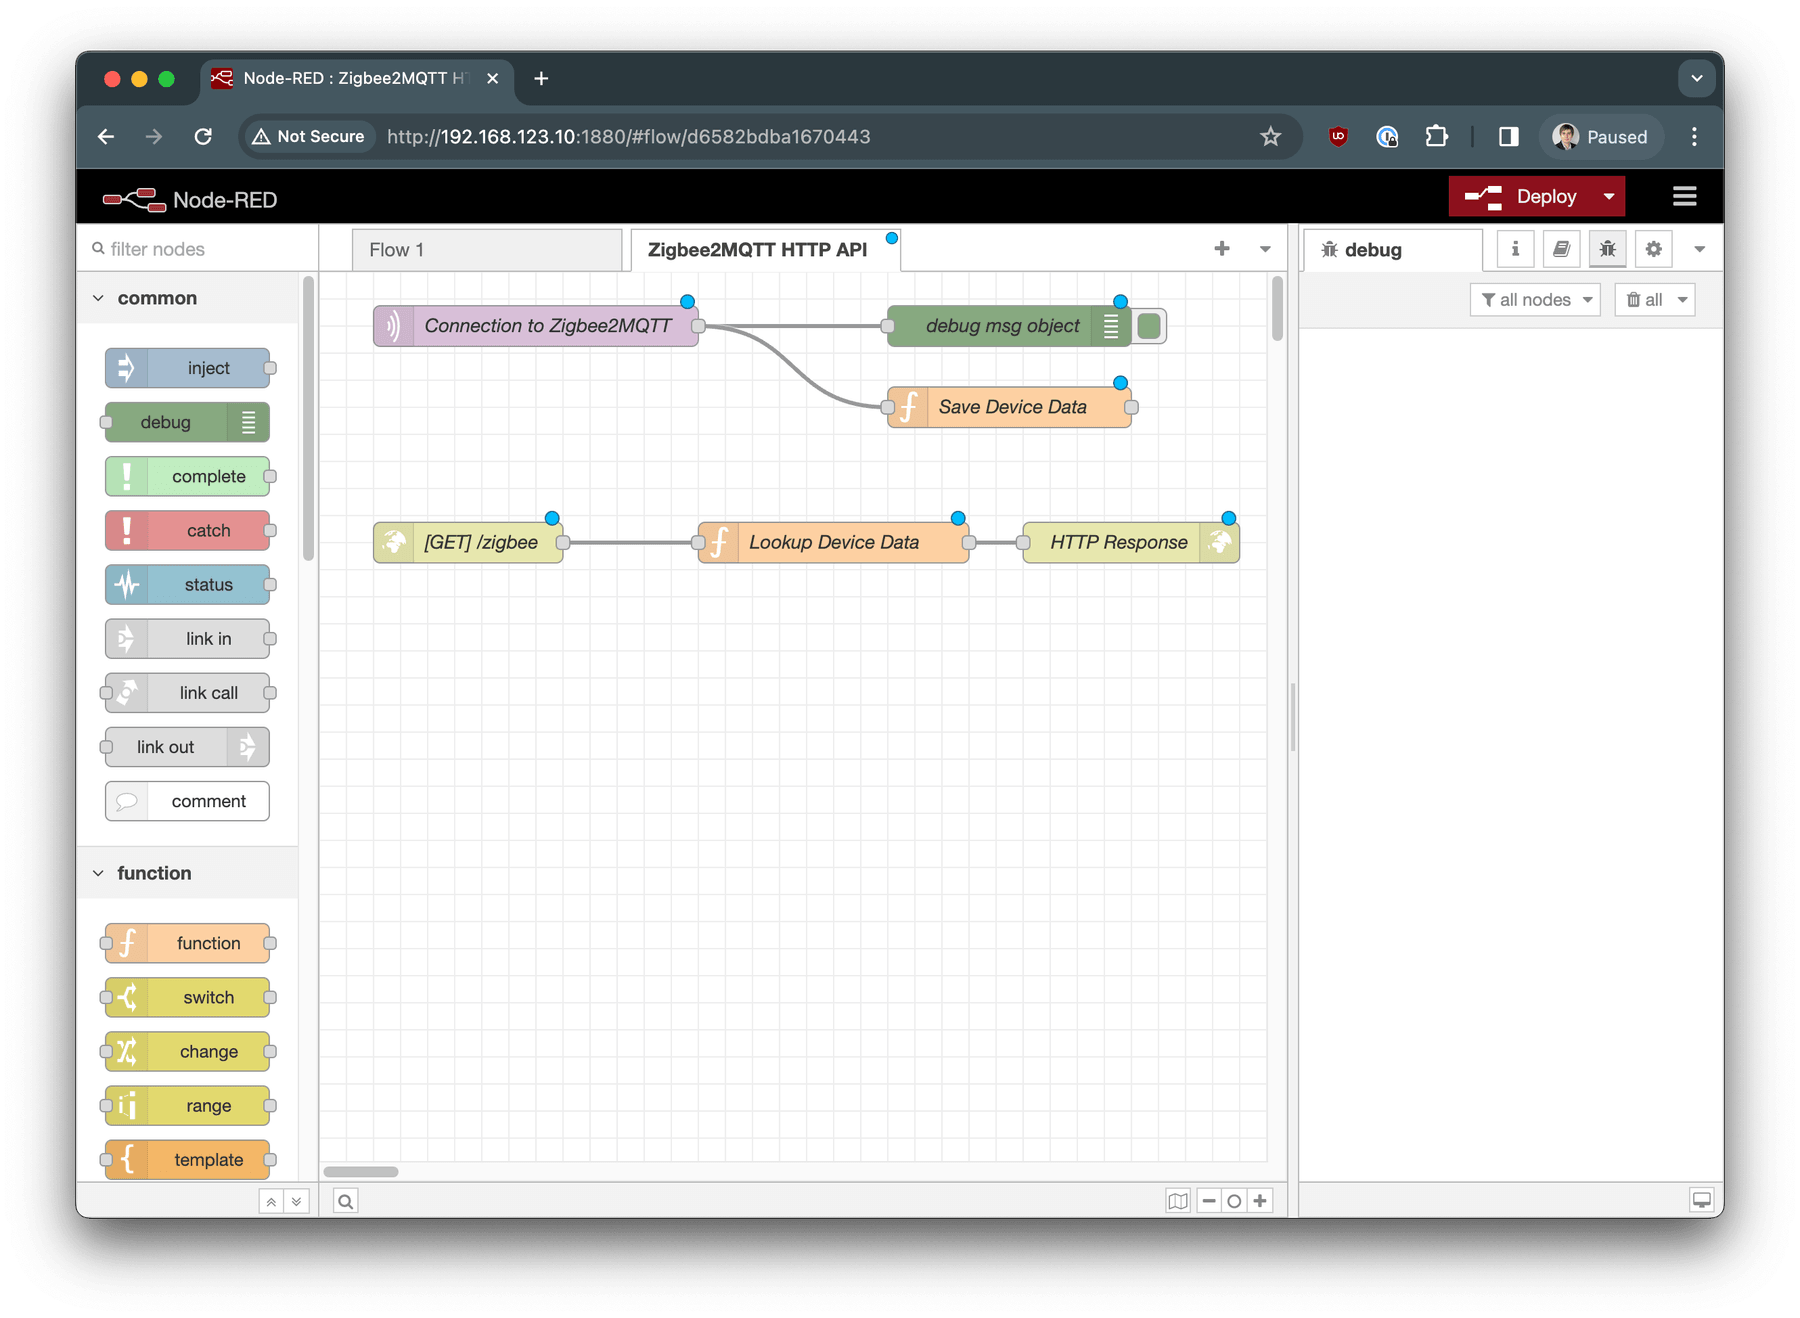
Double-click on Connection to Zigbee2MQTT node.
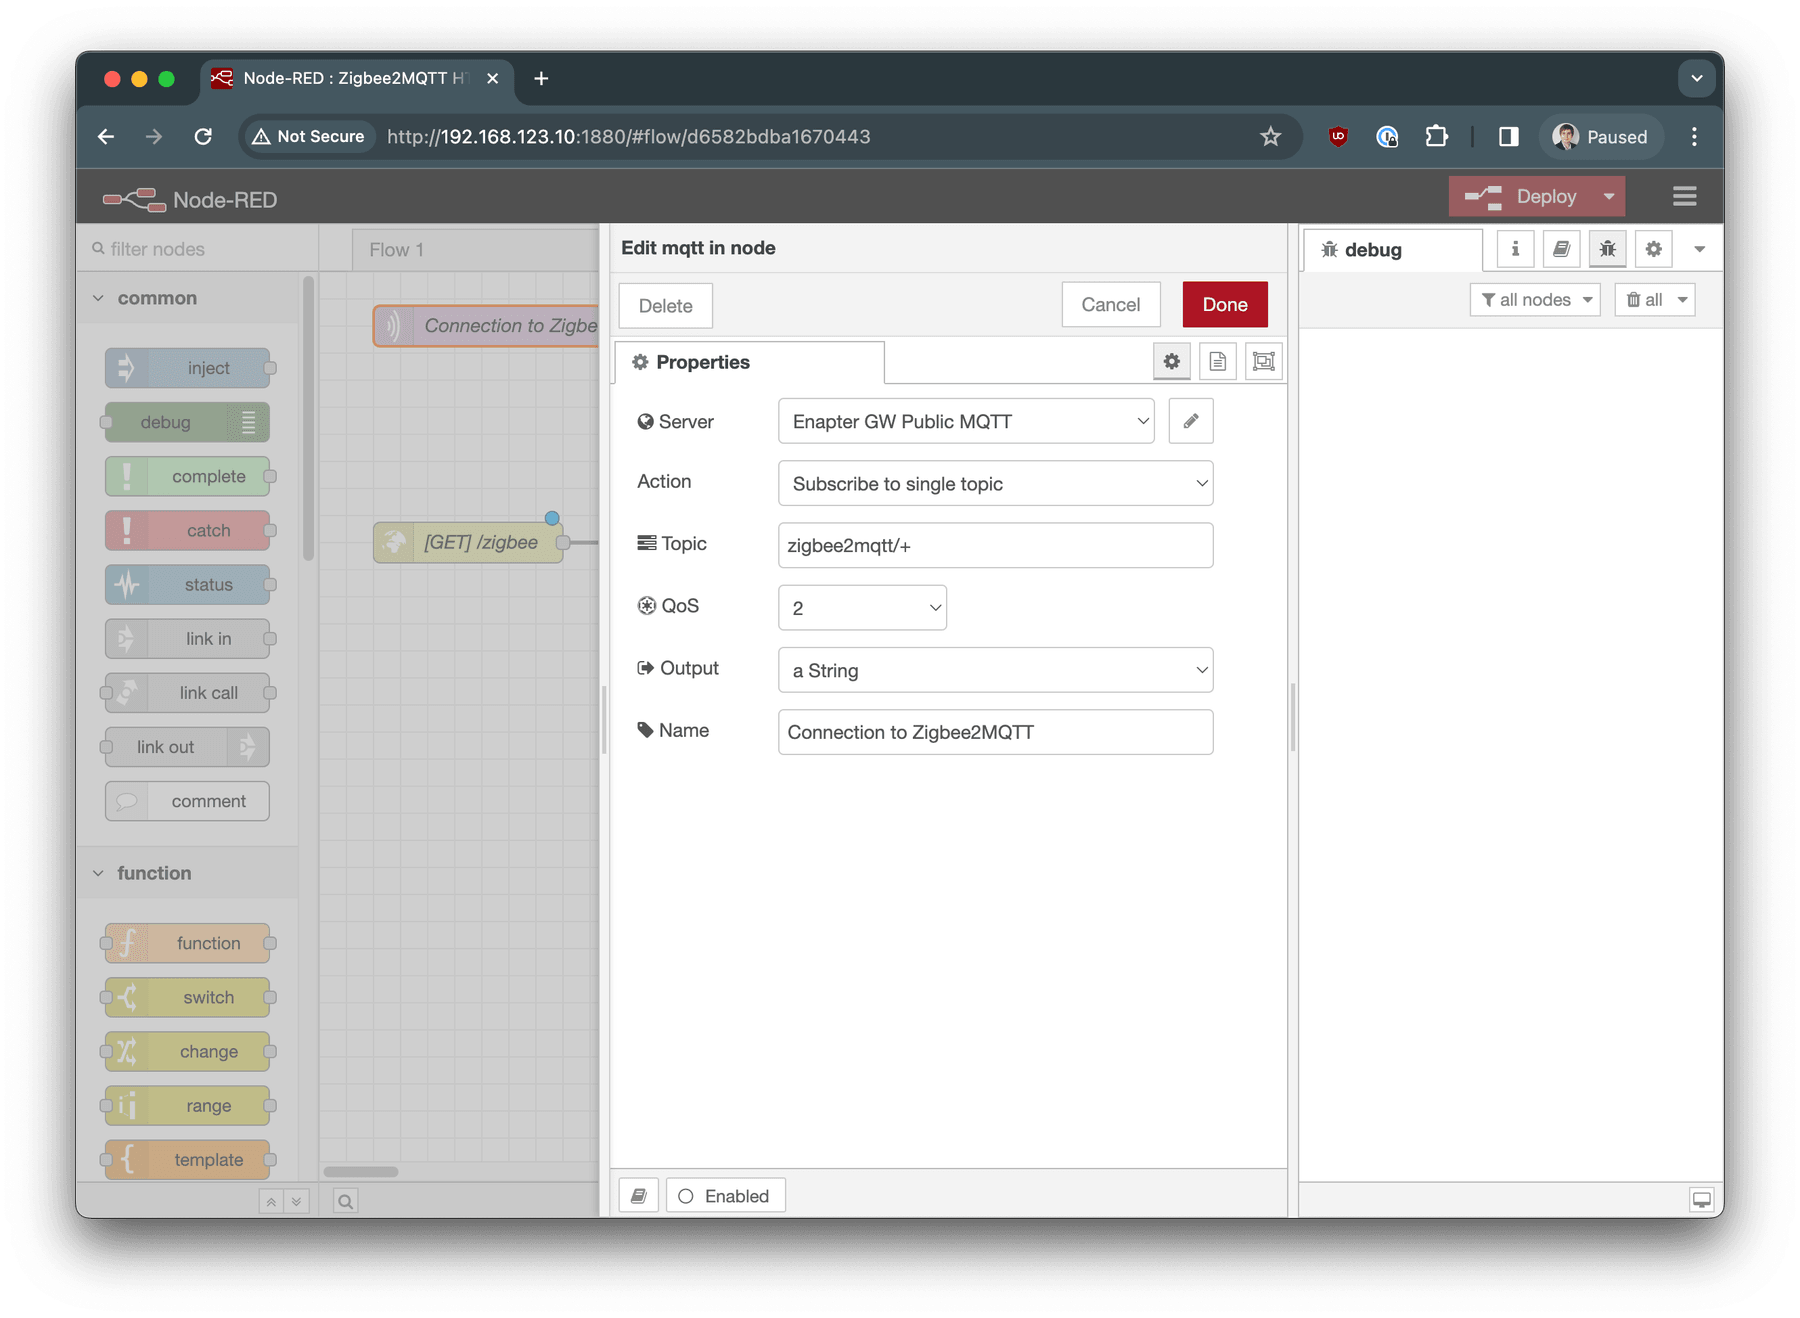
Check that Topic is set to correct Zigbee2MQTT Base Topic - zigbee2mqtt/# in our example. Click edit button right after the Enapter GW Public MQTT server name.
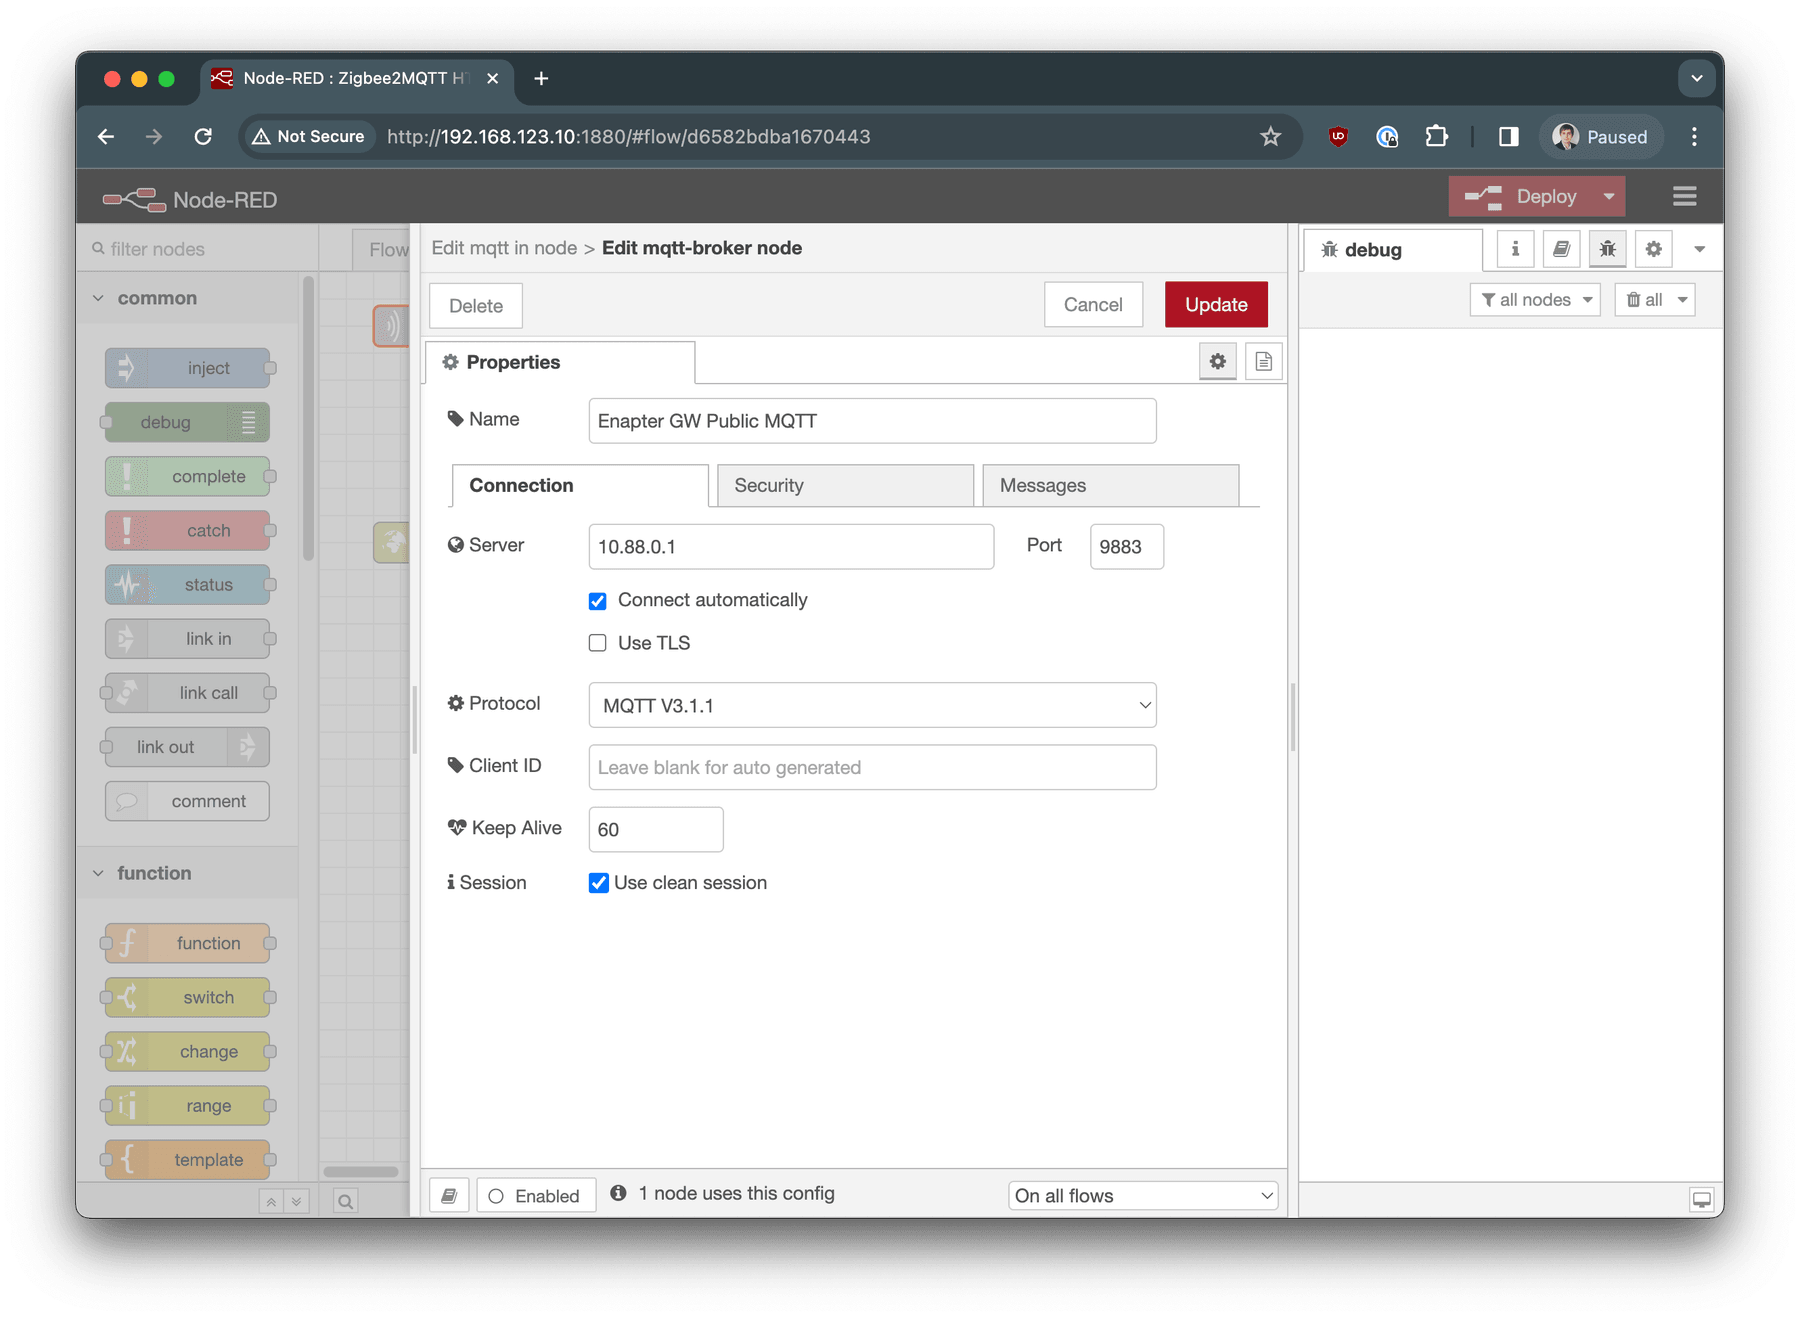
The default IP address of Enapter Gateway in Docker network is 10.88.0.1 and Public MQTT is running on port 9883.
Switch to the Security tab and put the username and password for your Public MQTT connection.
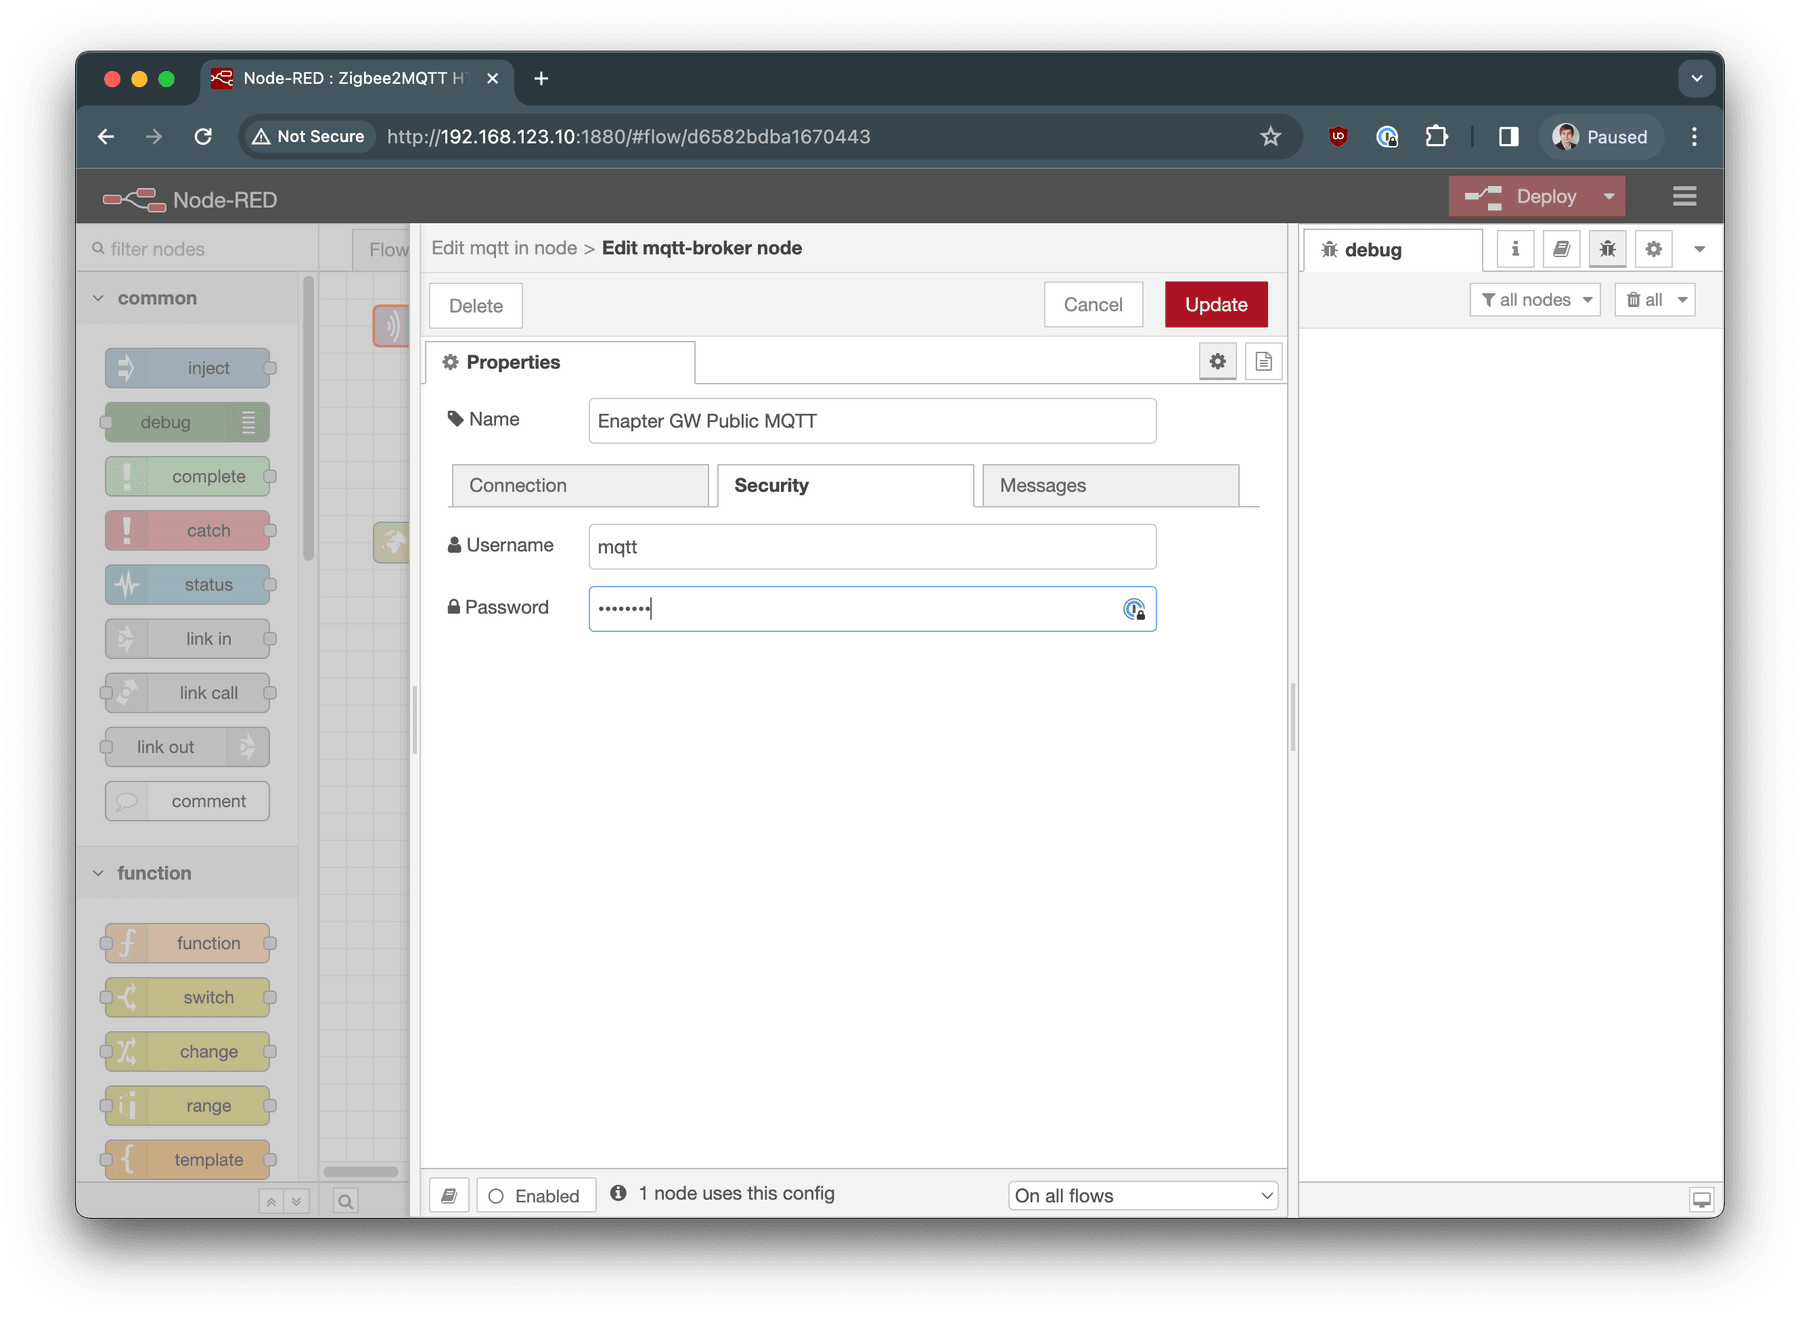
Click on Update button. In the opened windows click Done button to apply your settings.
Now you are ready to deploy your flow!
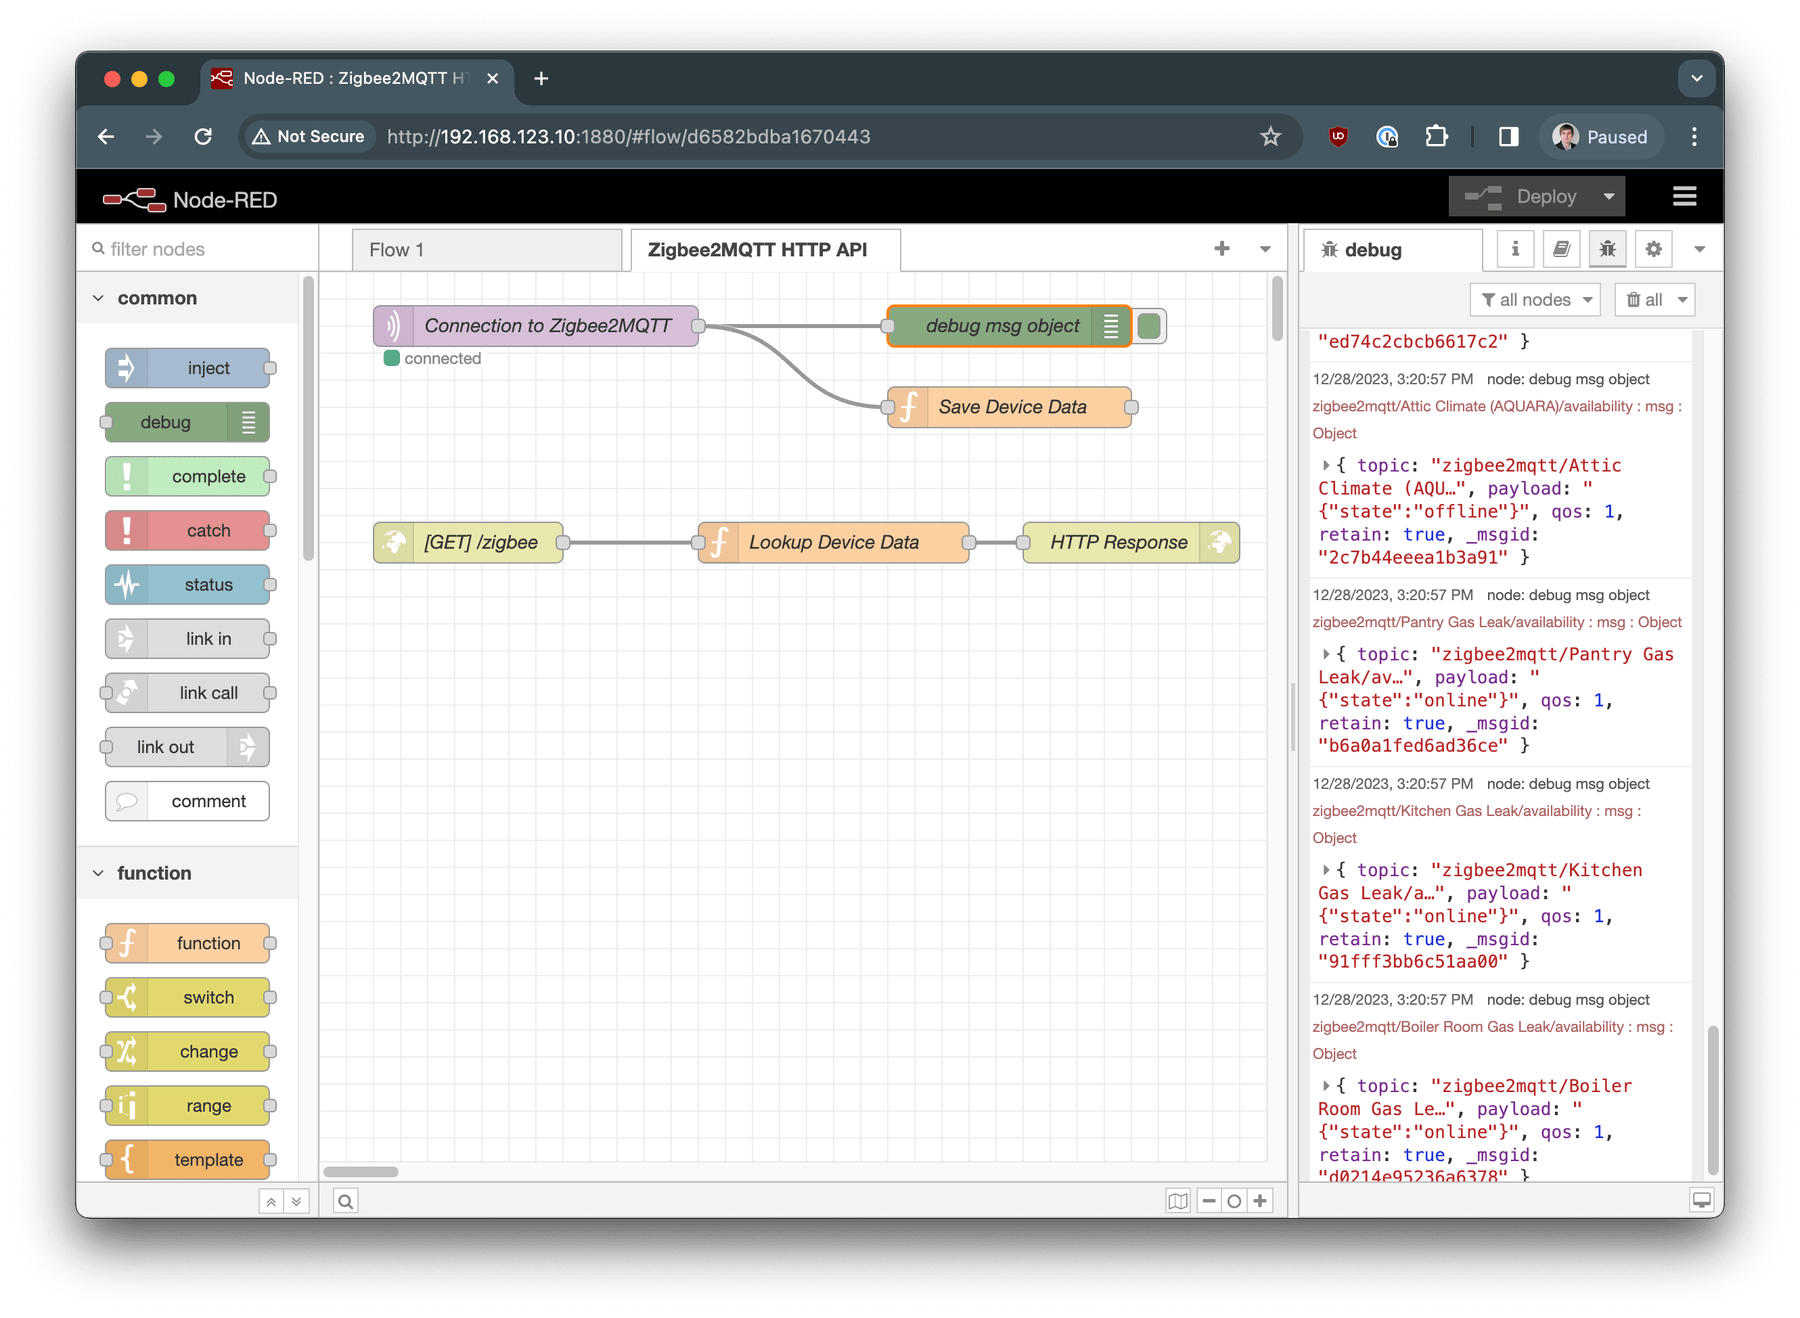
Click on the Deploy button in the top right corner.
As soon as the project is deployed, you will start receiving debug messages from Zigbee2MQTT. You will be able to see them in the debug panel.
Testing Zigbee2MQTT HTTP API
Wait for a few minutes to receive at least one message from the Zigbee device you would like to test HTTP API for. Open a new tab in your browser and navigate to the following URL:
http://YOUR_GATEWAY_IP:1880/zigbee?device=ZIGBEE_DEVICE_FRIENDLY_NAME
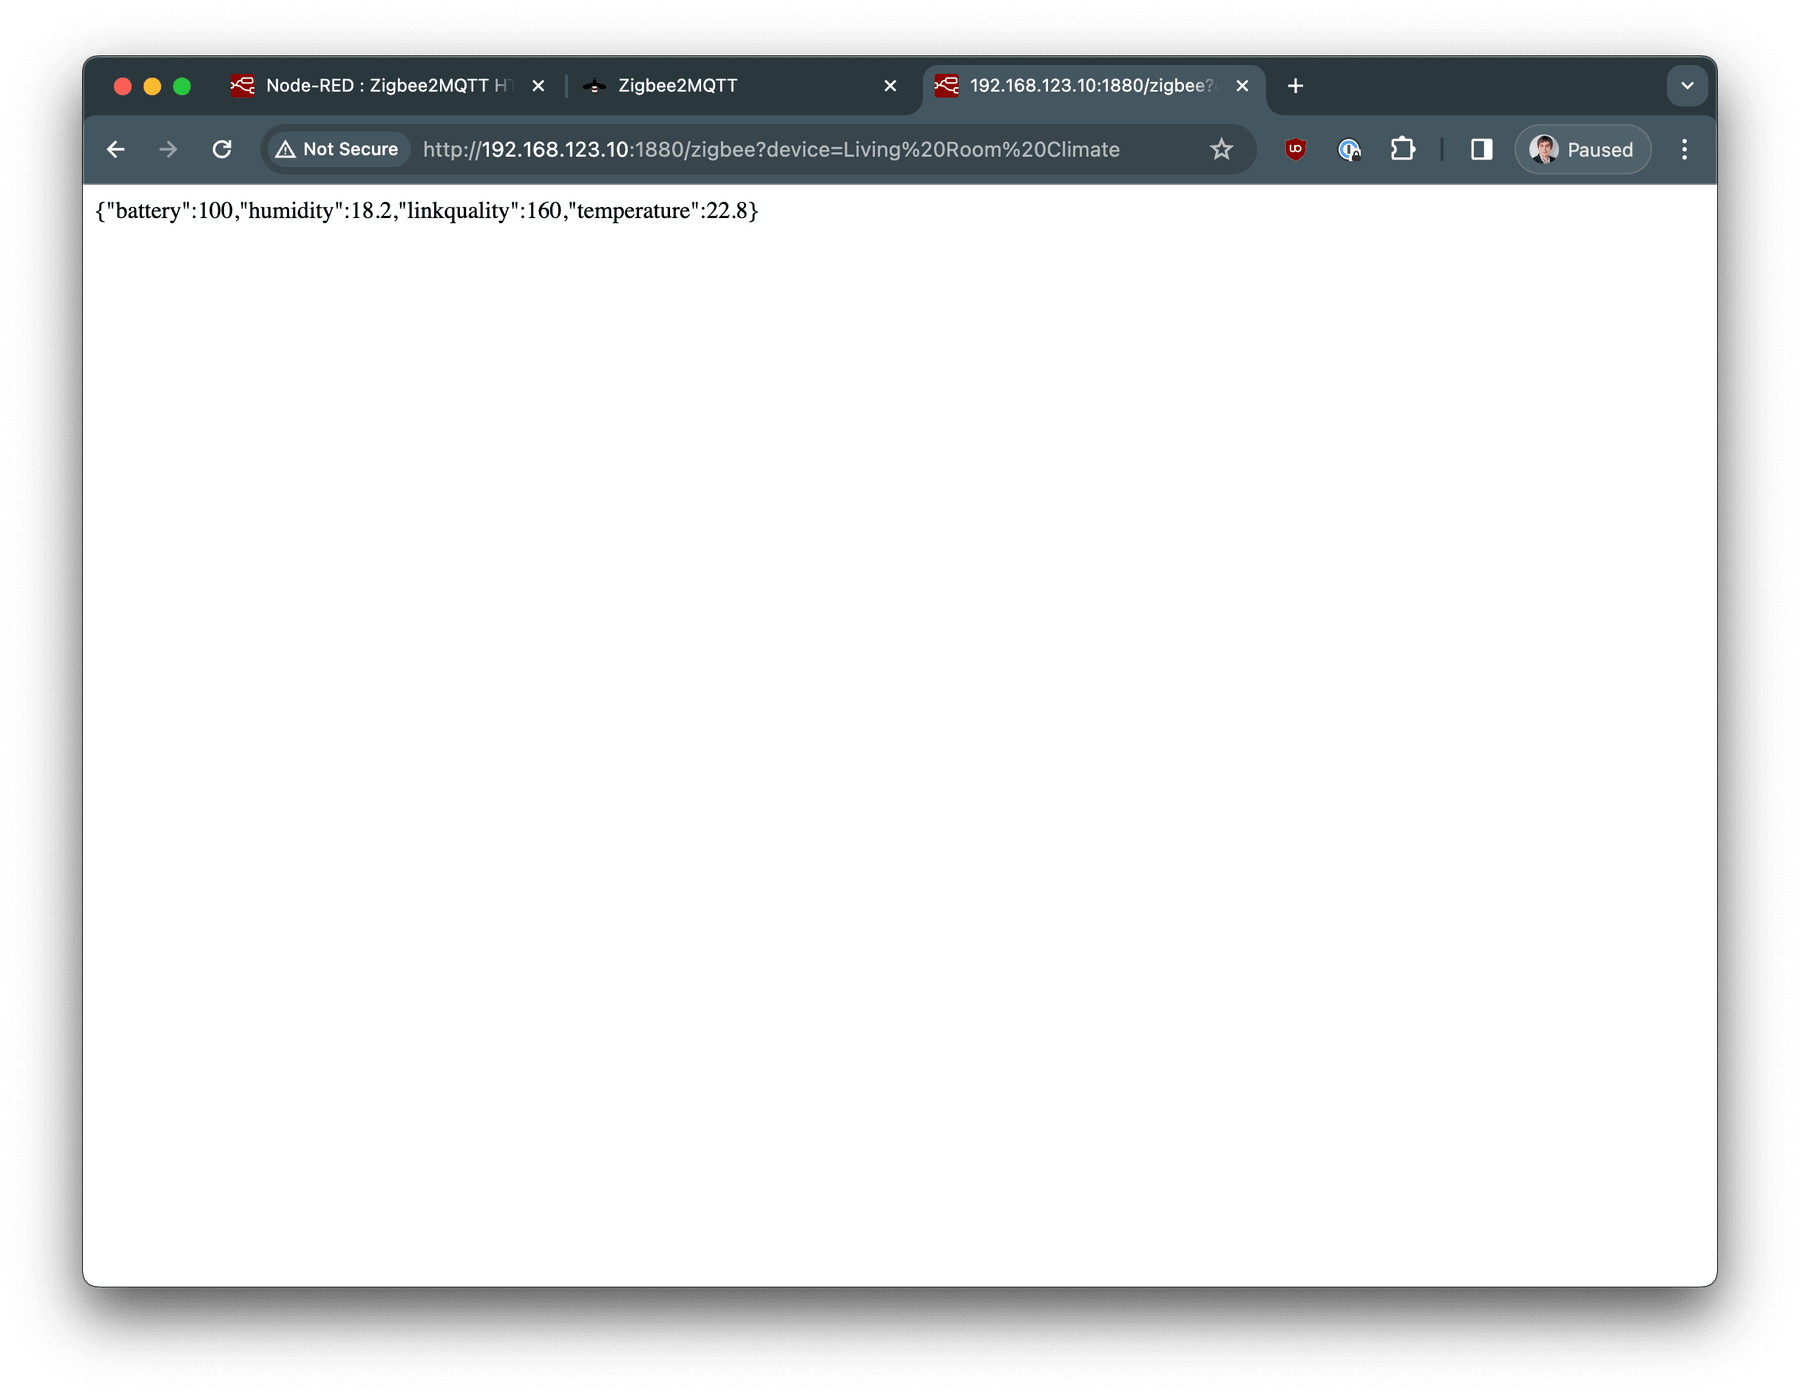
In our example: http://192.168.123.10:1880/zigbee?device=Living Room Climate.
You will be able to see JSON file with all metrics from your Zigbee device.
💬 Need Help?
Have a question or hit a roadblock? Join the Enapter Discord community to get quick support, exchange ideas, and collaborate with other developers and energy experts.