Zigbee Support in Enapter Gateway with Zigbee2MQTT
What is Zigbee?
Zigbee is a wireless communication standard designed for short-range, low-power digital communication among devices. It is primarily used in applications such as home automation, industrial automation, and sensor networks.
Zigbee-enabled energy devices encompass a wide variety, including smart meters, thermostats, underfloor heating controllers, and many others.
What is Zigbee2MQTT?
Zigbee2MQTT is an open-source project that serves as a bridge between Zigbee devices and MQTT (Message Queuing Telemetry Transport) communication protocol. This software allows users to integrate Zigbee-based smart devices into automation systems using the MQTT protocol.
Enapter Gateway runs the MQTT broker, which makes installation and integration of Zigbee2MQTT intuitive and straight forward.
Requirements
- Enapter Gateway version 2.x.x
- One of the supported Zigbee adapters. In this guide we will use SONOFF Zigbee 3.0 USB Dongle Plus-E adapter.
Connecting Adapter to Enapter Gateway
In general, the SONOFF Zigbee 3.0 USB Dongle Plus-E comes pre-flashed with coordinator firmware. Therefore, in most cases, it would be enough to connect your dongle to USB port of your Enapter Gateway.
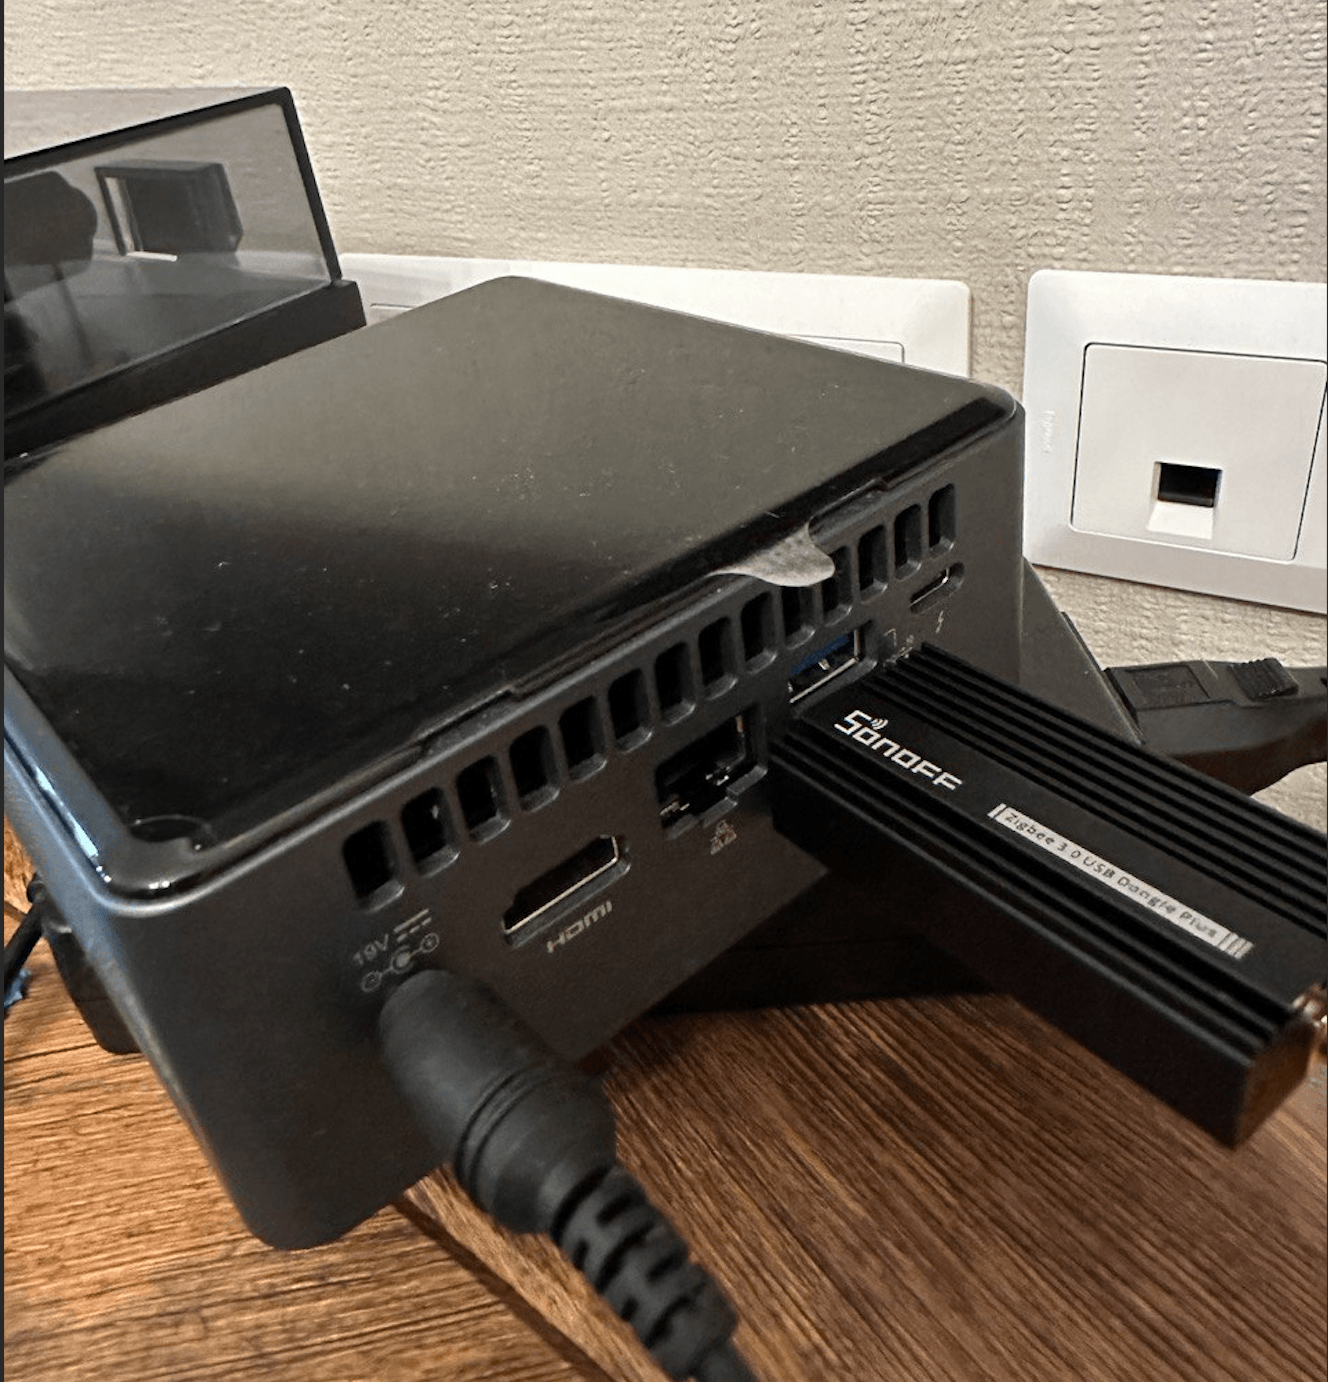
To ensure that the dongle is recognized correctly, connect to the Gateway Terminal either over SSH or Cloud. Start the shell with the bash command and run the ls -al /dev/ttyA* command.
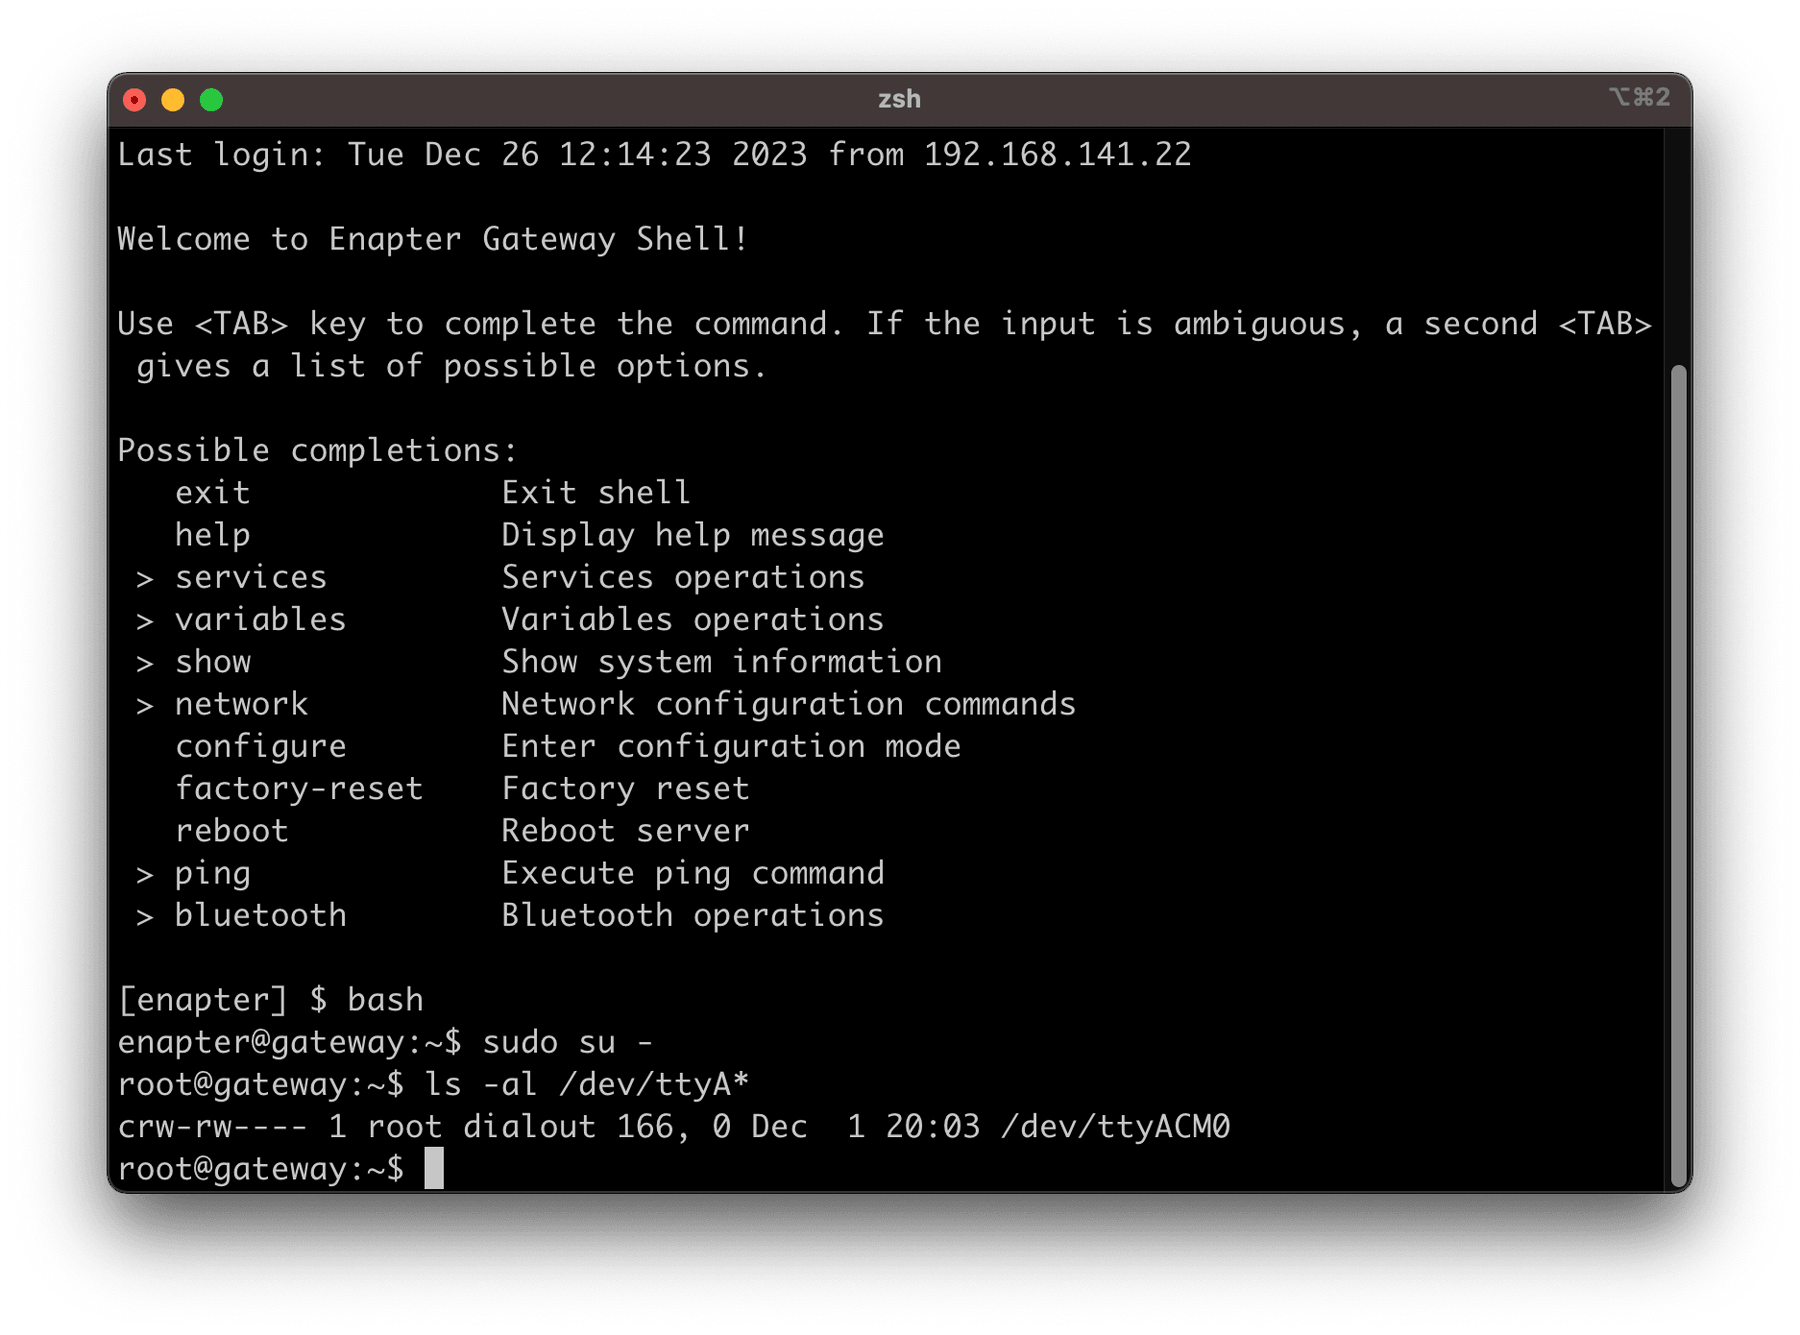
If you see the /dev/ttyACM0 - everything is set up in the right way.
In case you don't see the ttyACM0 device in the list, you need to check which firmware is installed in your Zigbee adapter. For more information and flashing instructions, check out the following resources:
- Zigbee2MQTT notes for ITead Sonoff Zigbee 3.0 USB Dongle Plus V2 model "ZBDongle-E"
- SONOFF Flashing Instructions
- SONOFF Coordinator Firmware
To flash the firmware you need to open adapter's enclosure to get access to the Flash button
Setting up MQTT Broker on Enapter Gateway
Enapter Gateway has a built-in MQTT broker which can be used for receiving devices telemetry as well as publishing MQTT messages from other services. In our case, we will be using MQTT broker as a backend for Zigbee2MQTT.
We need to set the public MQTT username and password. To do this, connect to the Gateway Terminal either over SSH or Cloud, switch to configuration mode with the configure command, and then run several commands:
set public-mqtt authentication username "public"
set public-mqtt authentication password "password"
commit
save
Remember to choose a unique username and password instead of the default ones (public/password) provided in this example.
Public MQTT is running on port 9883.
This information is required for the next steps.
More information can be found at Enapter Handbook
Setting up Zigbee2MQTT Using Docker Container
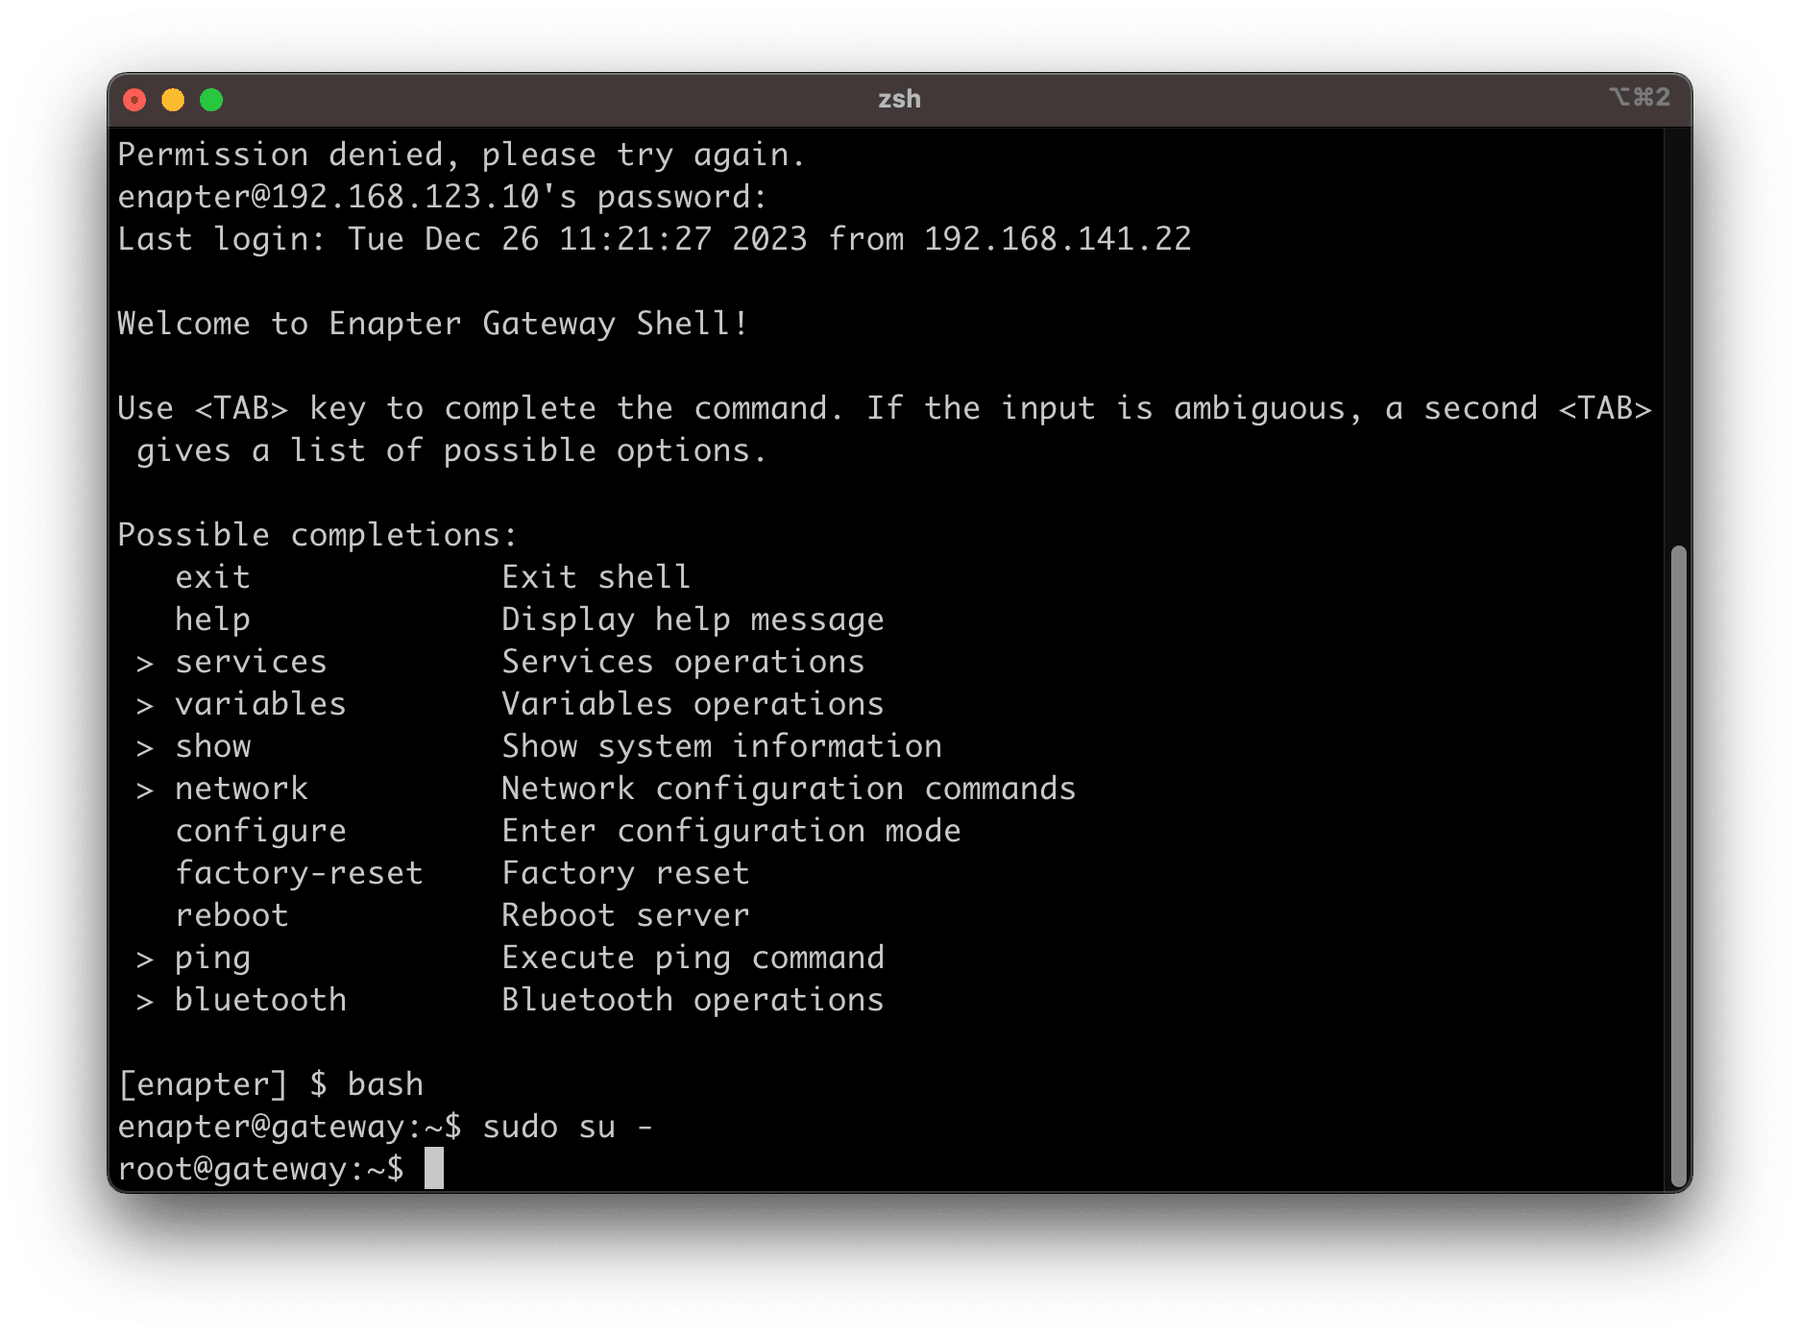
Connect to the Gateway Terminal either over SSH or Cloud. Switch to the shell
using the bash command, and then switch to root with the
sudo su -
command.
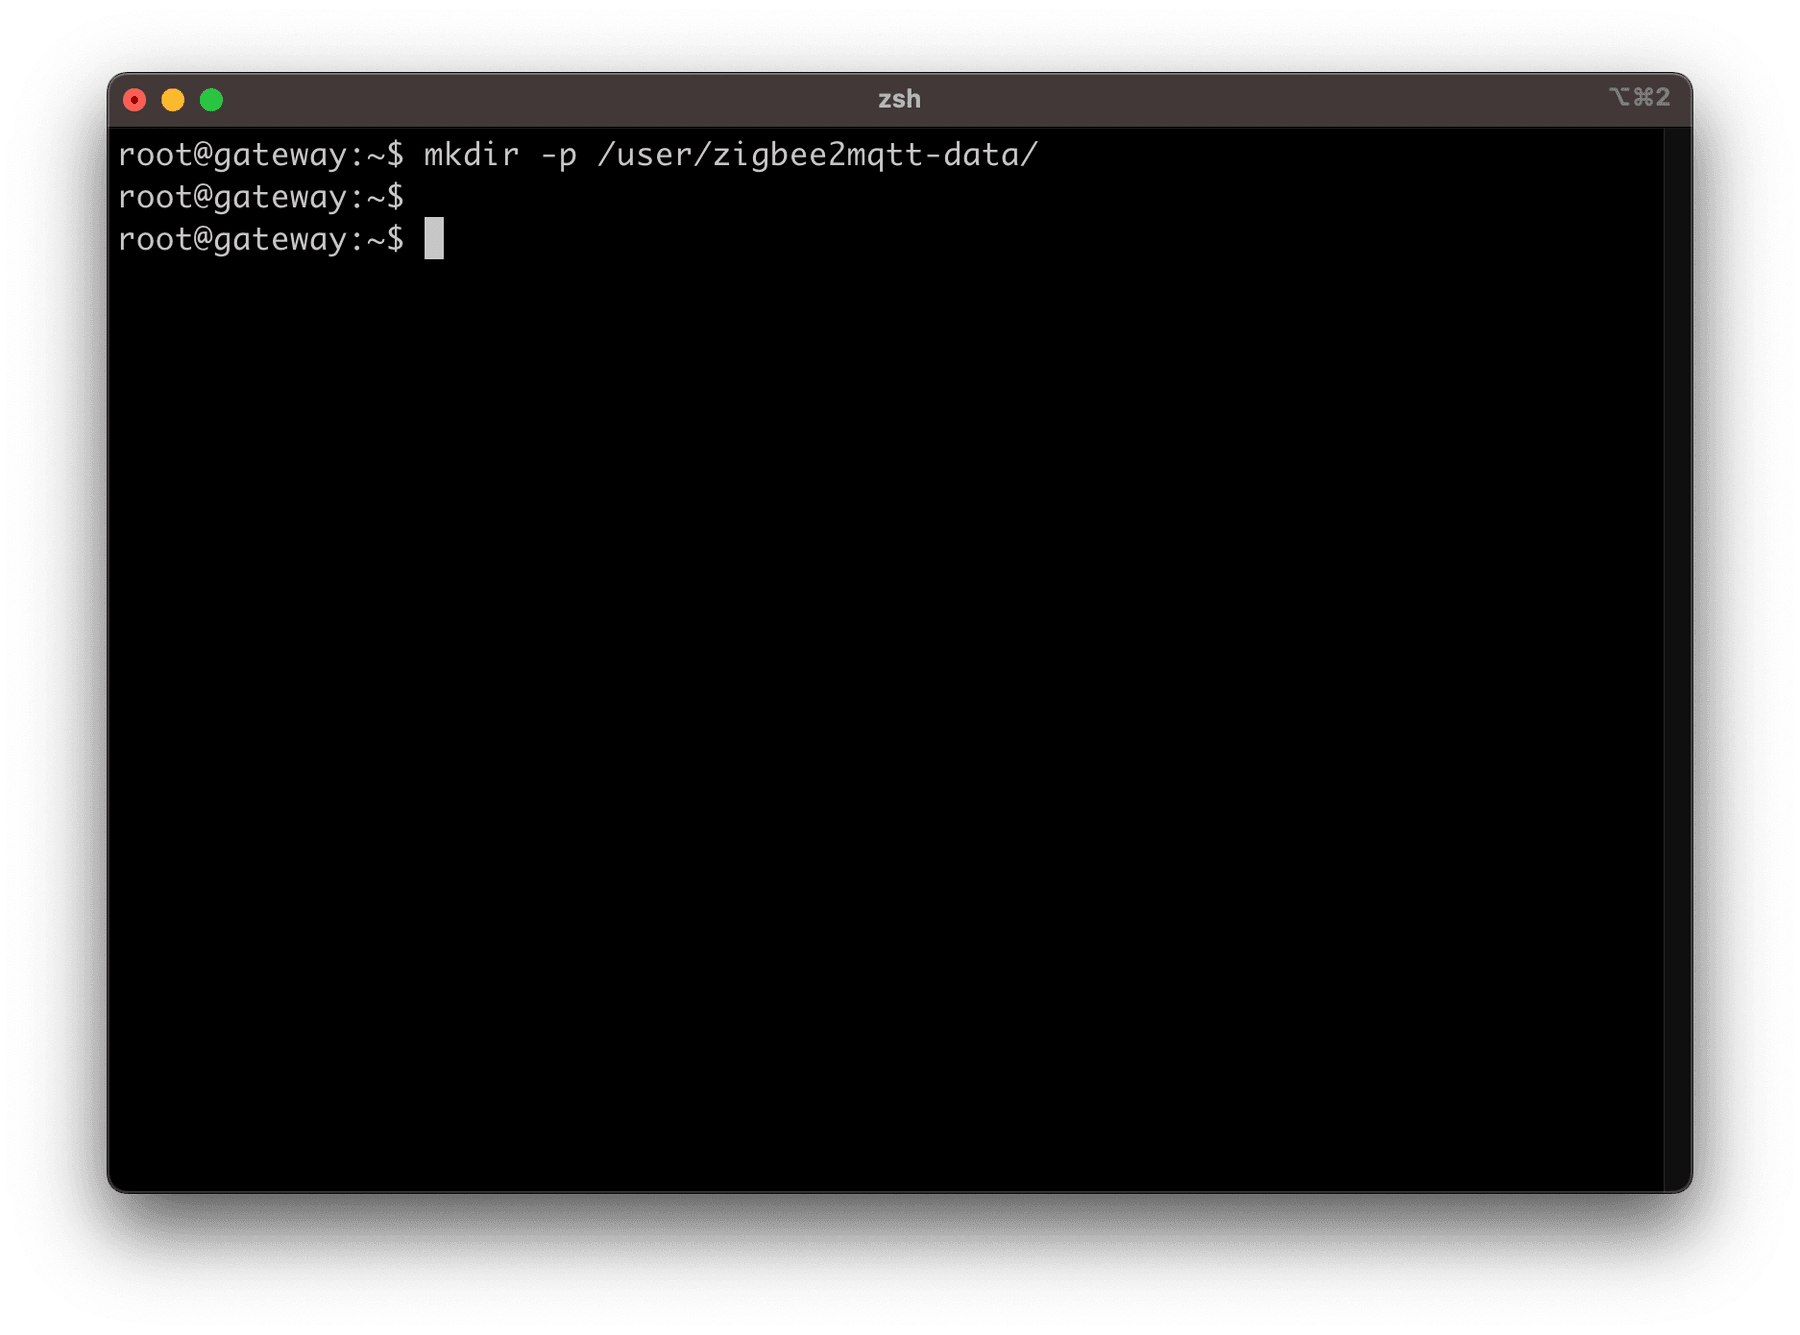
Create Zigbee2MQTT data directory:
mkdir -p /user/zigbee2mqtt-data/
.
Open /user/etc/docker-compose/docker-compose.yml with nano editor and put the configuration below under services section.
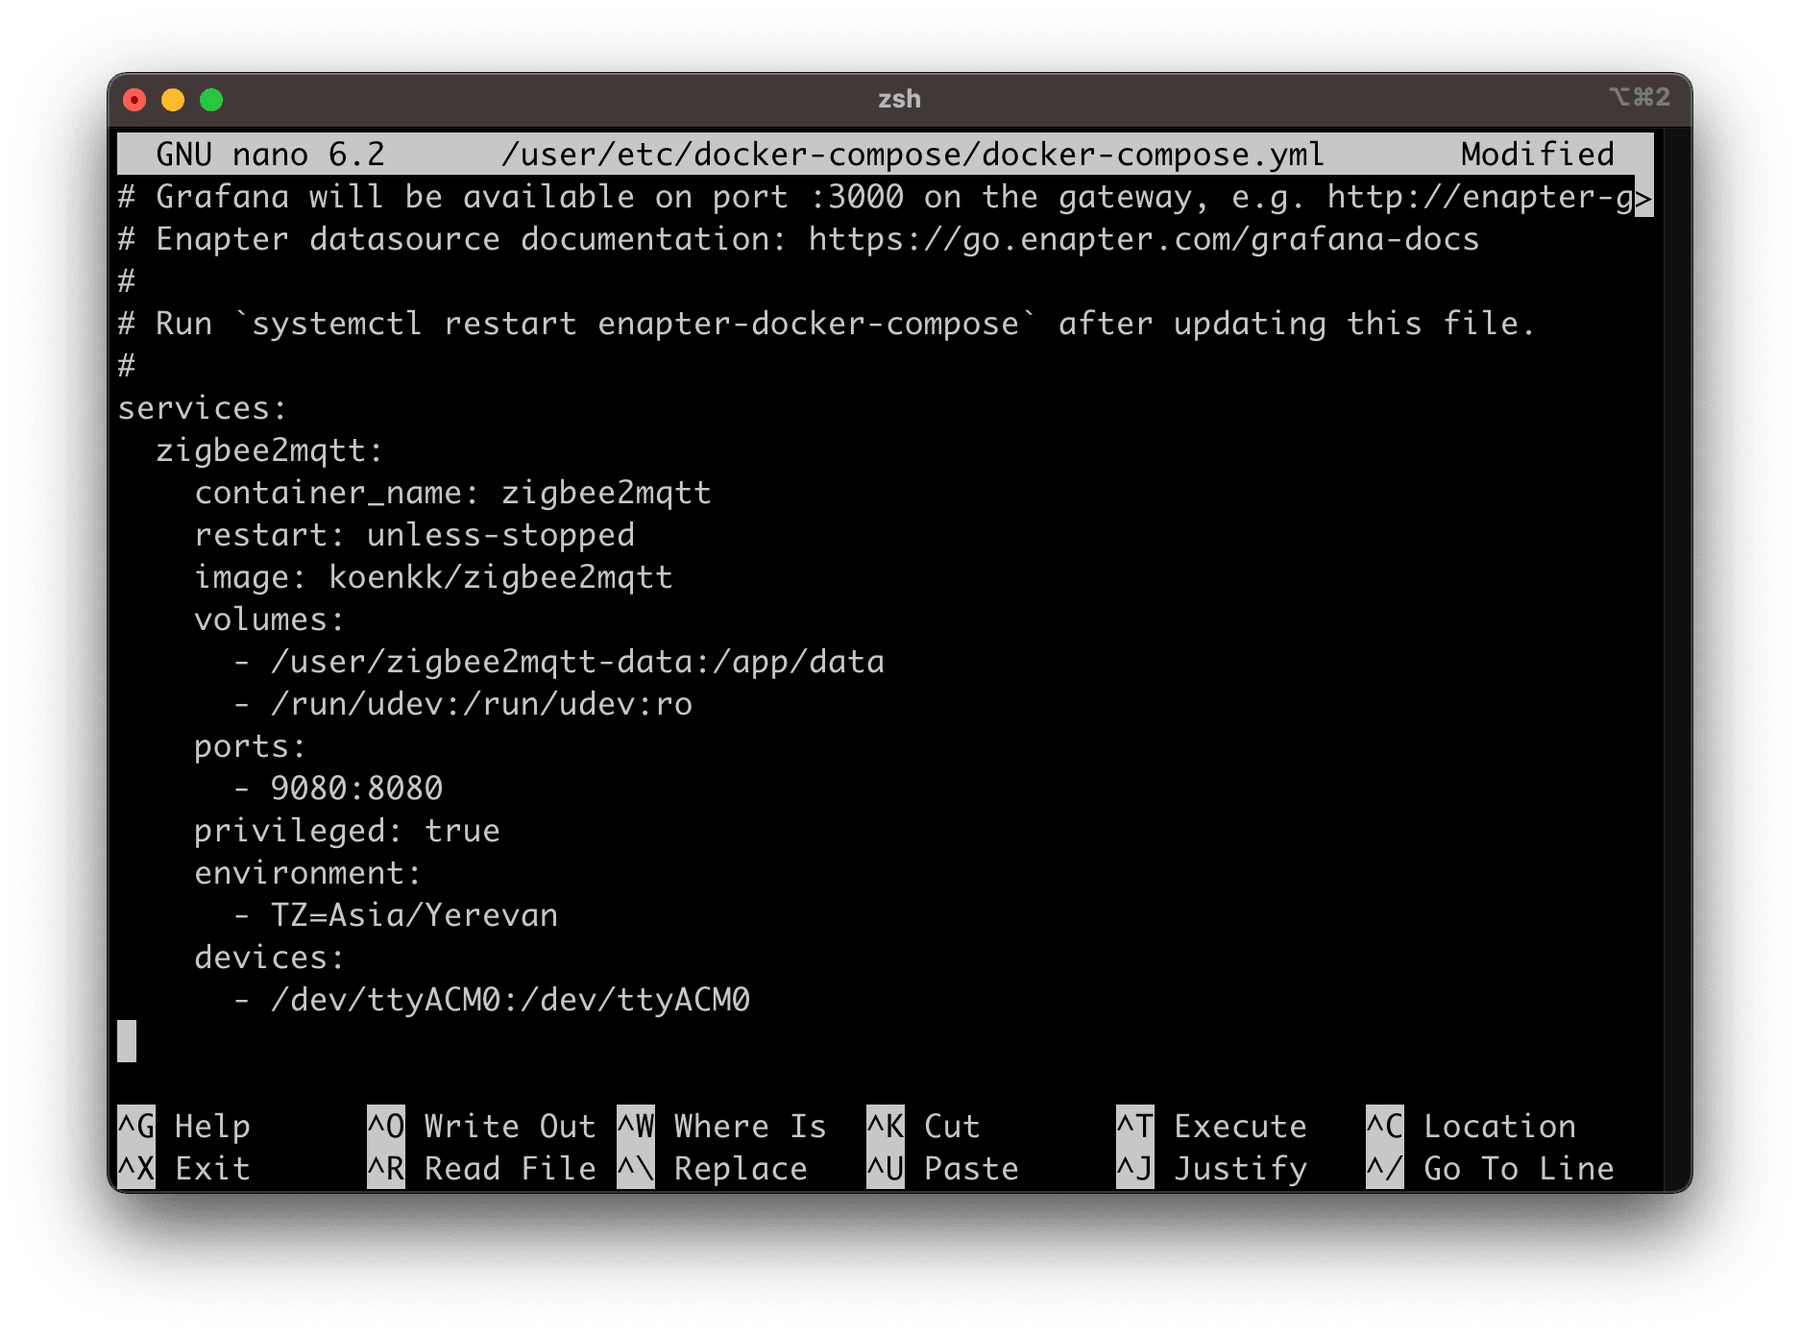
services:
  zigbee2mqtt:
    container_name: zigbee2mqtt
    restart: unless-stopped
    image: koenkk/zigbee2mqtt
    volumes:
      - /user/zigbee2mqtt-data:/app/data
      - /run/udev:/run/udev:ro
    ports:
      - 9080:8080
    privileged: true
    environment:
      - TZ=Asia/Yerevan
    devices:
      - /dev/ttyACM0:/dev/ttyACM0
Press CTRL+X to exit, save your configuration and restart docker compose with systemctl restart enapter-docker-compose command.
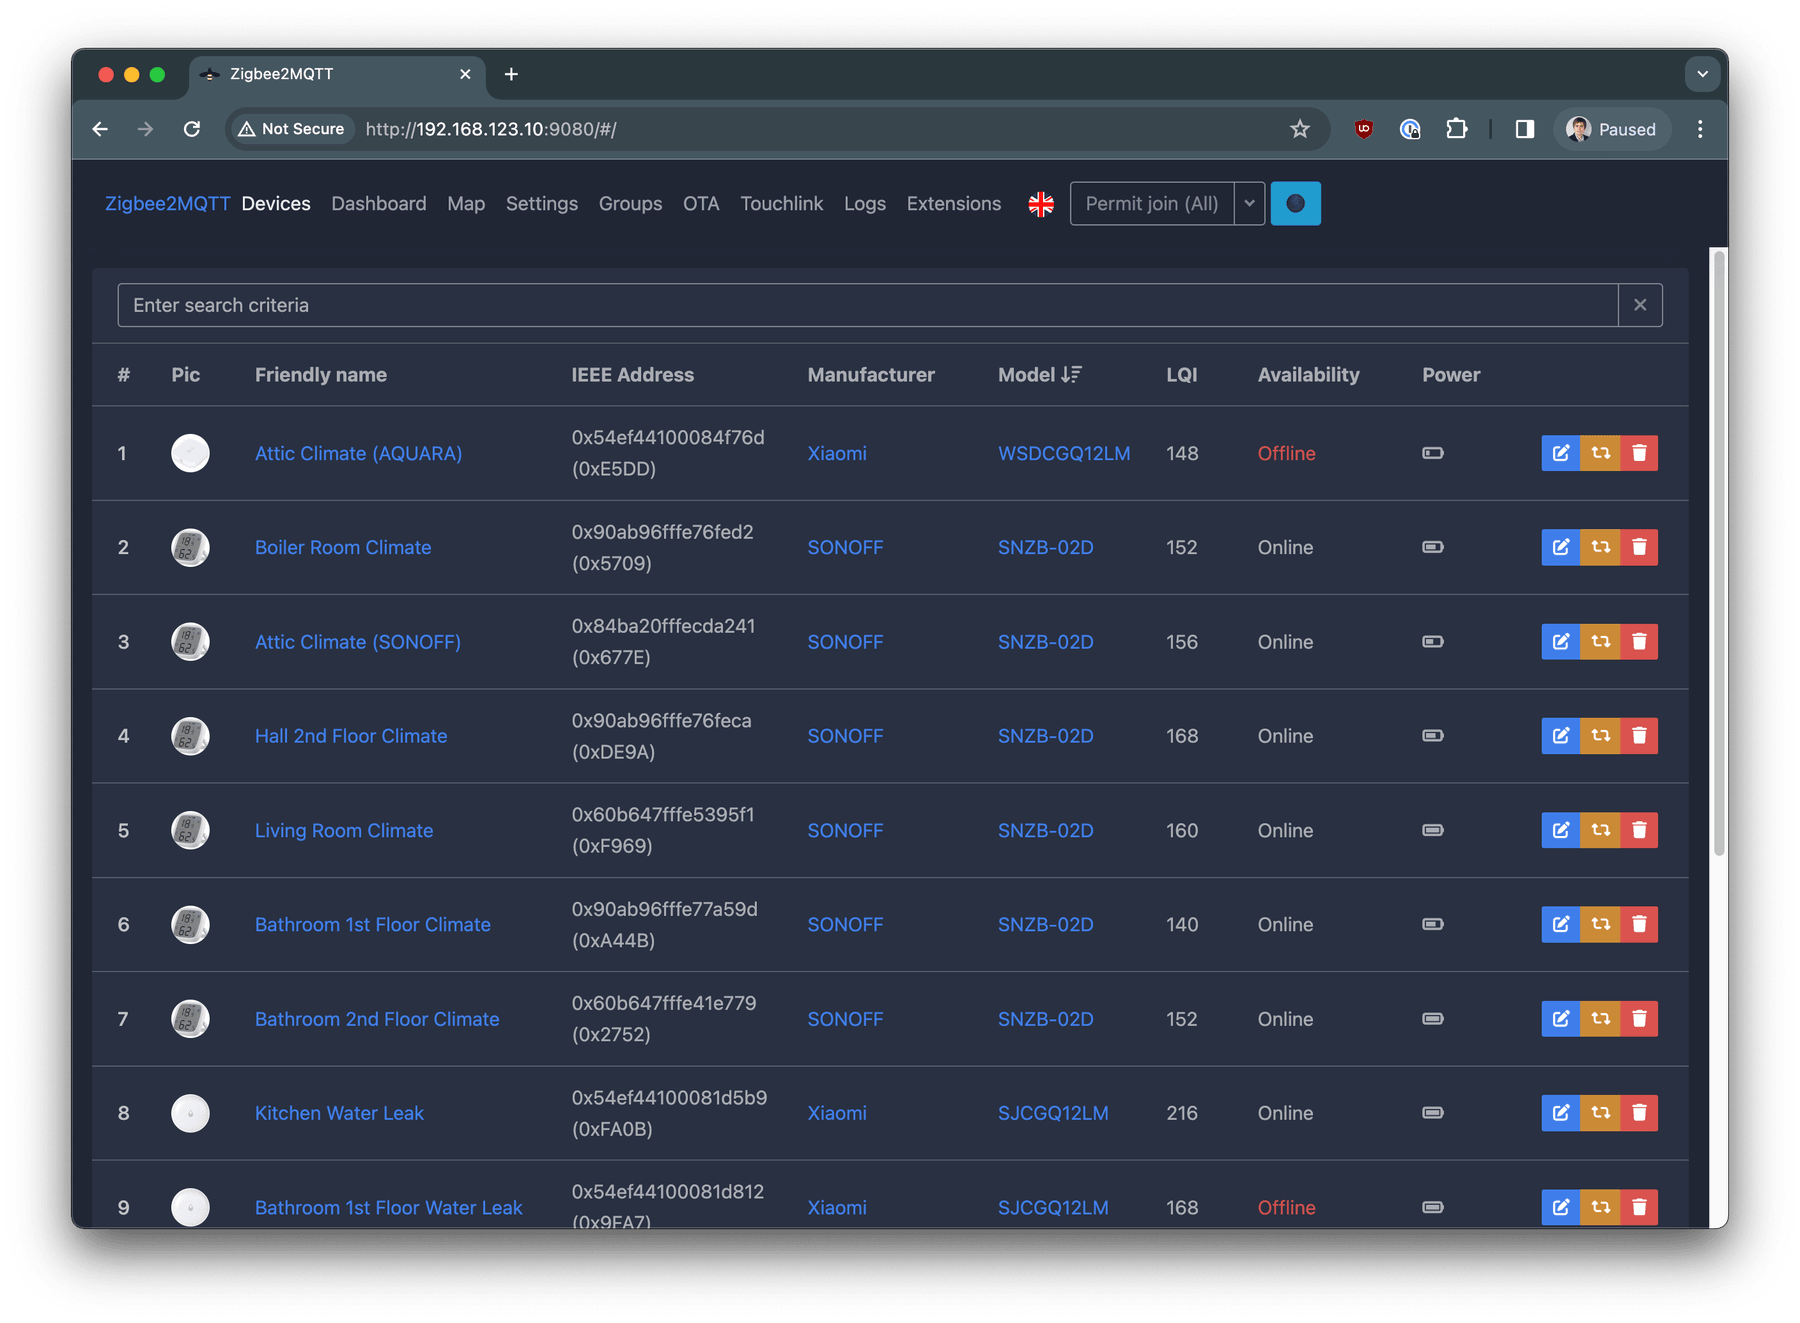
If everything was done correctly, you will be able to connect to Zigbee2MQTT web interface using URL http://YOUR_GATEWAY_IP:9080.
Configuring Zigbee2MQTT
Navigate to Settings -> Settings -> MQTT.
Configure the following settings:
- Base topic: zigbee2mqtt
- MQTT server: mqtt://10.88.0.1:9883
- User: PUBLIC MQTT USER
- Password: PUBLIC MQTT PASSWORD
The IP address 10.88.0.1 is the default IP address of Enapter Gateway in the Docker network. Public MQTT default port is 9883.
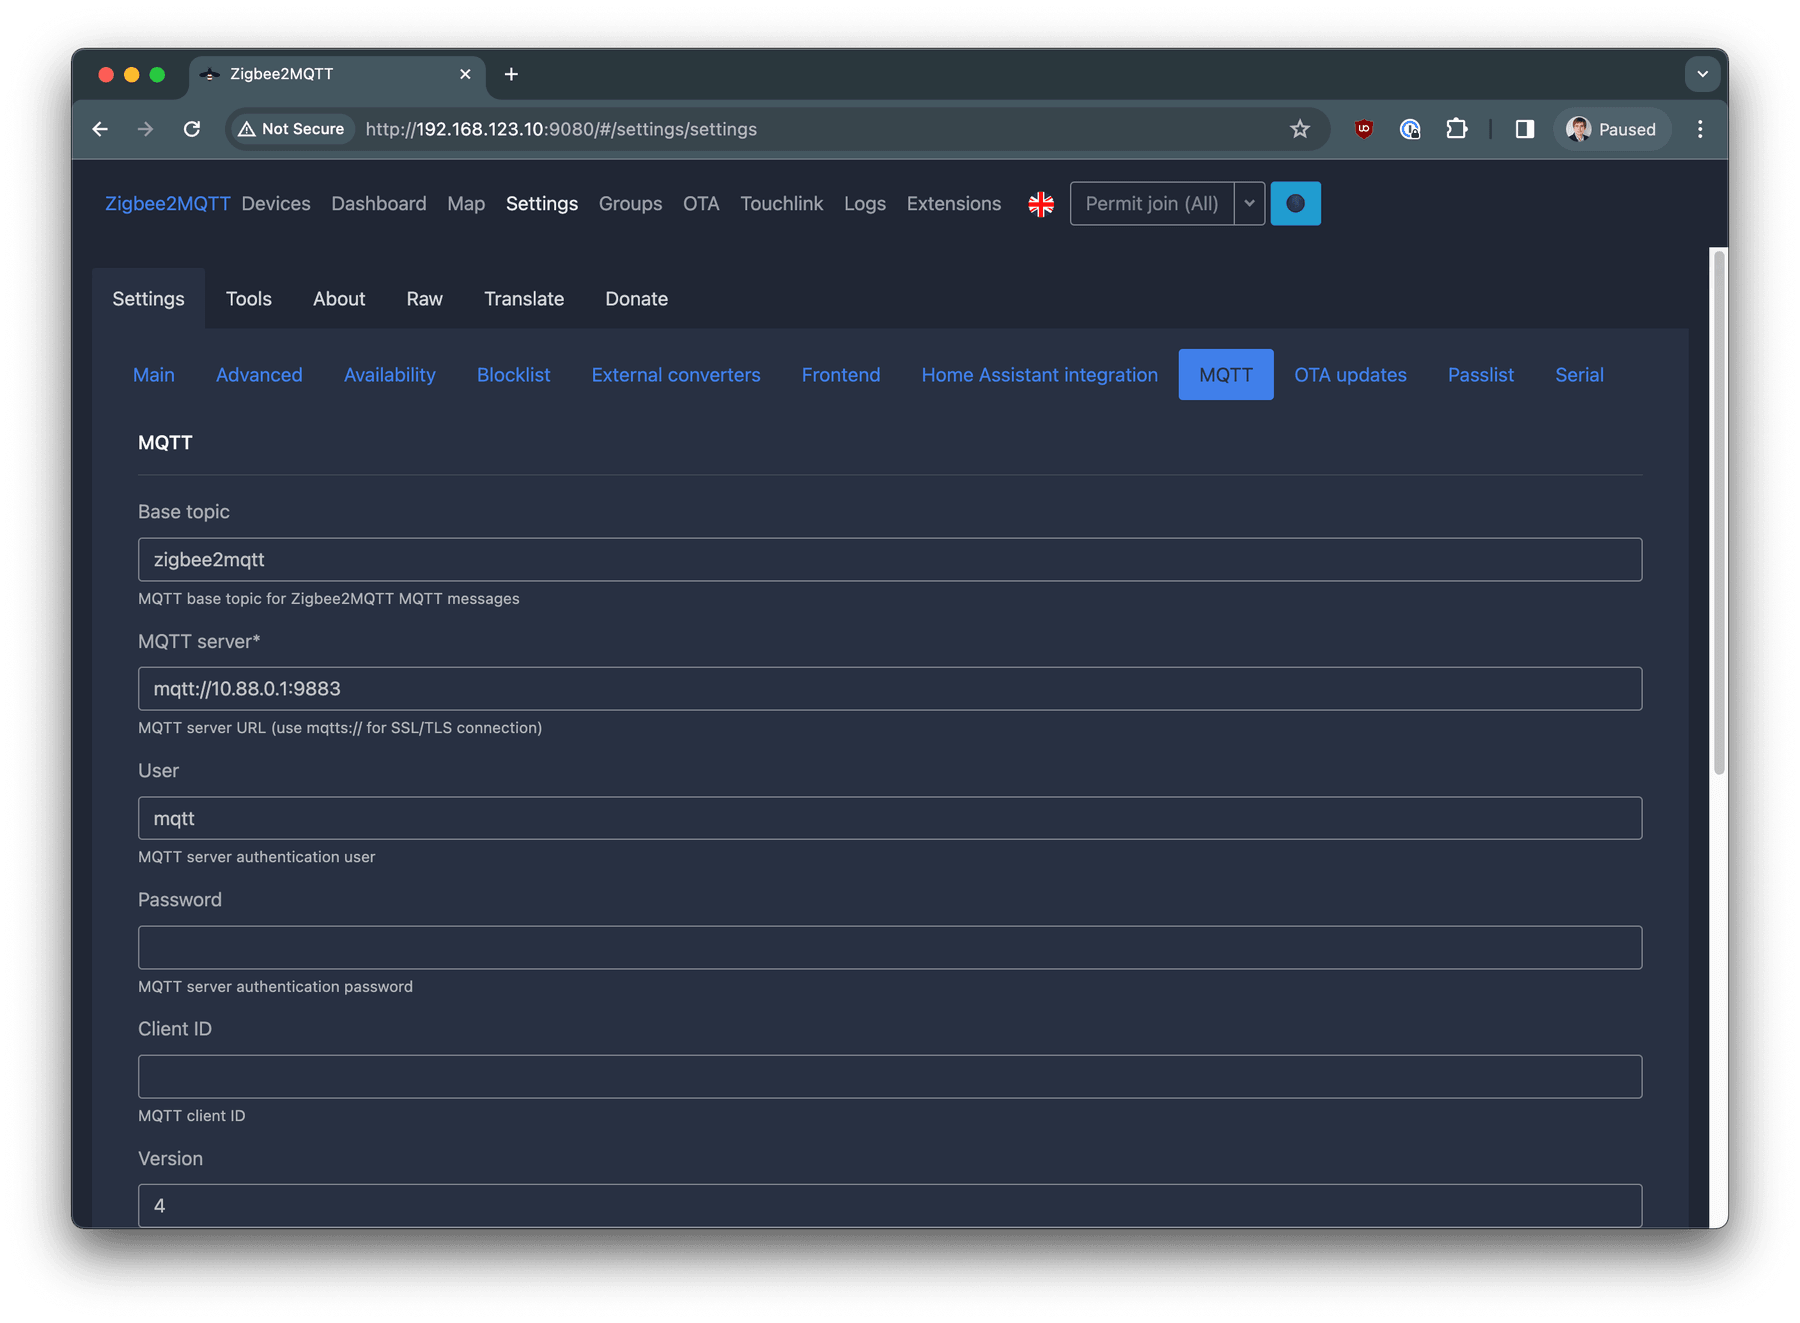
Submit configuration using Submit button.
Navigate to Settings -> Settings -> Serial.
Configure the following settings:
- Port: /dev/ttyACM0
- Adapter: auto
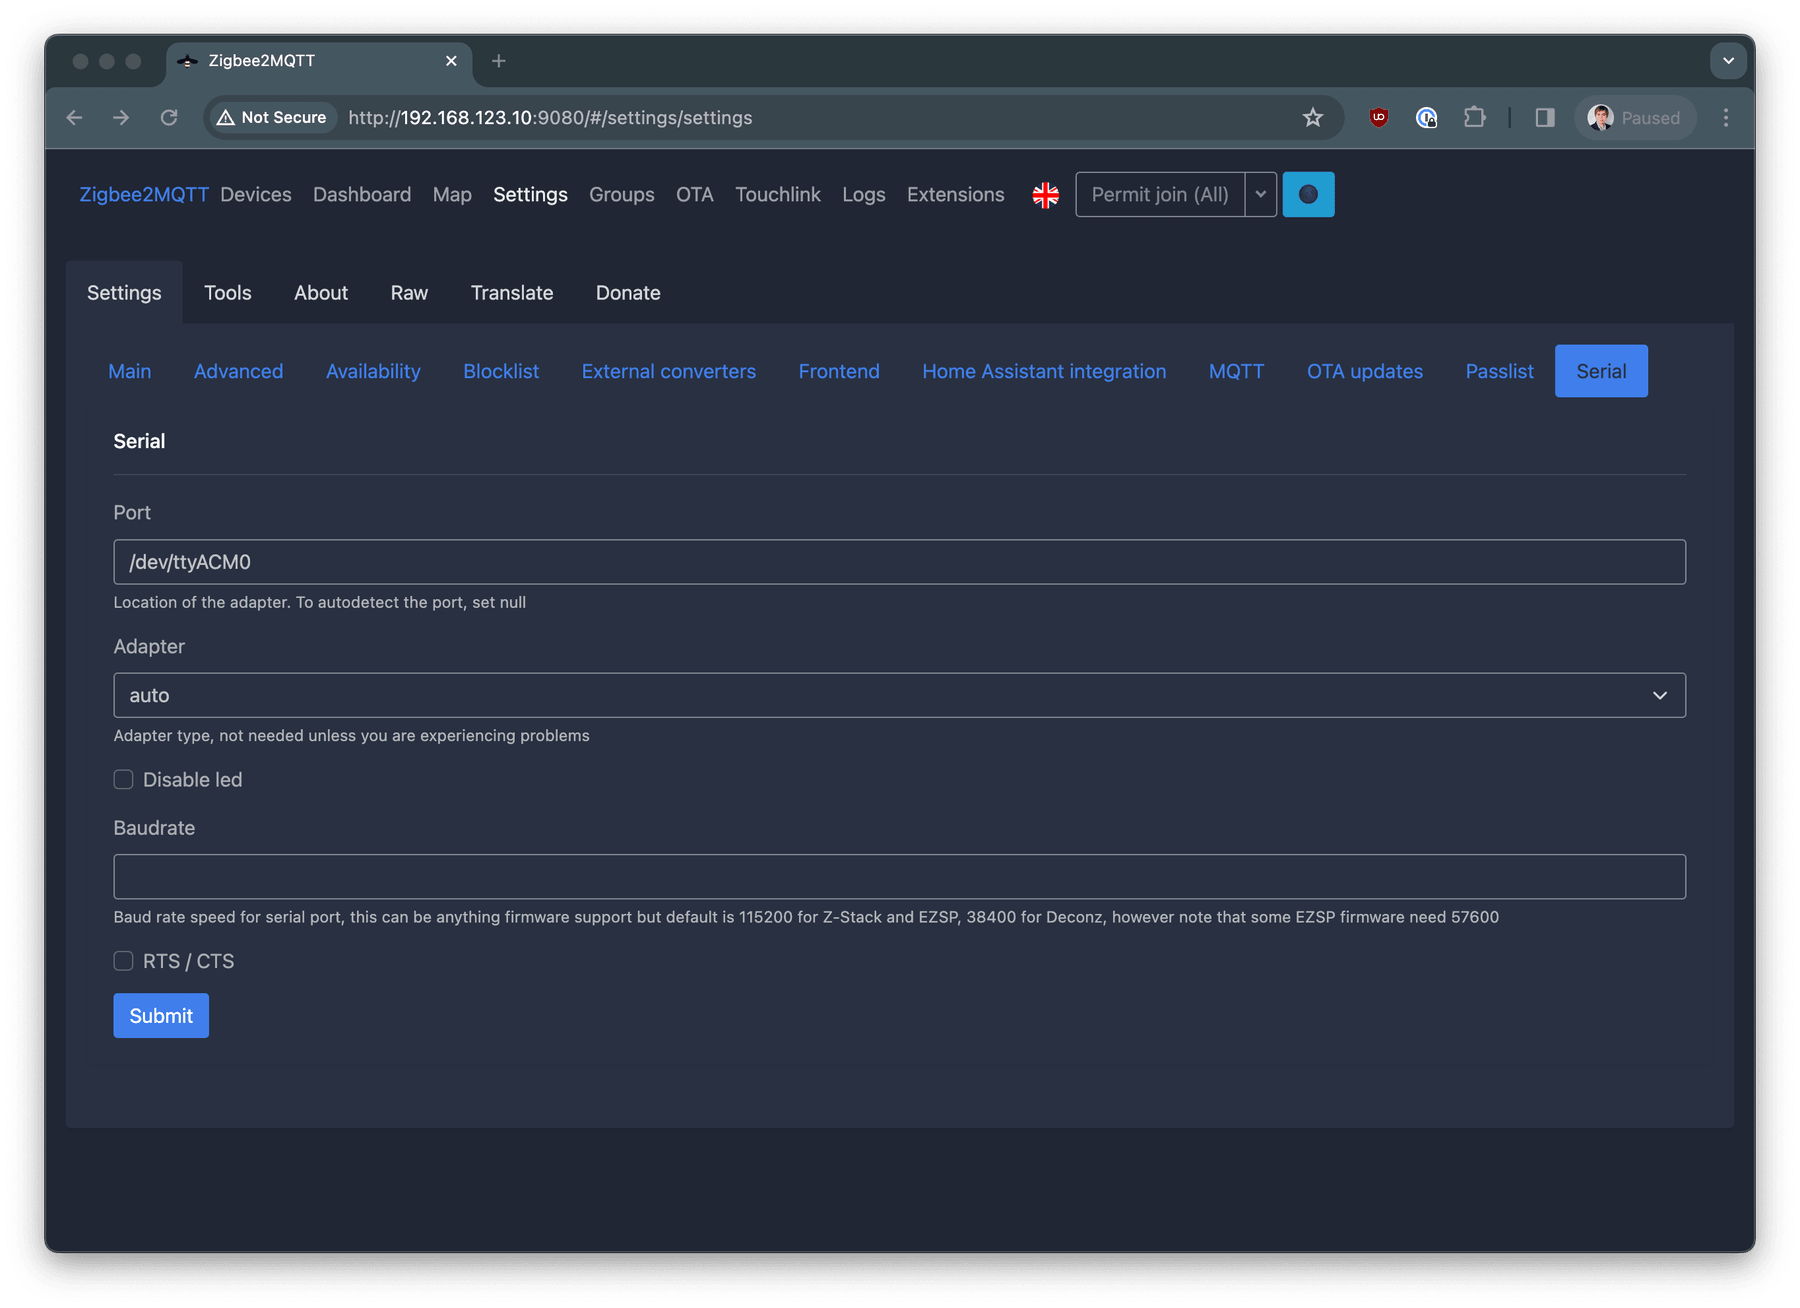
Submit configuration using Submit button.
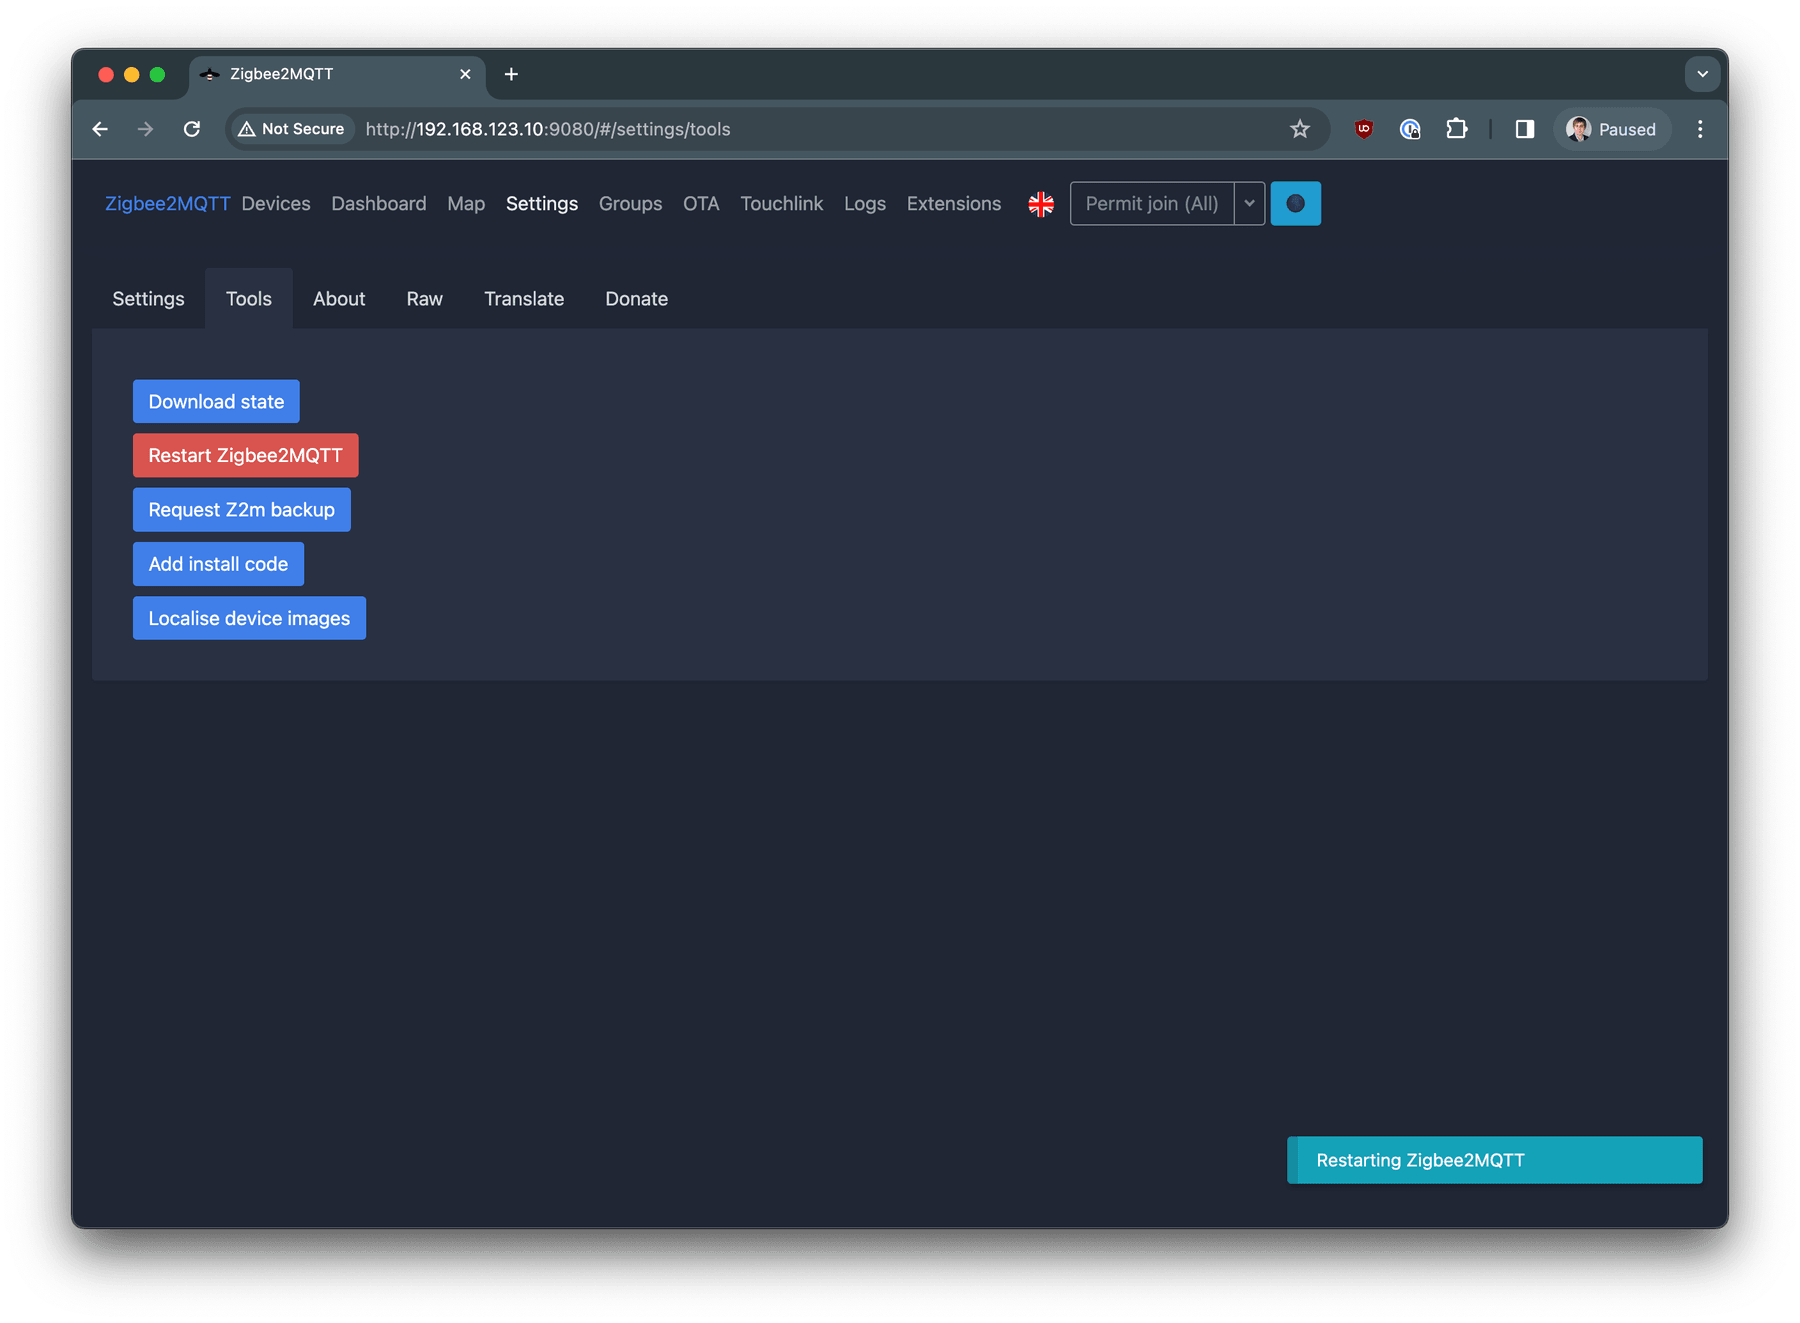
Navigate to Settings -> Tools, click on Restart Zigbee2MQTT red button and confirm the action.
Adding Zigbee Device
Navigate to Zigbee2MQTT Web Interface and click on Permit join (All) button in the top right corner. After this, you will have around 4 minutes to add your devices.
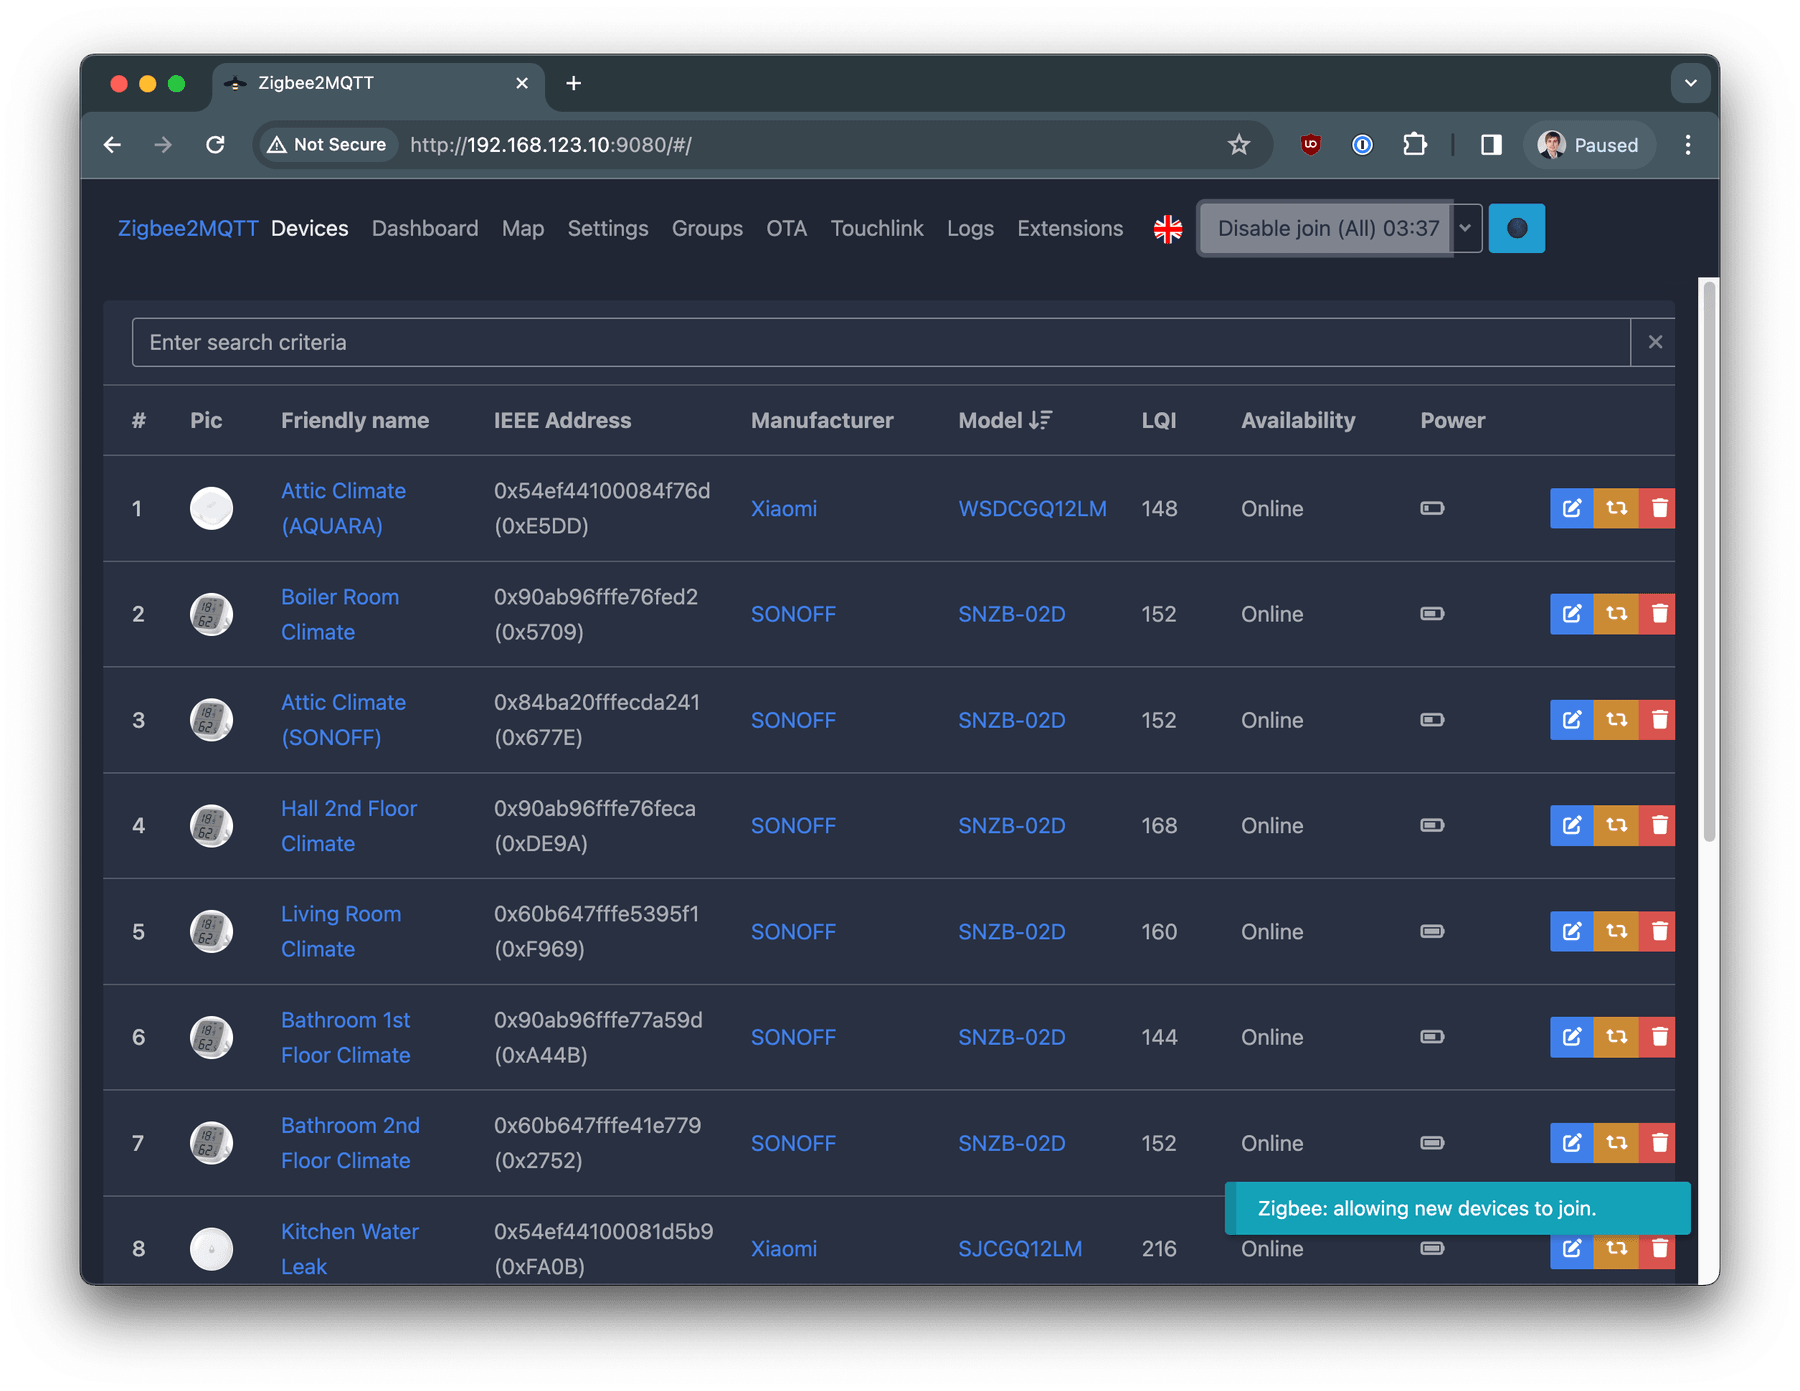
Follow the instructions provided by your device to connect it to the Zigbee network. In many cases, this is achieved by a long press of the button located on your device. Once the device is discovered, it will appear in the list on the 'Devices' page.
Click on blue Rename device button and set it nice and friendly name.
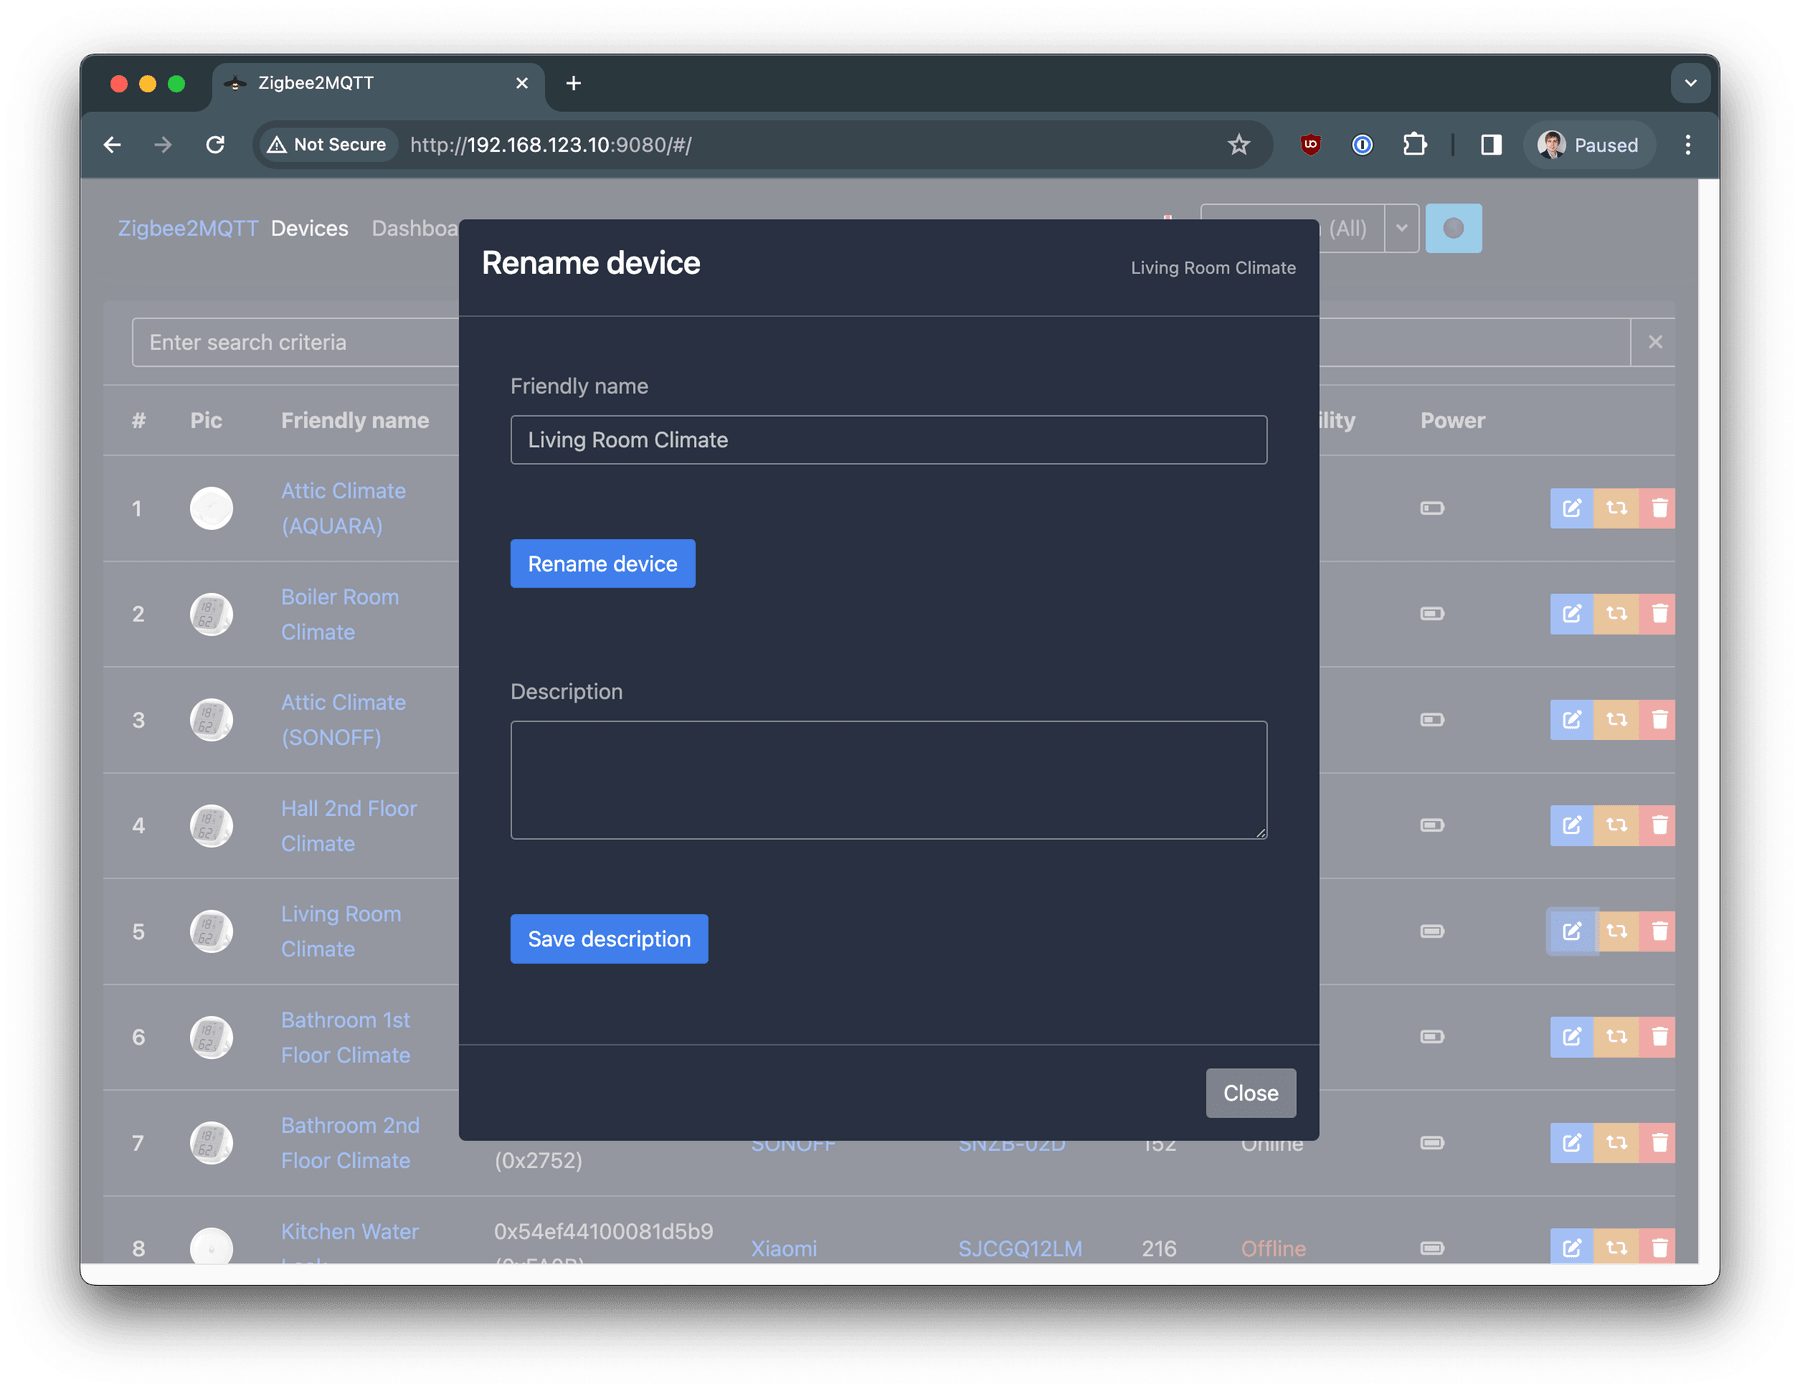
Your device is successfully sending data over MQTT, and you are able to subscribe to receive it now.
Checking MQTT connection (subscribing to messages)
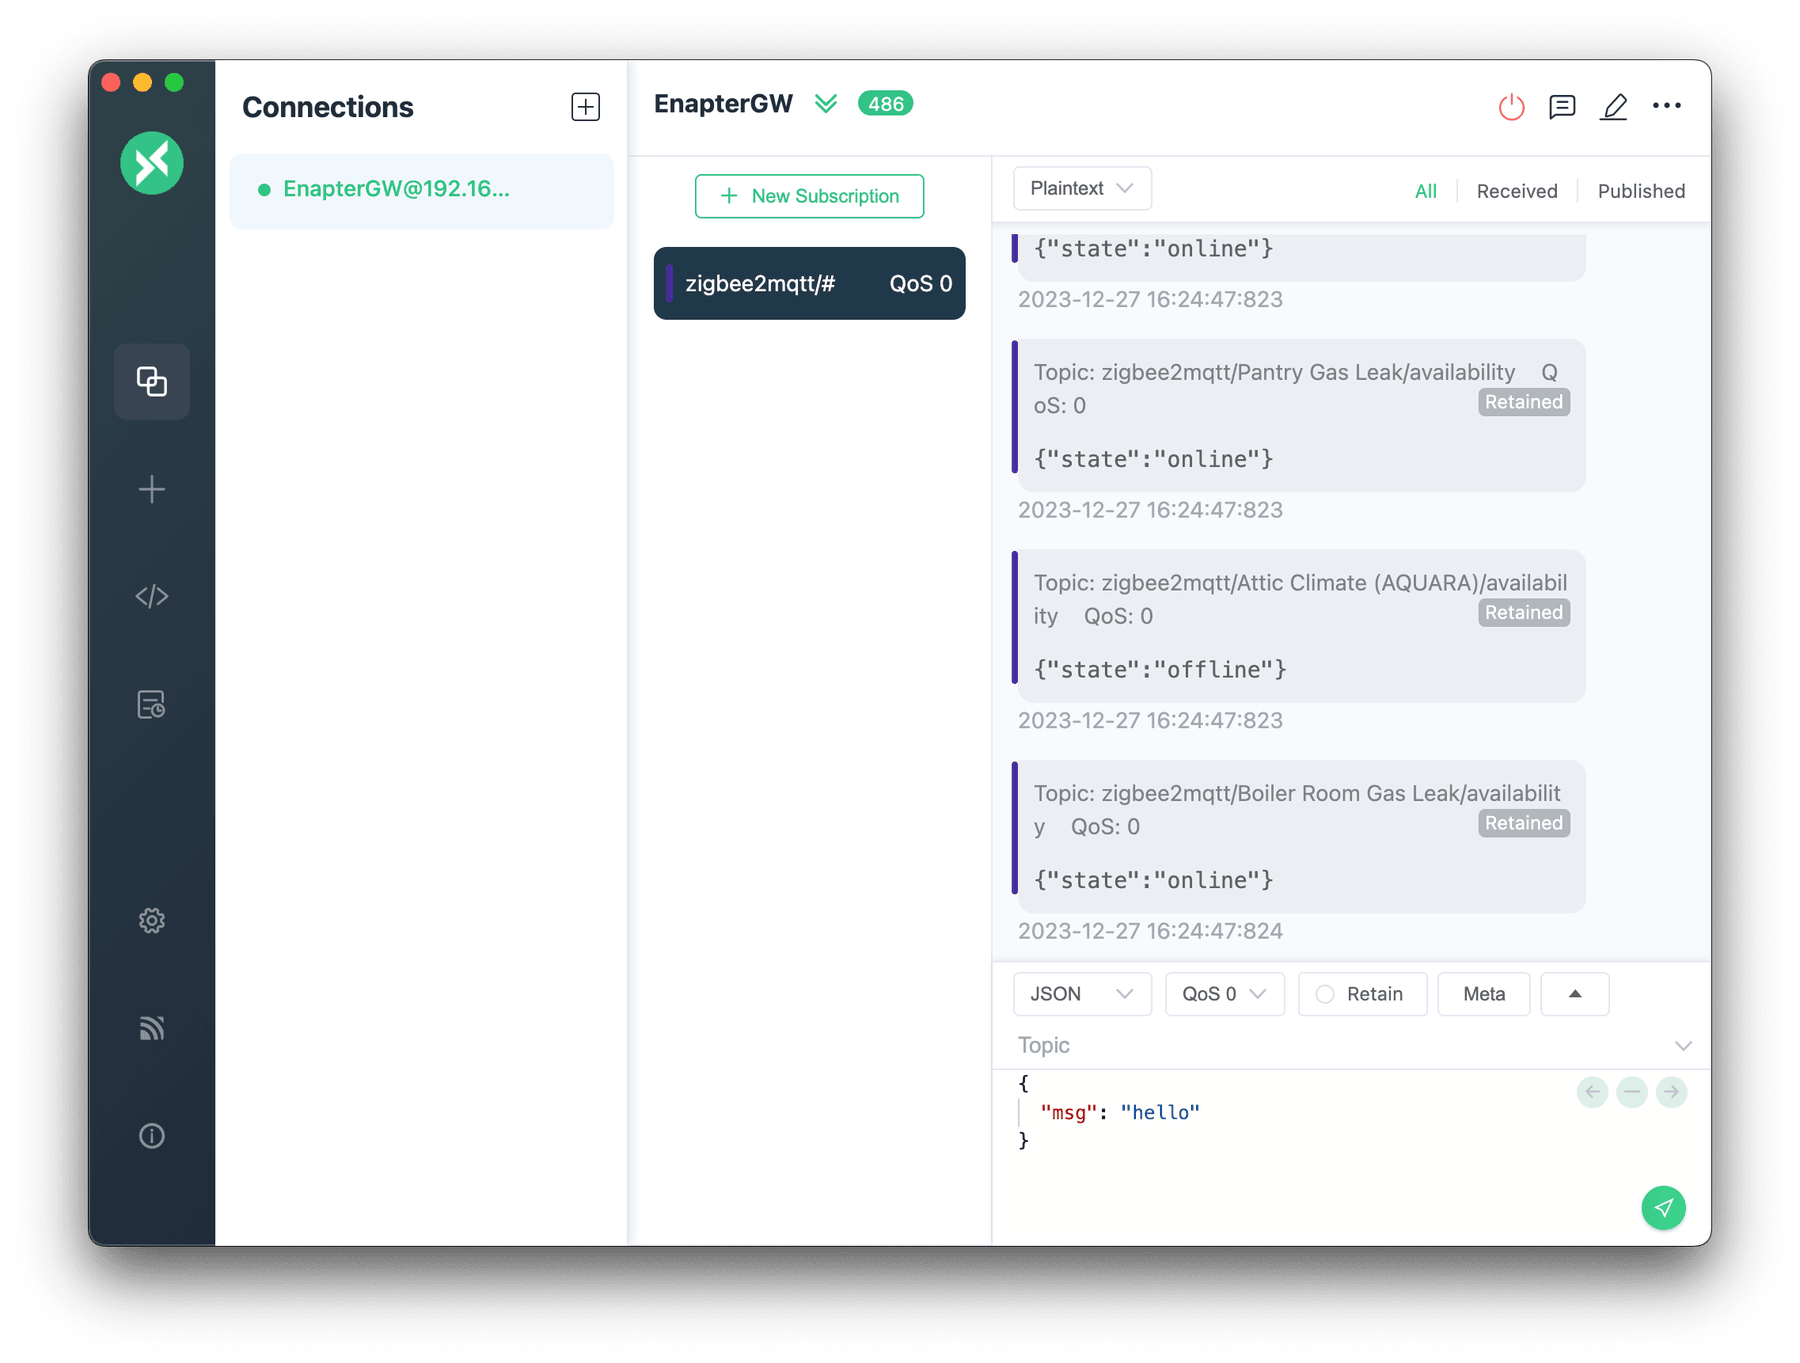
You are able to check connection using MQTTX Desktop Client. The detailed guide on how to use it available at this page
You need to subscribe to the topic you set in Zigbee2MQTT MQTT settings (zigbee2mqtt/# in this guide).
Tips
- At the moment of writing this article, Virtual UCM had no support for subscribing/publishing to MQTT, but it is still possible to integrate by setting up the 'MQTT to REST HTTP API.' The most convenient tool for this is Node-RED, which can also be run in a Docker container.
💬 Need Help?
Have a question or hit a roadblock? Join the Enapter Discord community to get quick support, exchange ideas, and collaborate with other developers and energy experts.