Watchpower Solar Inverter Monitoring And Automation
What We Monitor?
In this guide we will set up a real-time remote monitoring and automation of Voltronic Axpert-based inverter like MPP Solar, Kodak, Mecer, Phocos, RCT, Richsolar, and others, over RS-232/COM port.
Required Hardware
For physical RS-232 connection with inverter we will need:
- RS-232 communication module:
- Either Enapter ENP-RS232 communication module,
- Or ENP-KIT-232-485-CAN module (check out UCM Kit introduction and simple JLPCB ordering guide) + ESP-32 development board.
- Communication cable with RJ45 connector on one side and plain wires on another side. You can use RJ45 breakout connector to assemble such cable.
The module will run a data acquisition program to collect inverter data and will send those data to Enapter Cloud.
Physical Connection
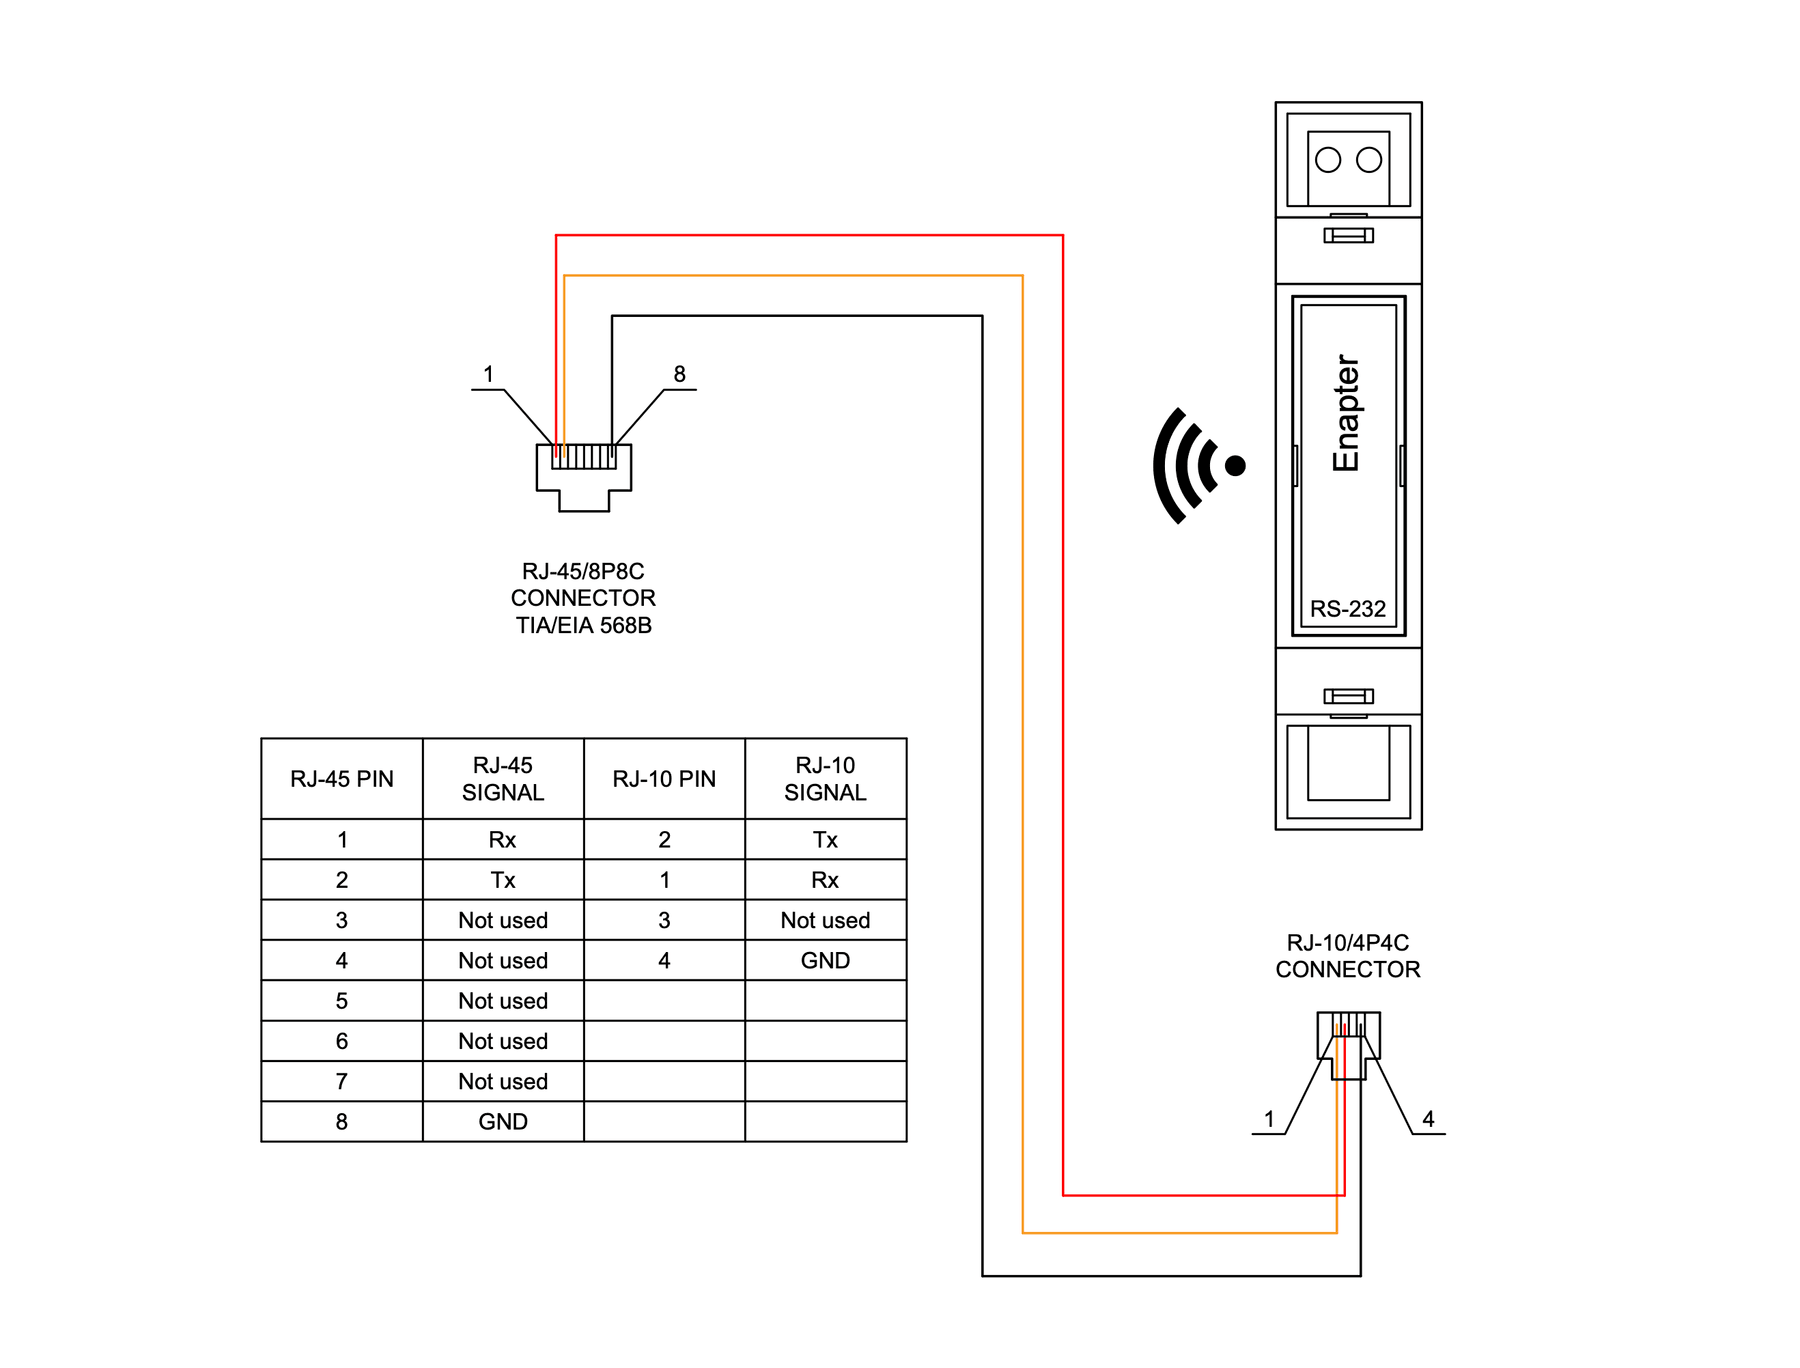
Inverter has an RJ45 port with RS-232/COM pins. Pins 1 and 2 are used as TX and RX and should be connected to Enapter ENP-RS232 or ENP-KIT-232-485-CAN modules as shown on schemes below.
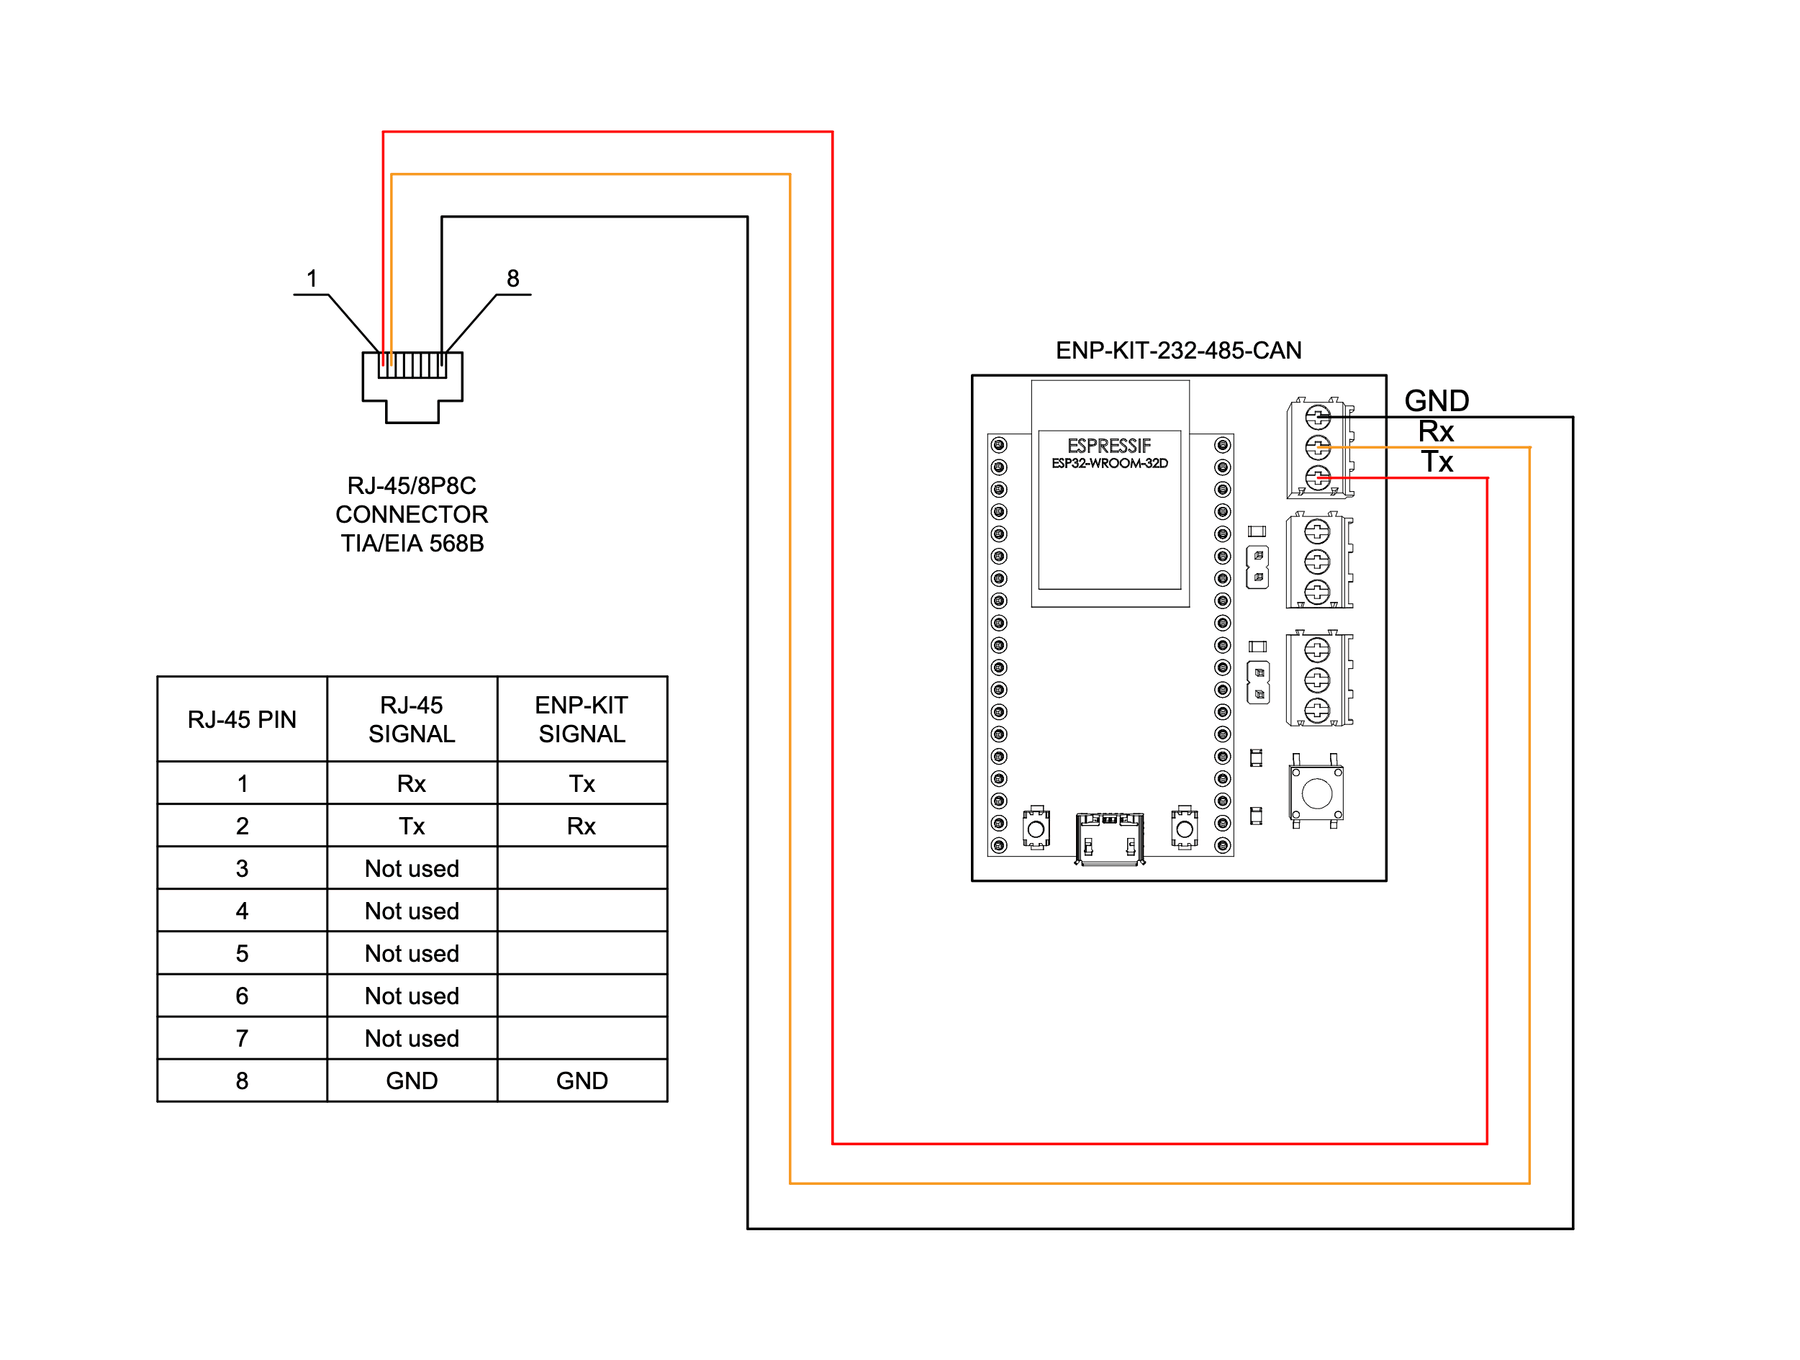
Connection scheme for ENP-KIT-232-485-CAN communication module .
Communication Module Setup
1. Create Site
Use Enapter mobile app for iOS or Android to create your site — the system installation in specific location.
- Press
Create New Sitebutton. - Enter your site details and press
Create Site. - Your site is ready for adding new devices.
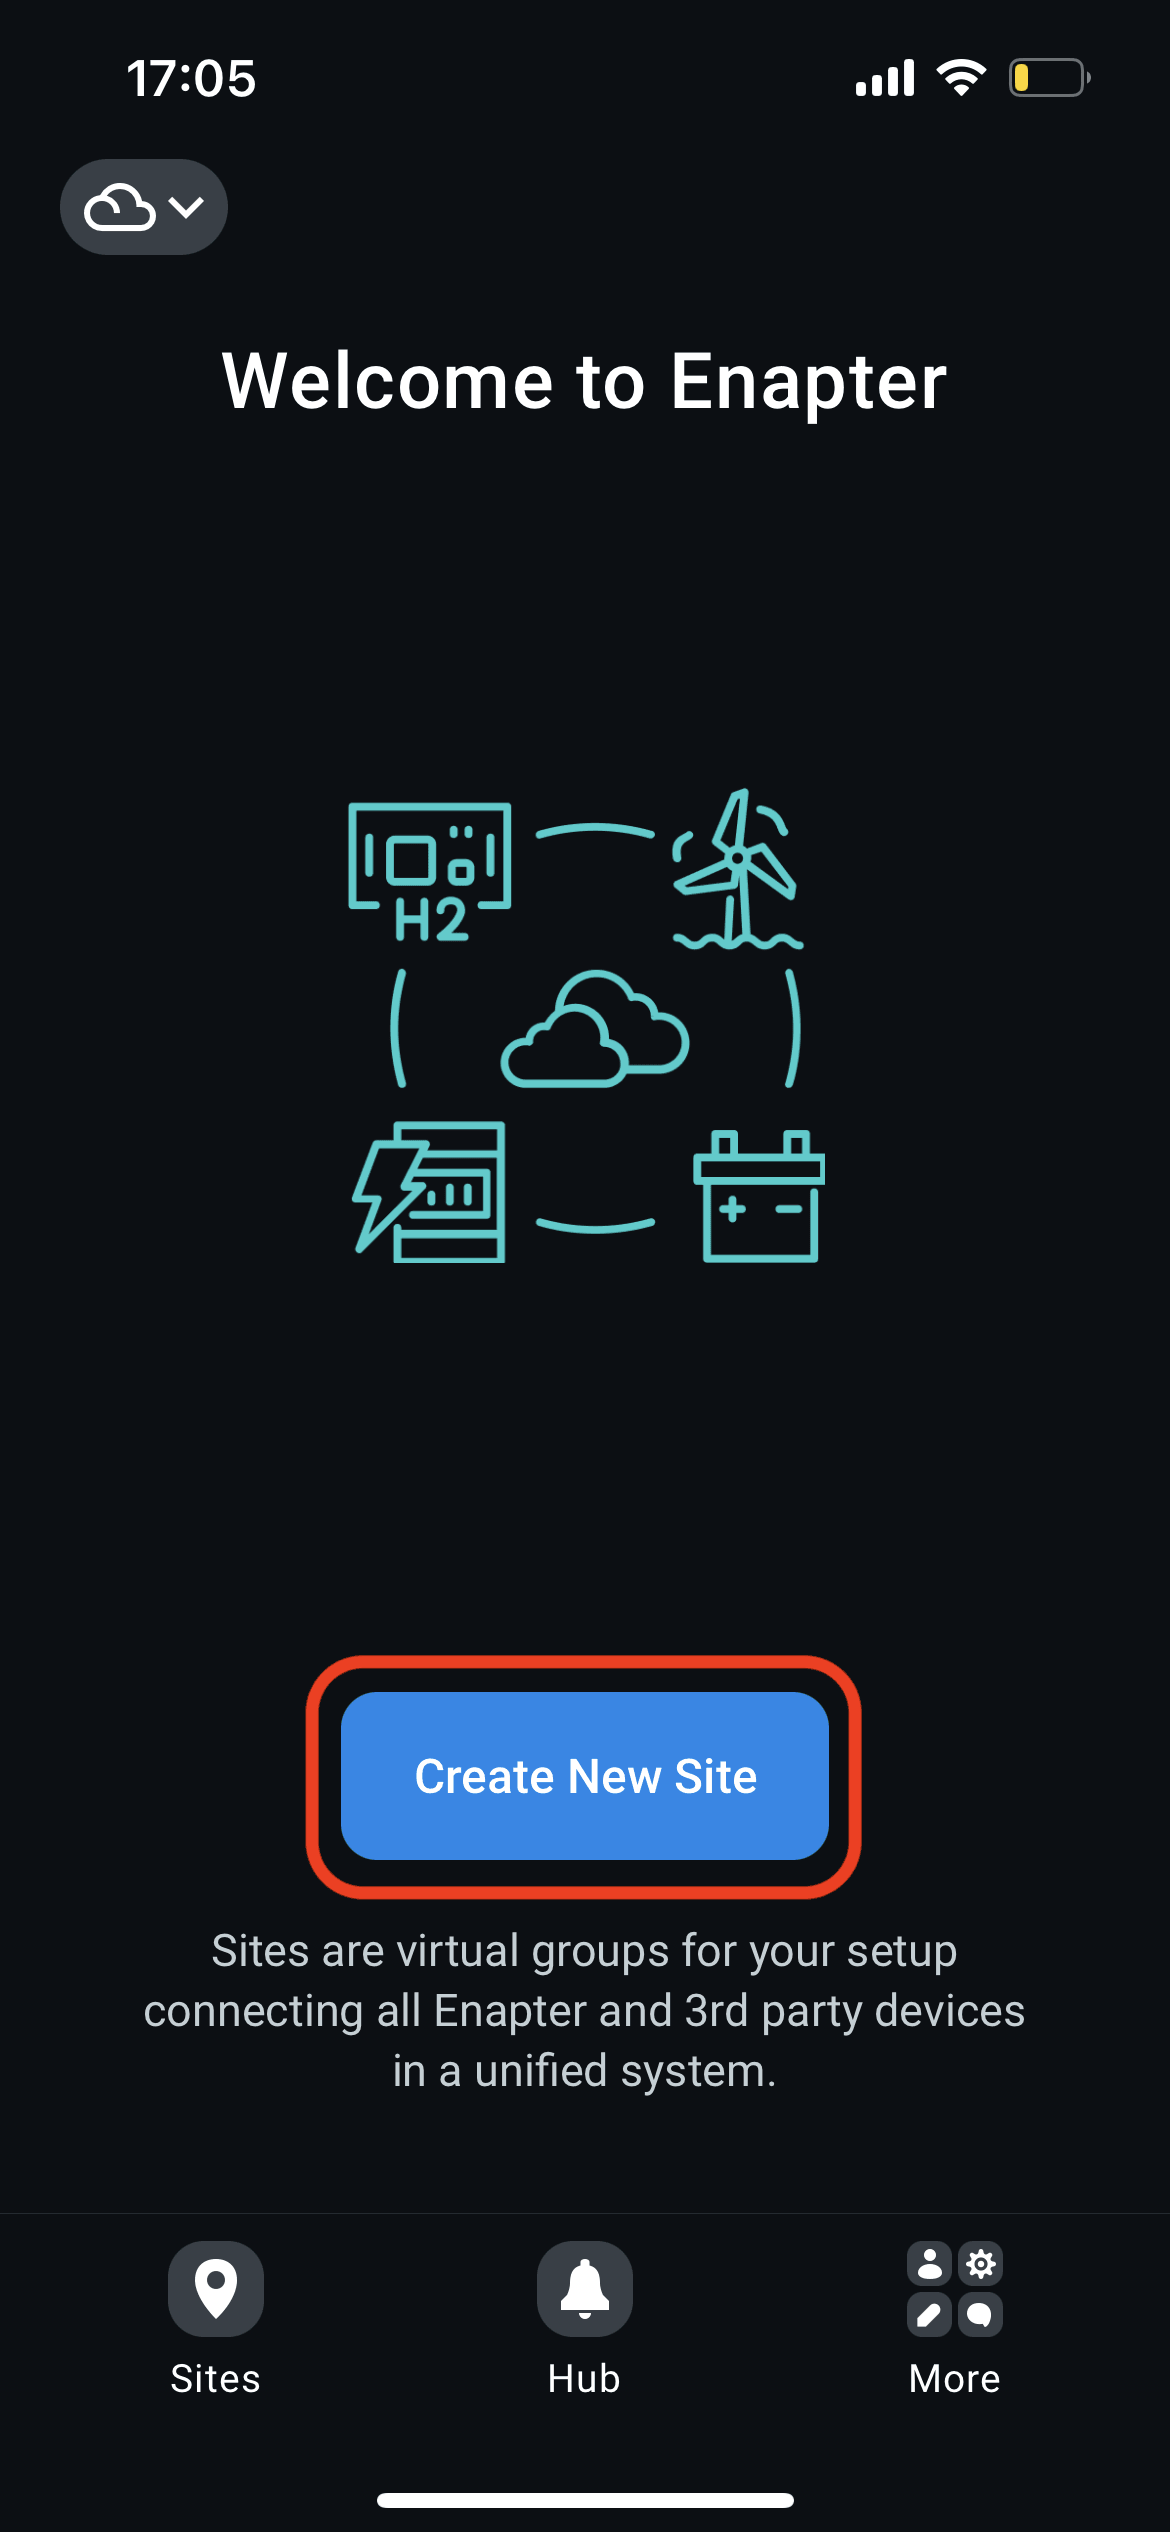
Press Create New Site button.
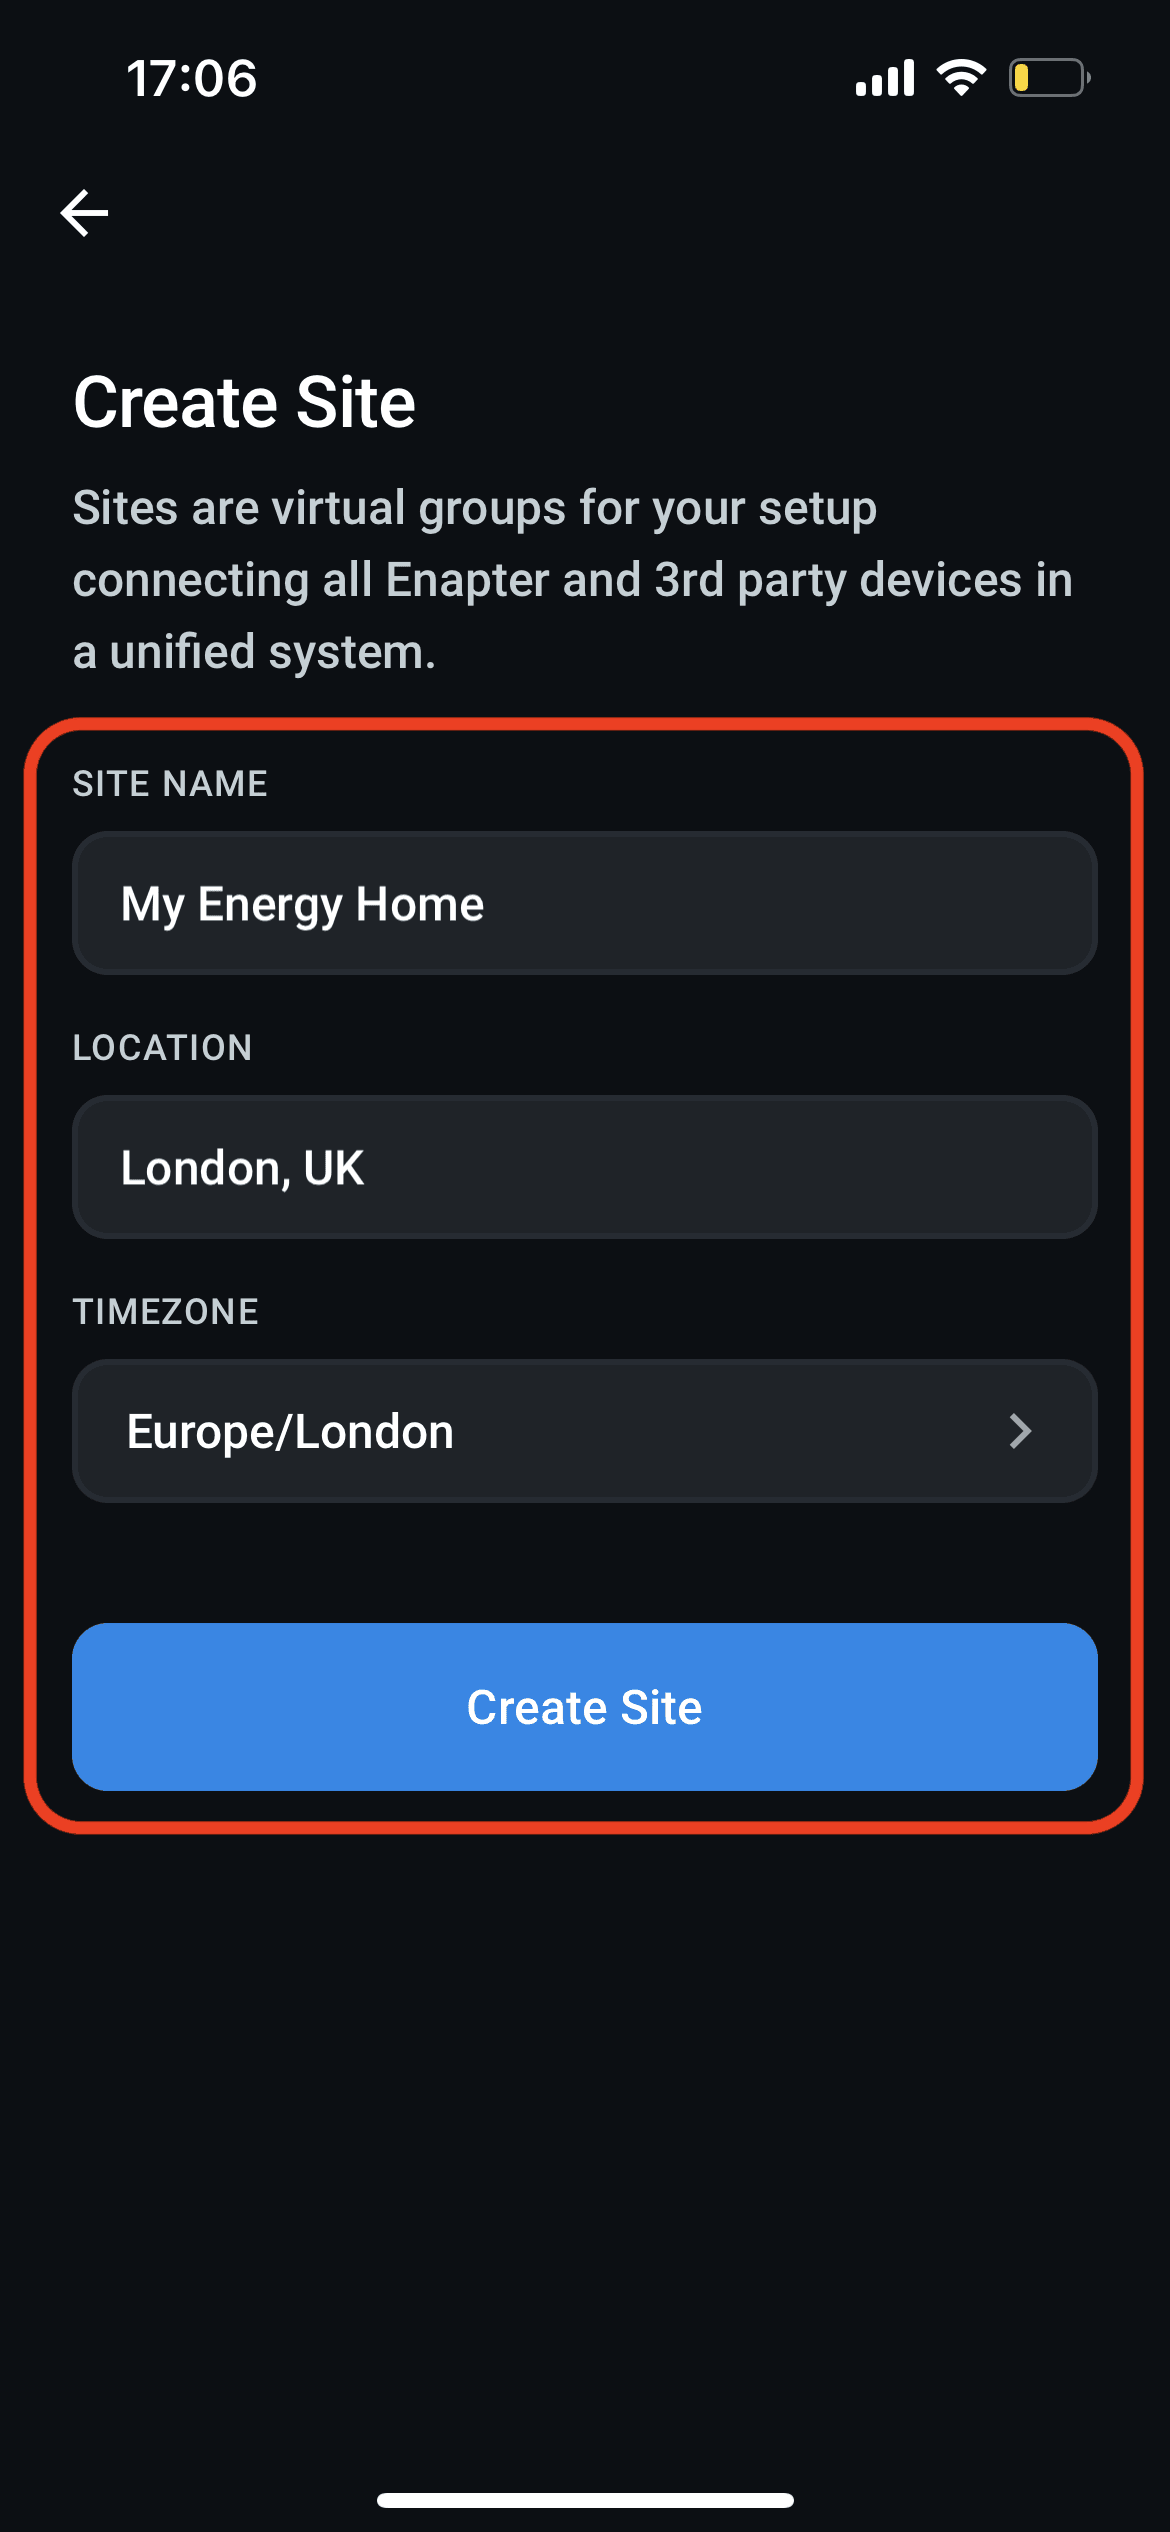
Enter your site details and press Create Site.
Your site is ready for adding new devices.
2. Configure ENP-RS232
ENP-RS232 module uses WiFi to communicate to Enapter Cloud over internet. Use mobile app to add the module to the site and to configure WiFi connection.
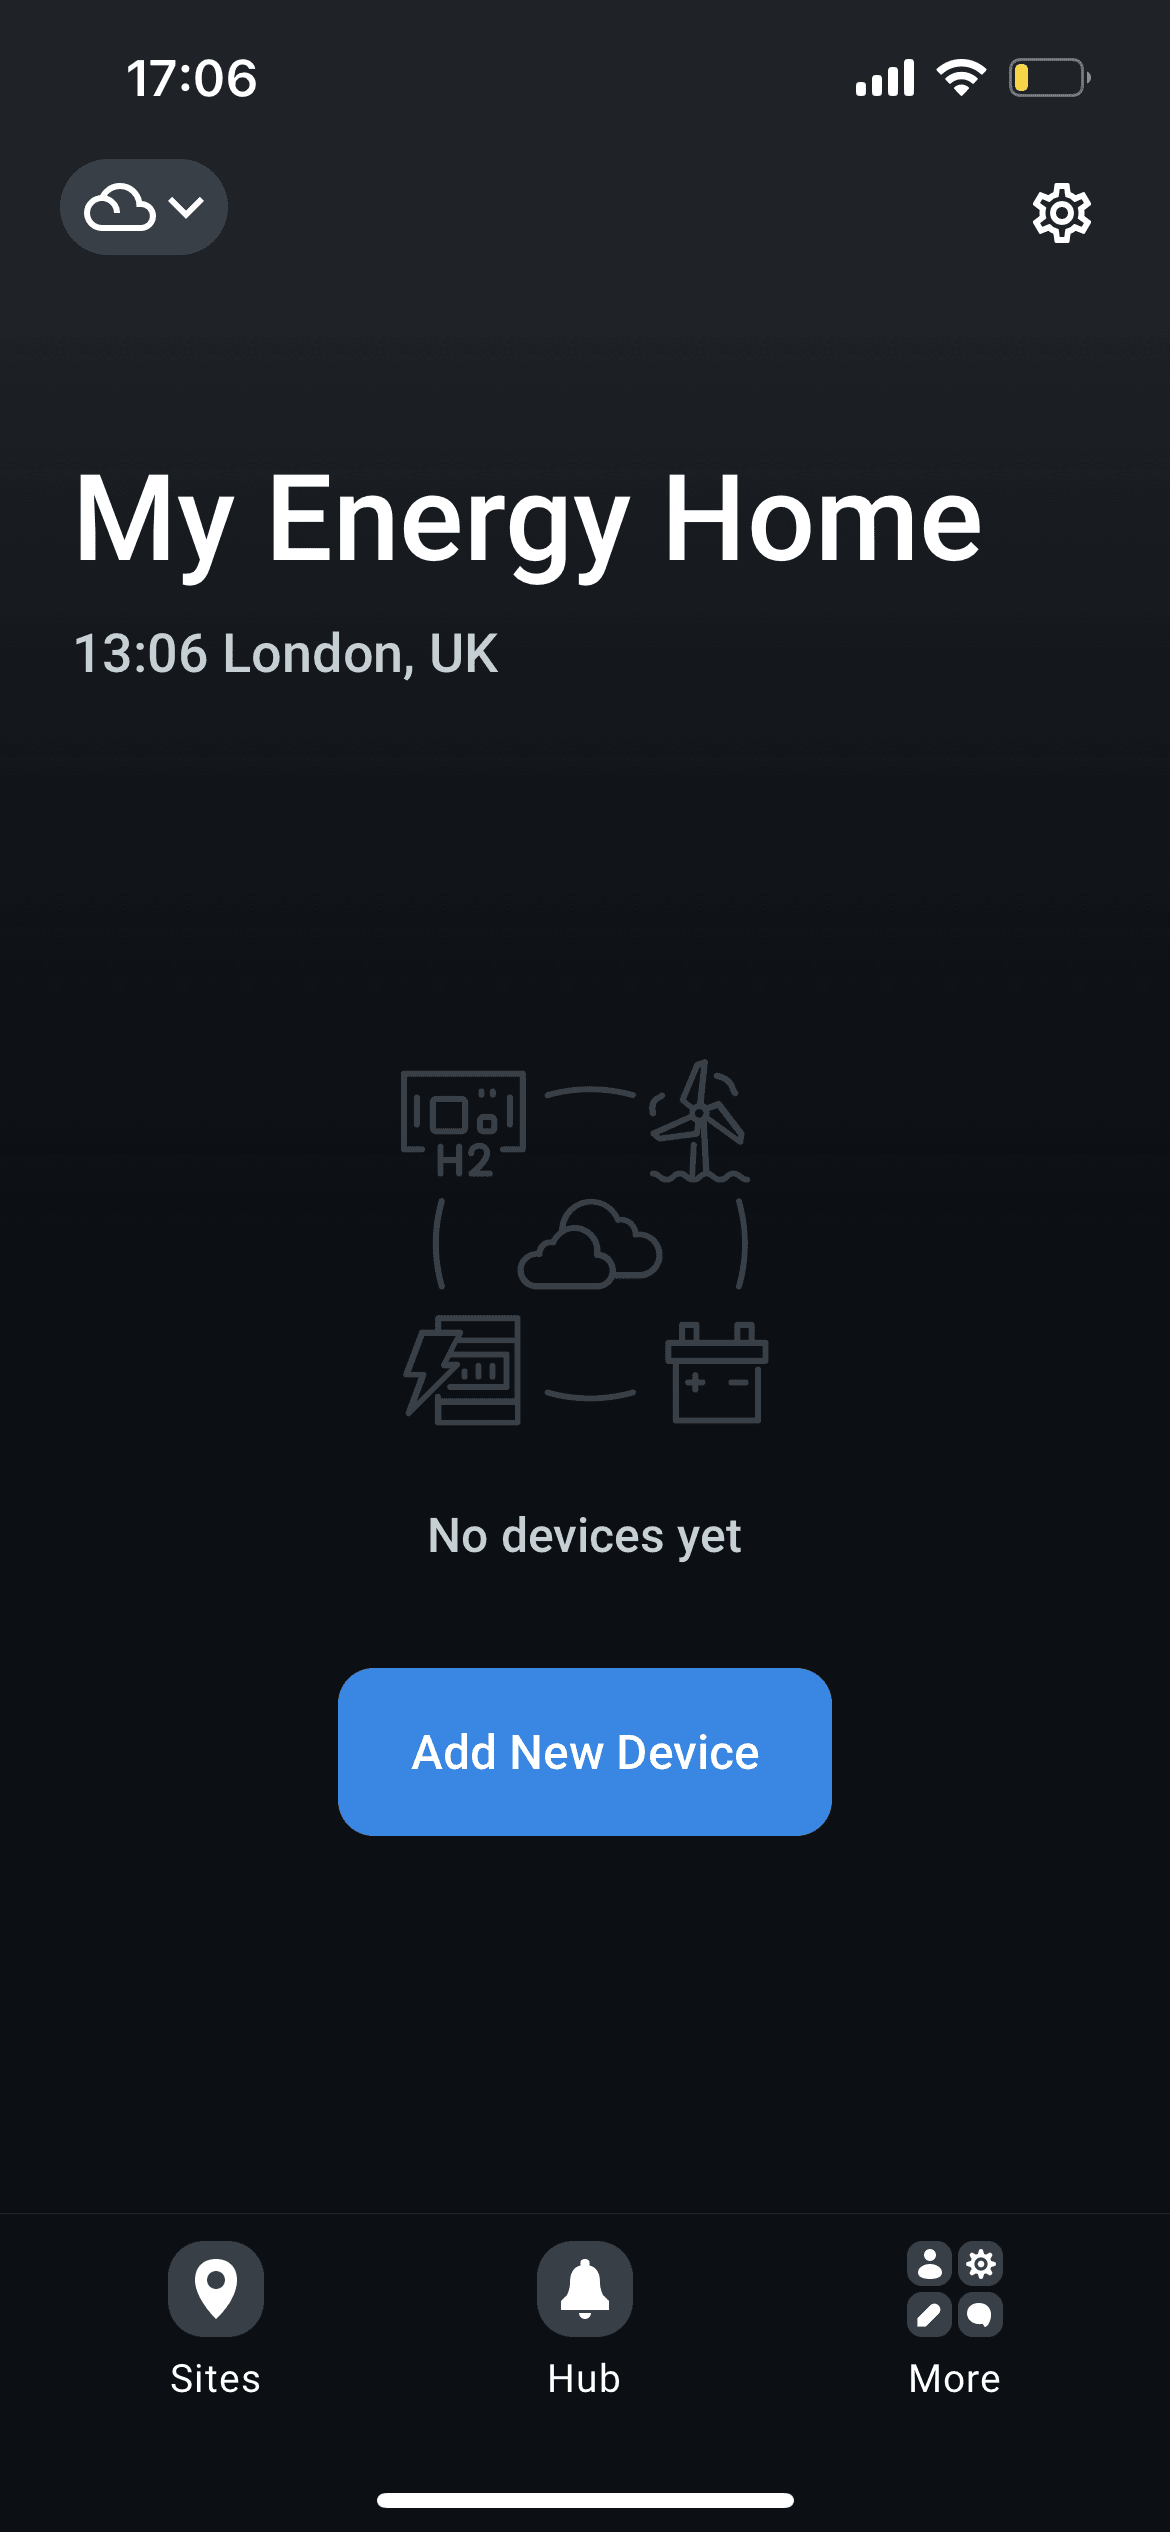
- Press
Add New Devicebutton. - Scan QR code located on the side of ENP-RS232 module to initiate Bluetooth connection.
- Enter your WiFi SSID and password, and press
Continue. - Wait until the module is configured and connected to Enapter Cloud.
- Enter the name you'd like to use for the device.
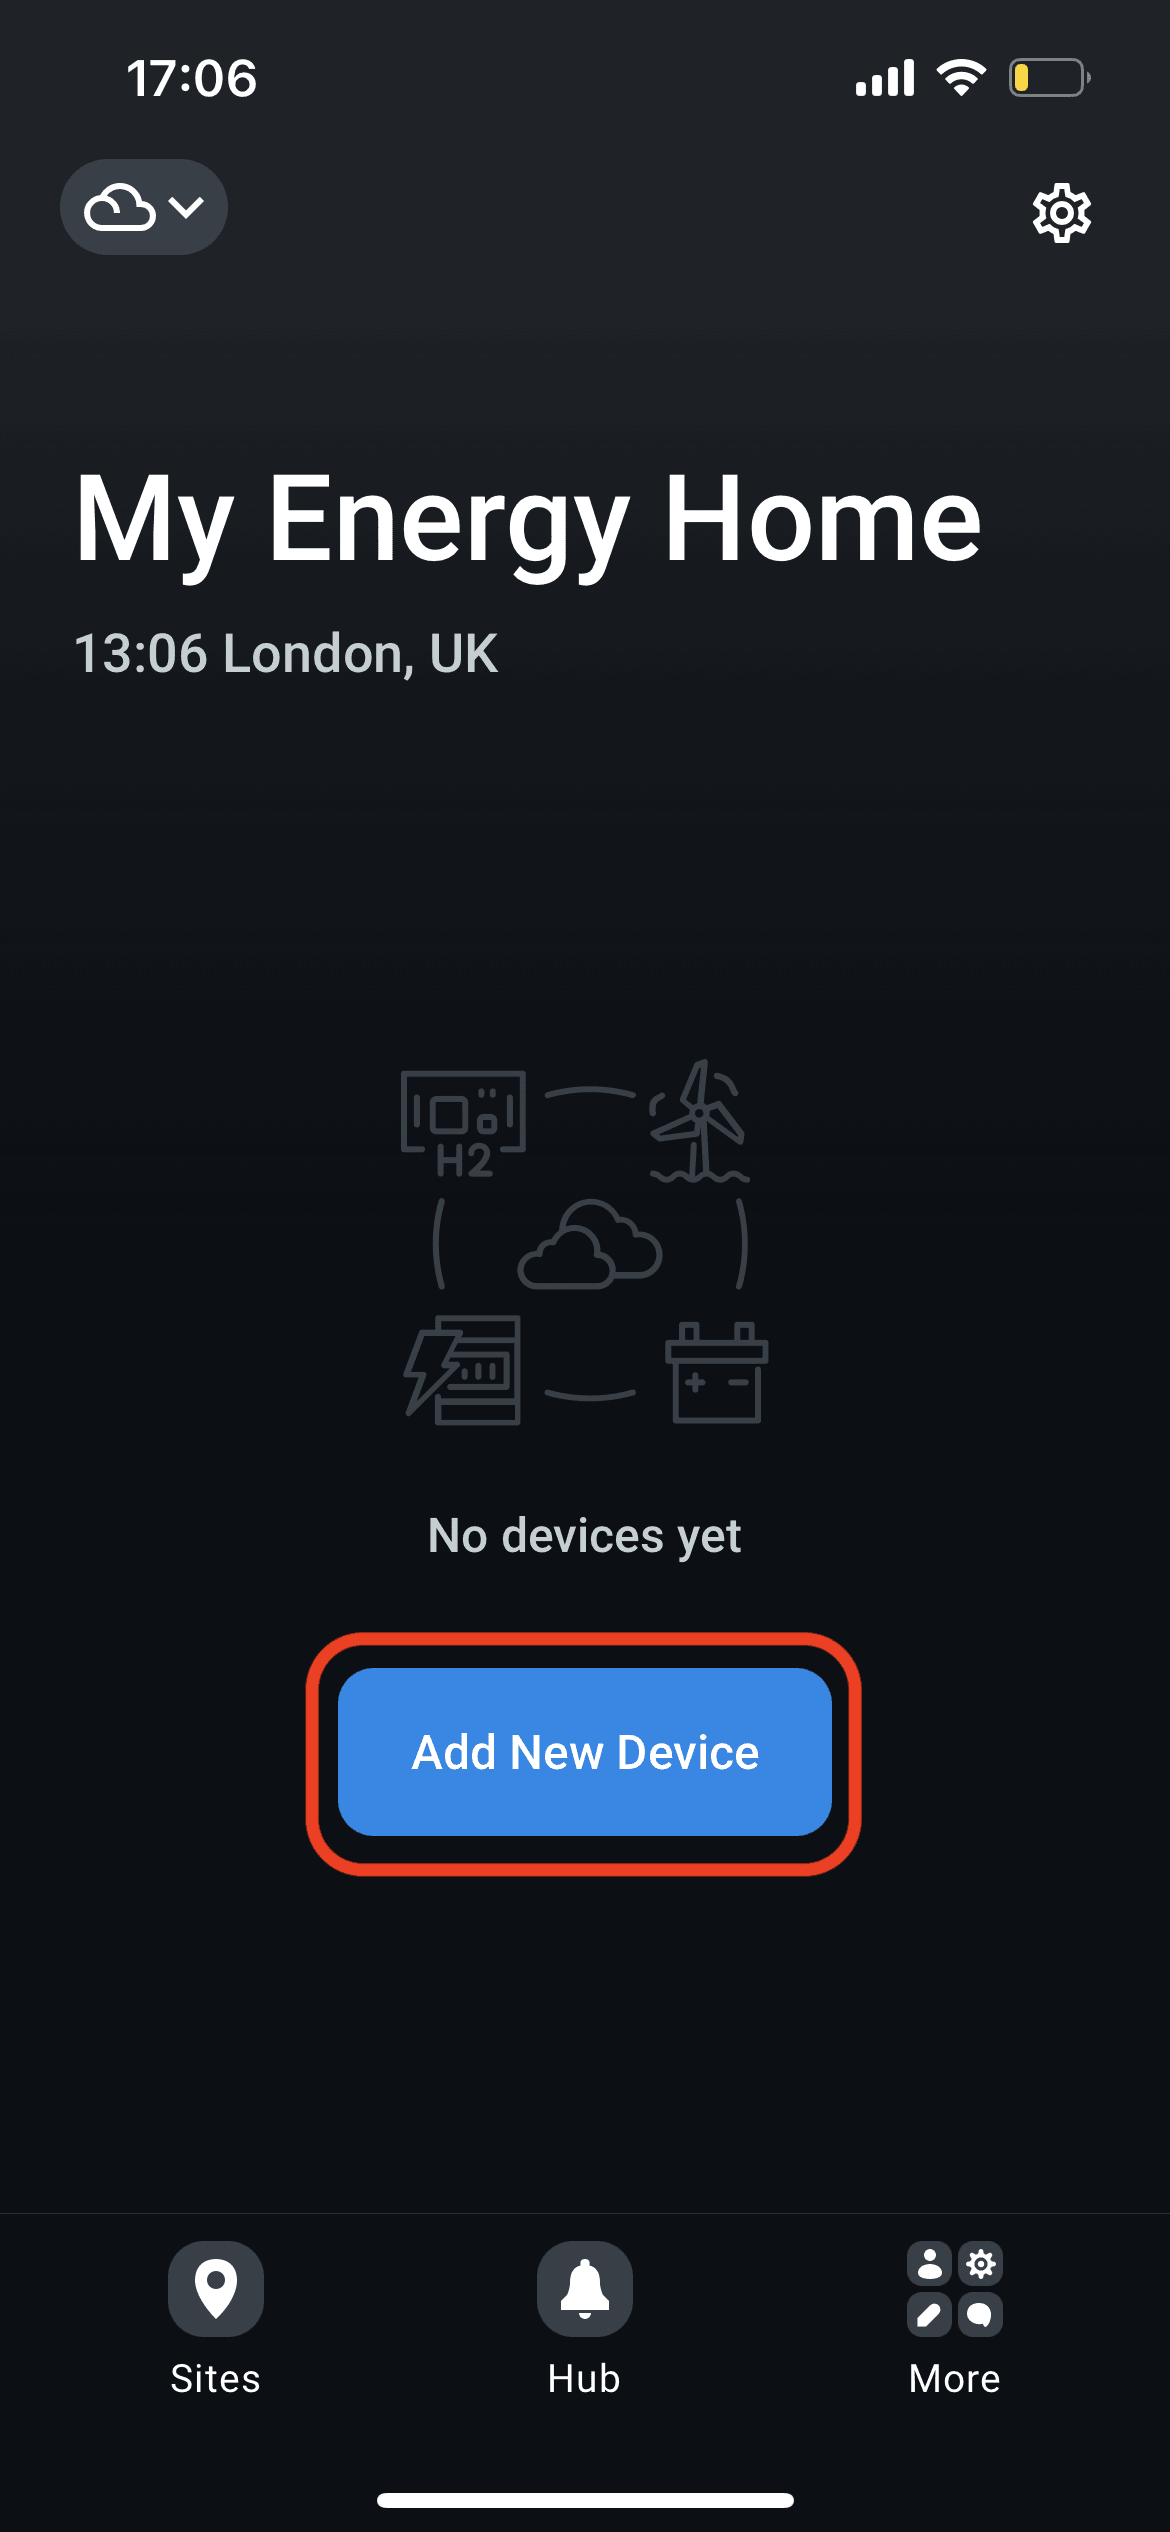
Press Add New Device button.
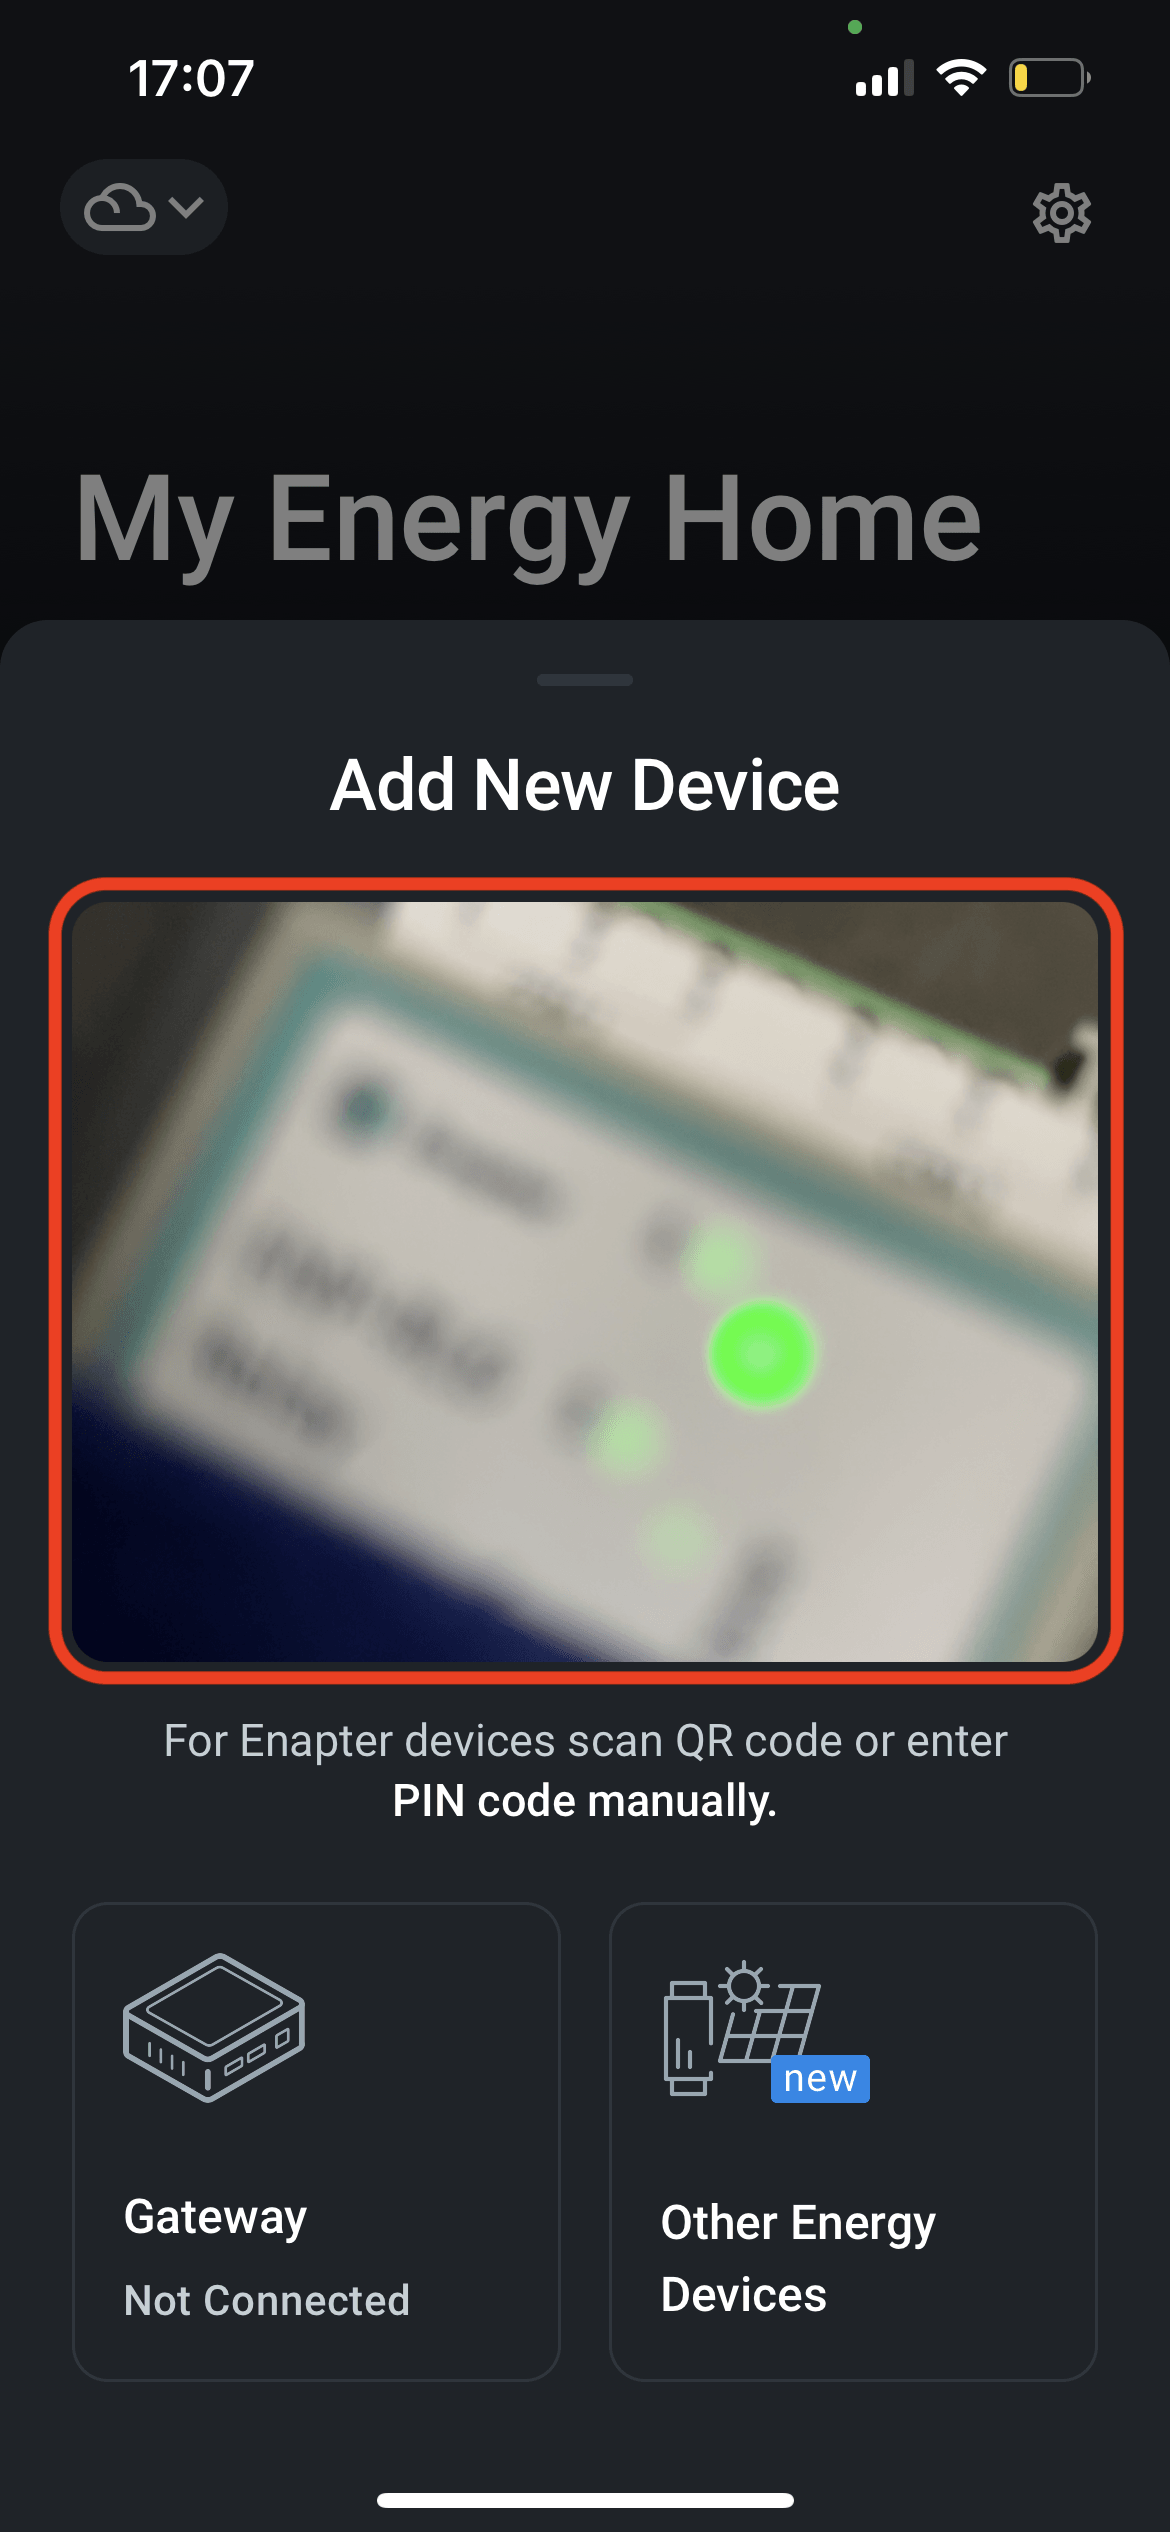
Scan QR code located on the side of ENP-CAN module to initiate Bluetooth connection.
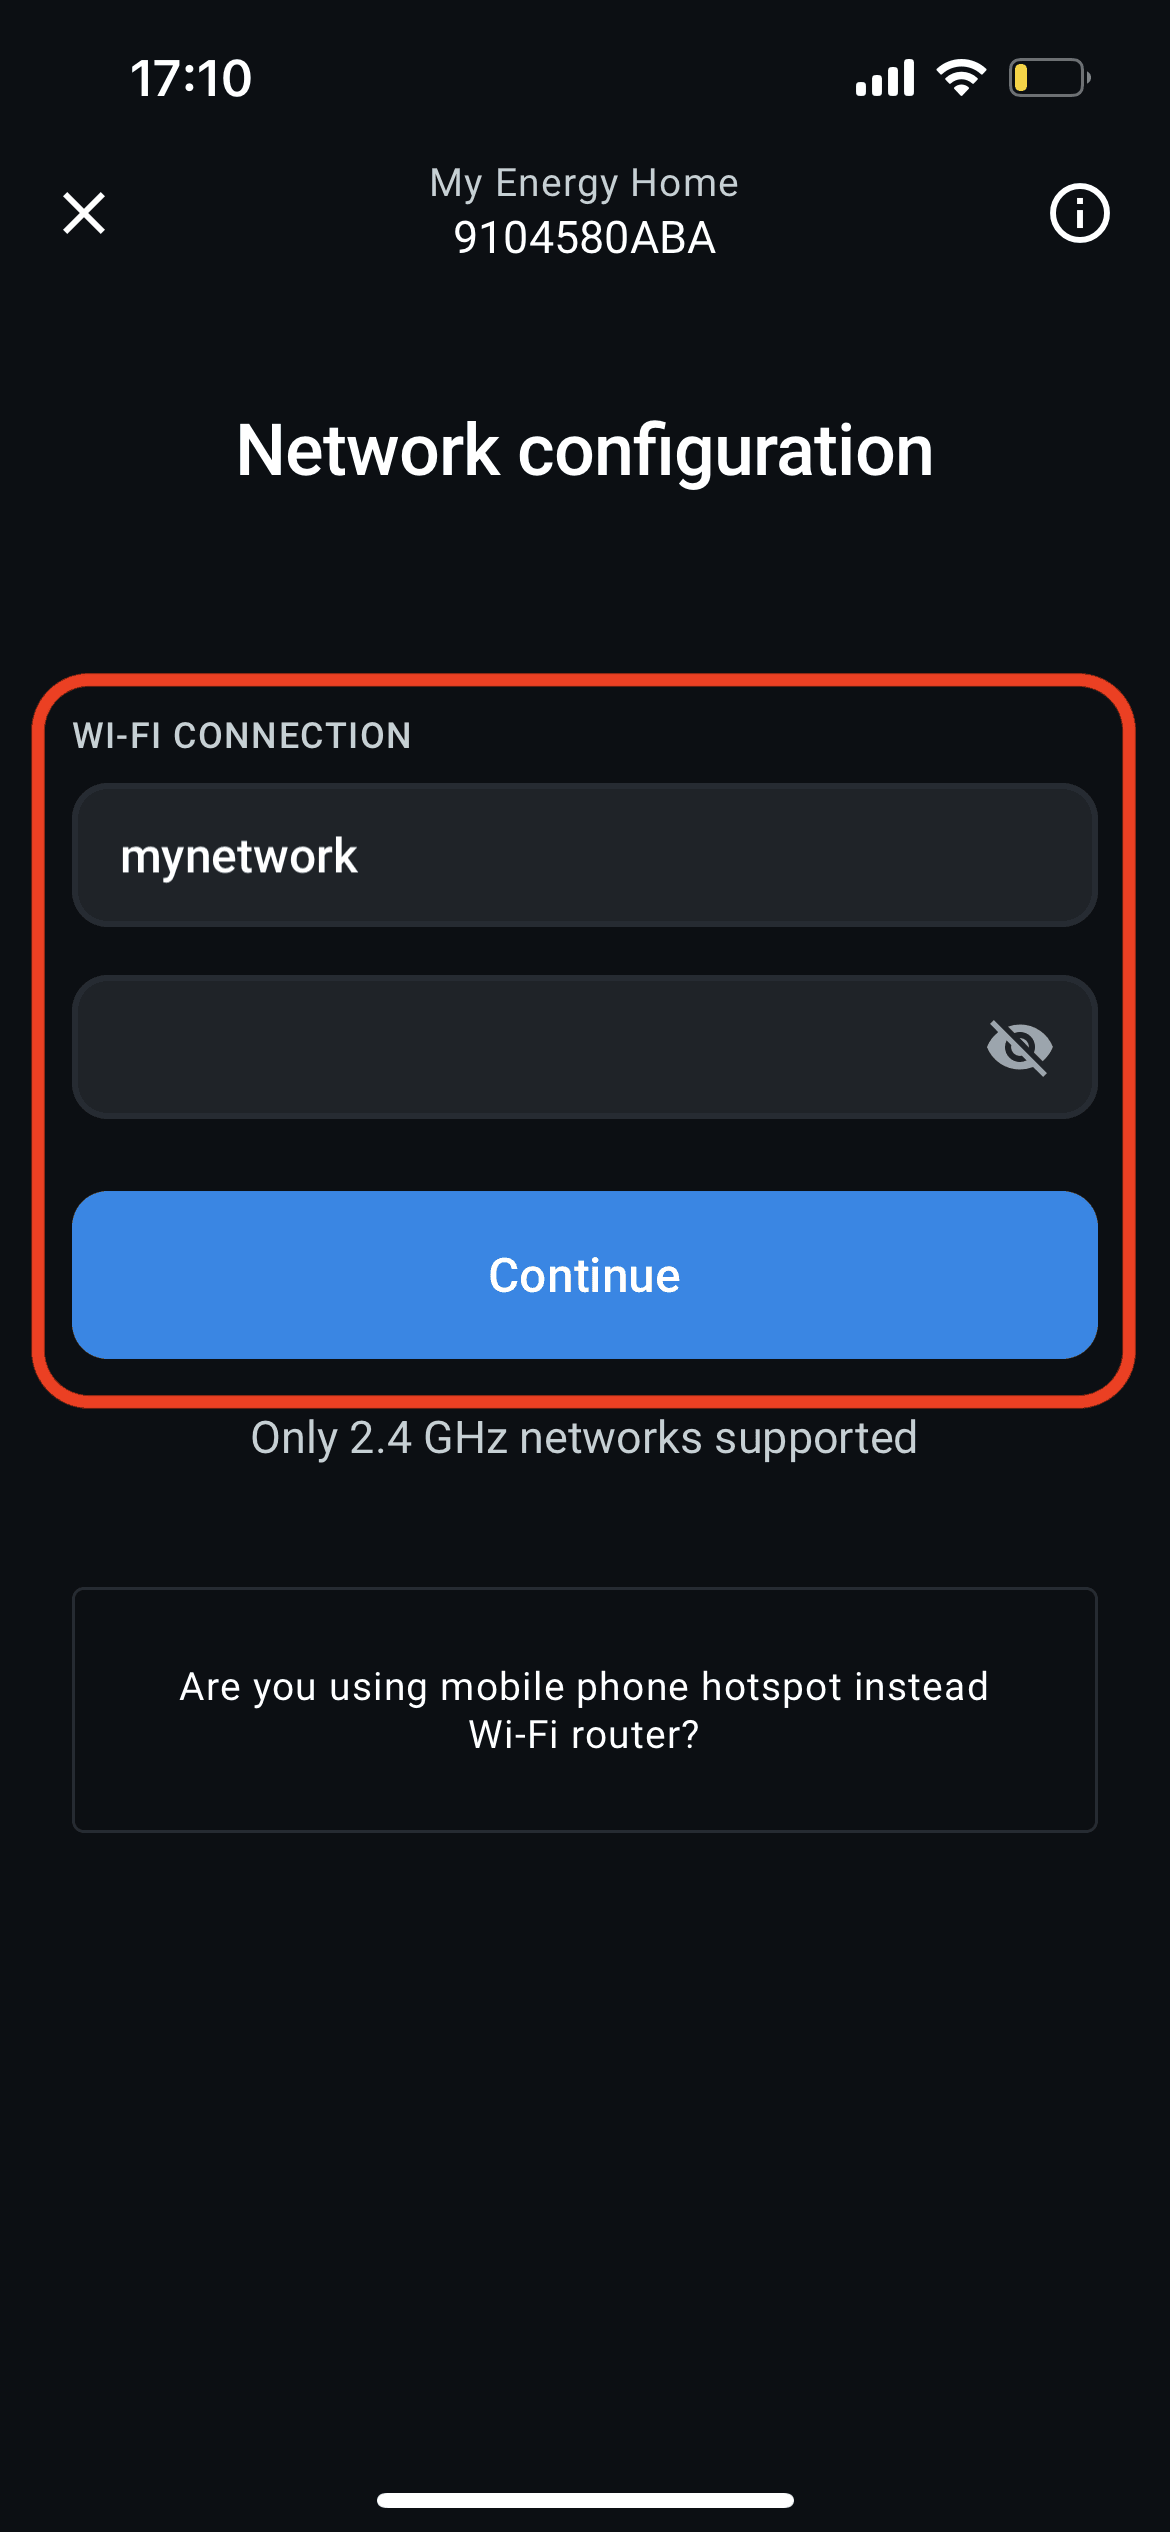
Enter your WiFi SSID and password, and press Continue.
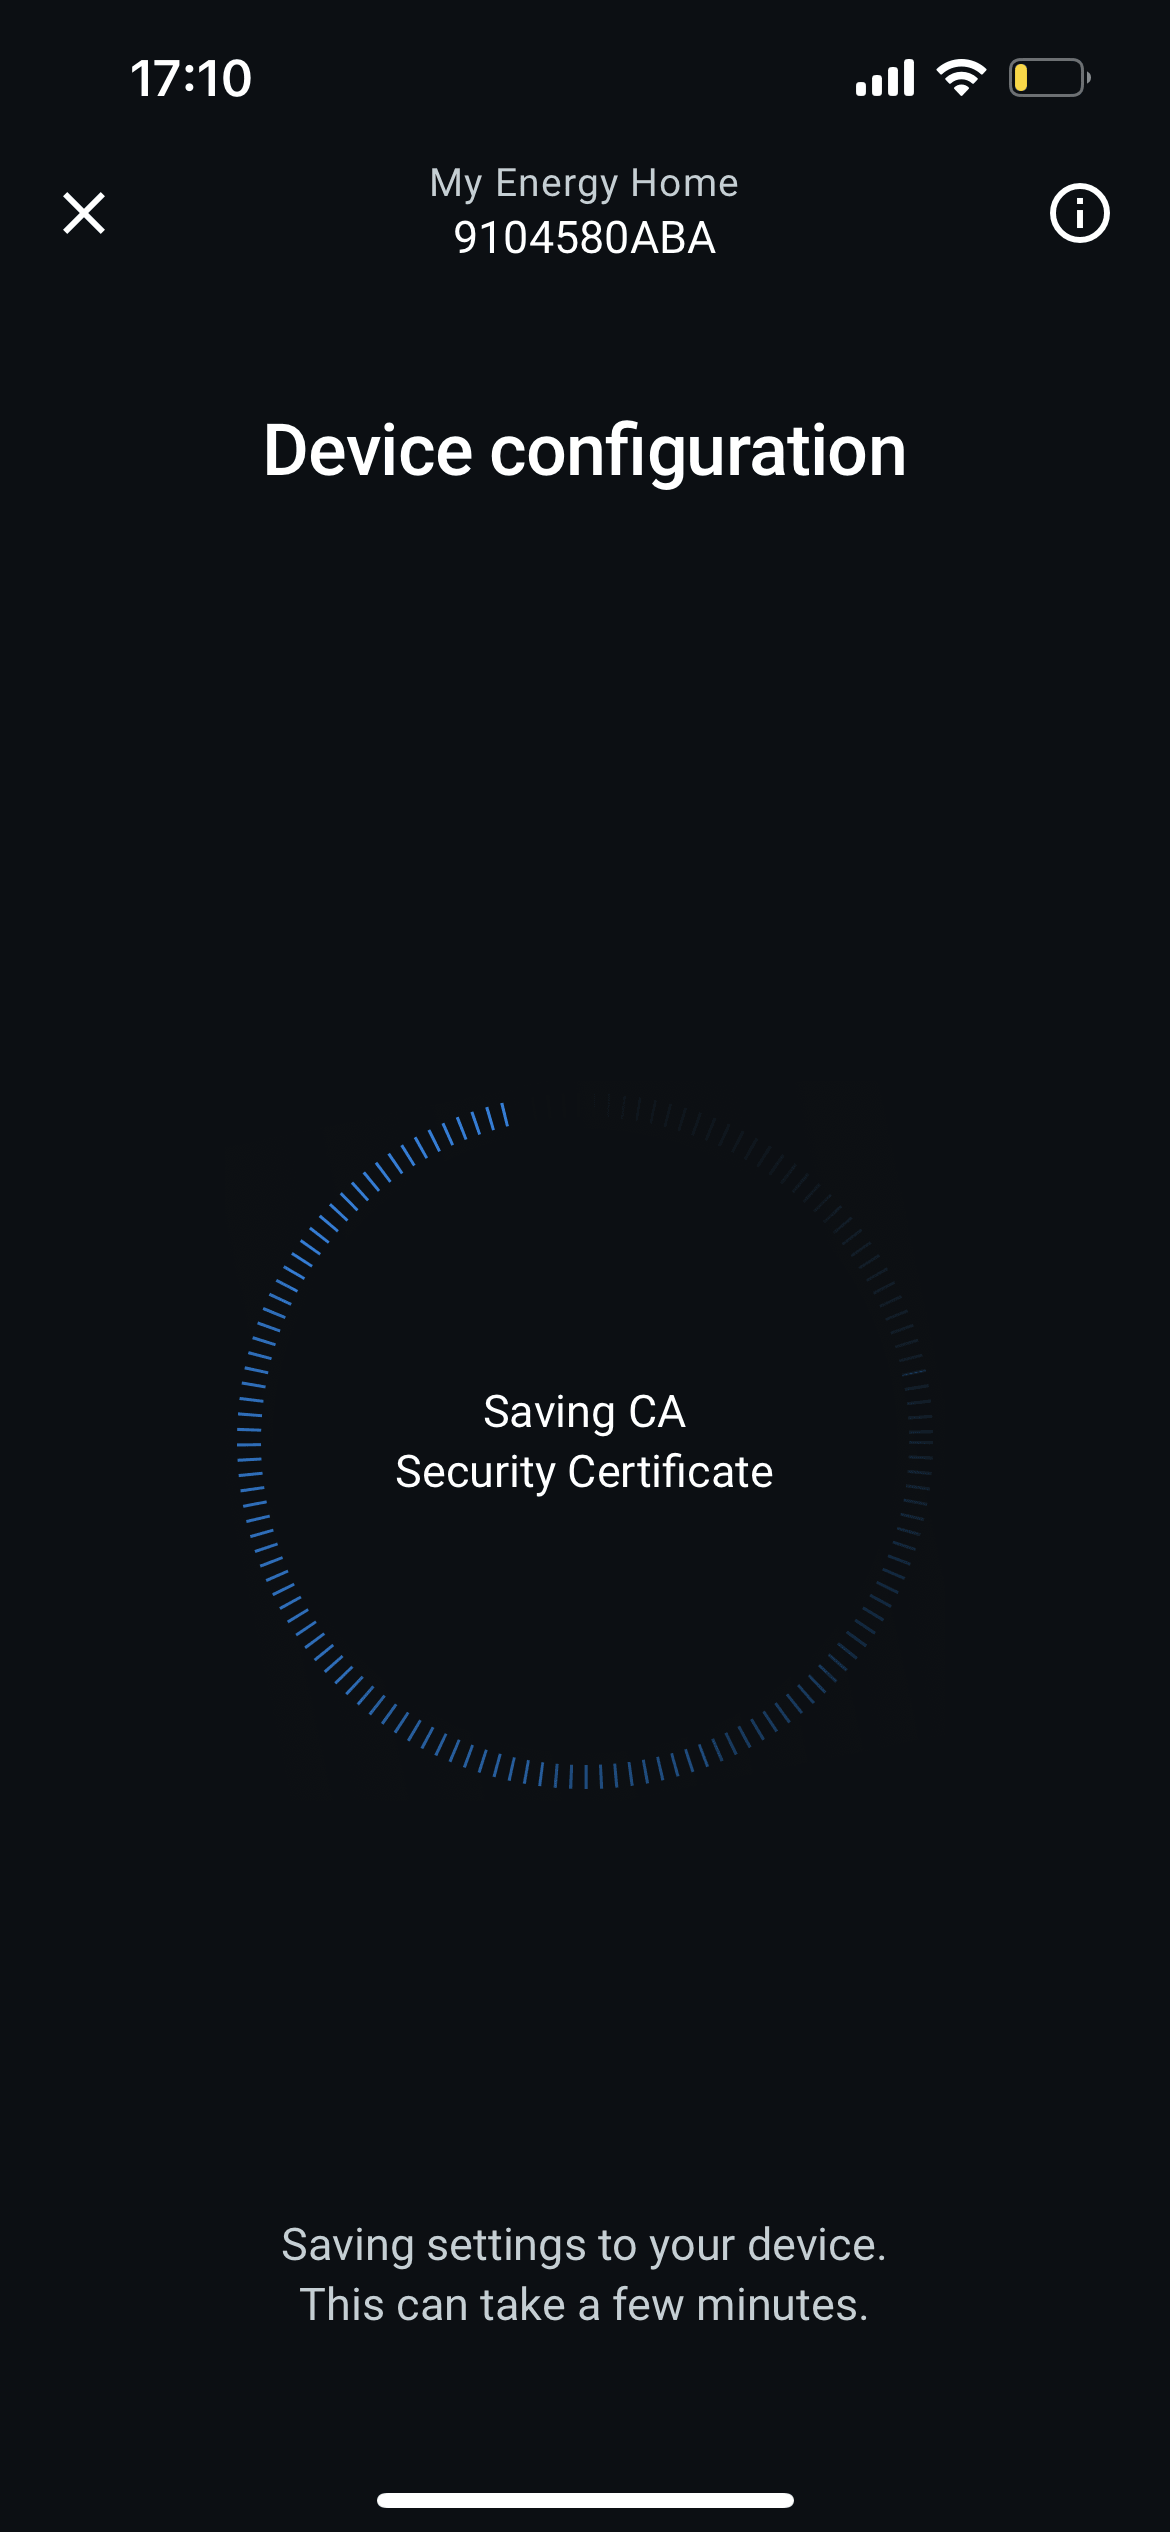
Wait until the module is configured and connected to Enapter Cloud.
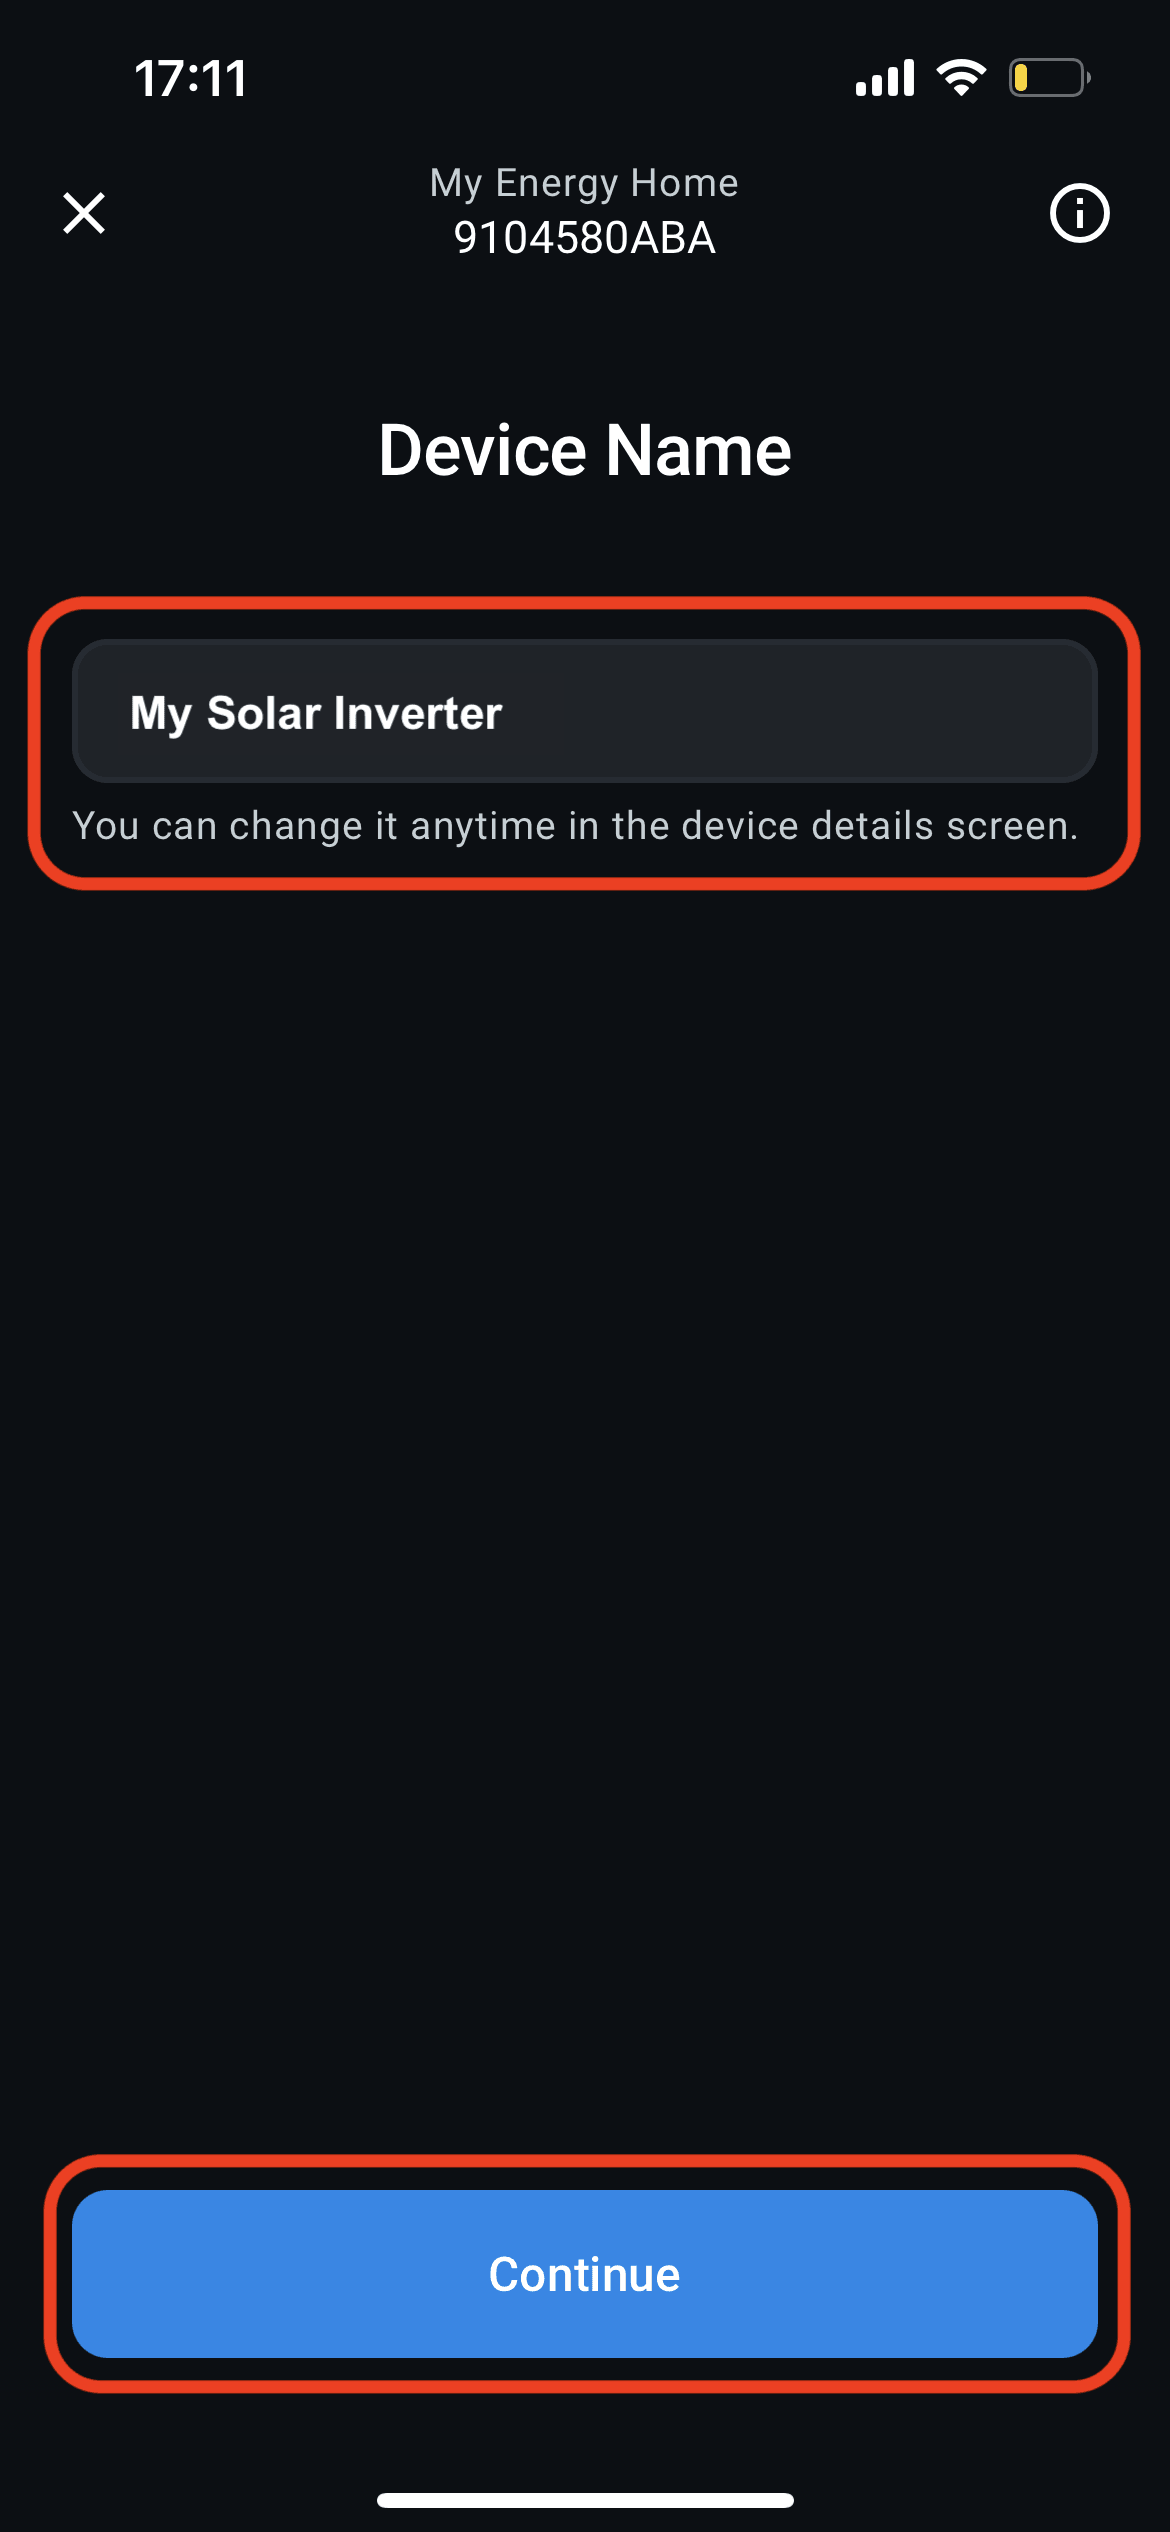
Enter the name you'd like to use for the device.
3. Install Blueprint
After ENP-RS232 connection is established you'll be able to select and install device Blueprint — an integration package that contains all necessary information to acquire data from the inverter and to show it properly on mobile and web interfaces.
Install MPP Solar Inverter blueprint.
- Find MPP Solar Inverter blueprint in the list and press
Install. - Wait until installation process is finished, normally it takes few seconds.
- The module configuration is done! Press
OpenorDevice Dashboardto go to device screen.
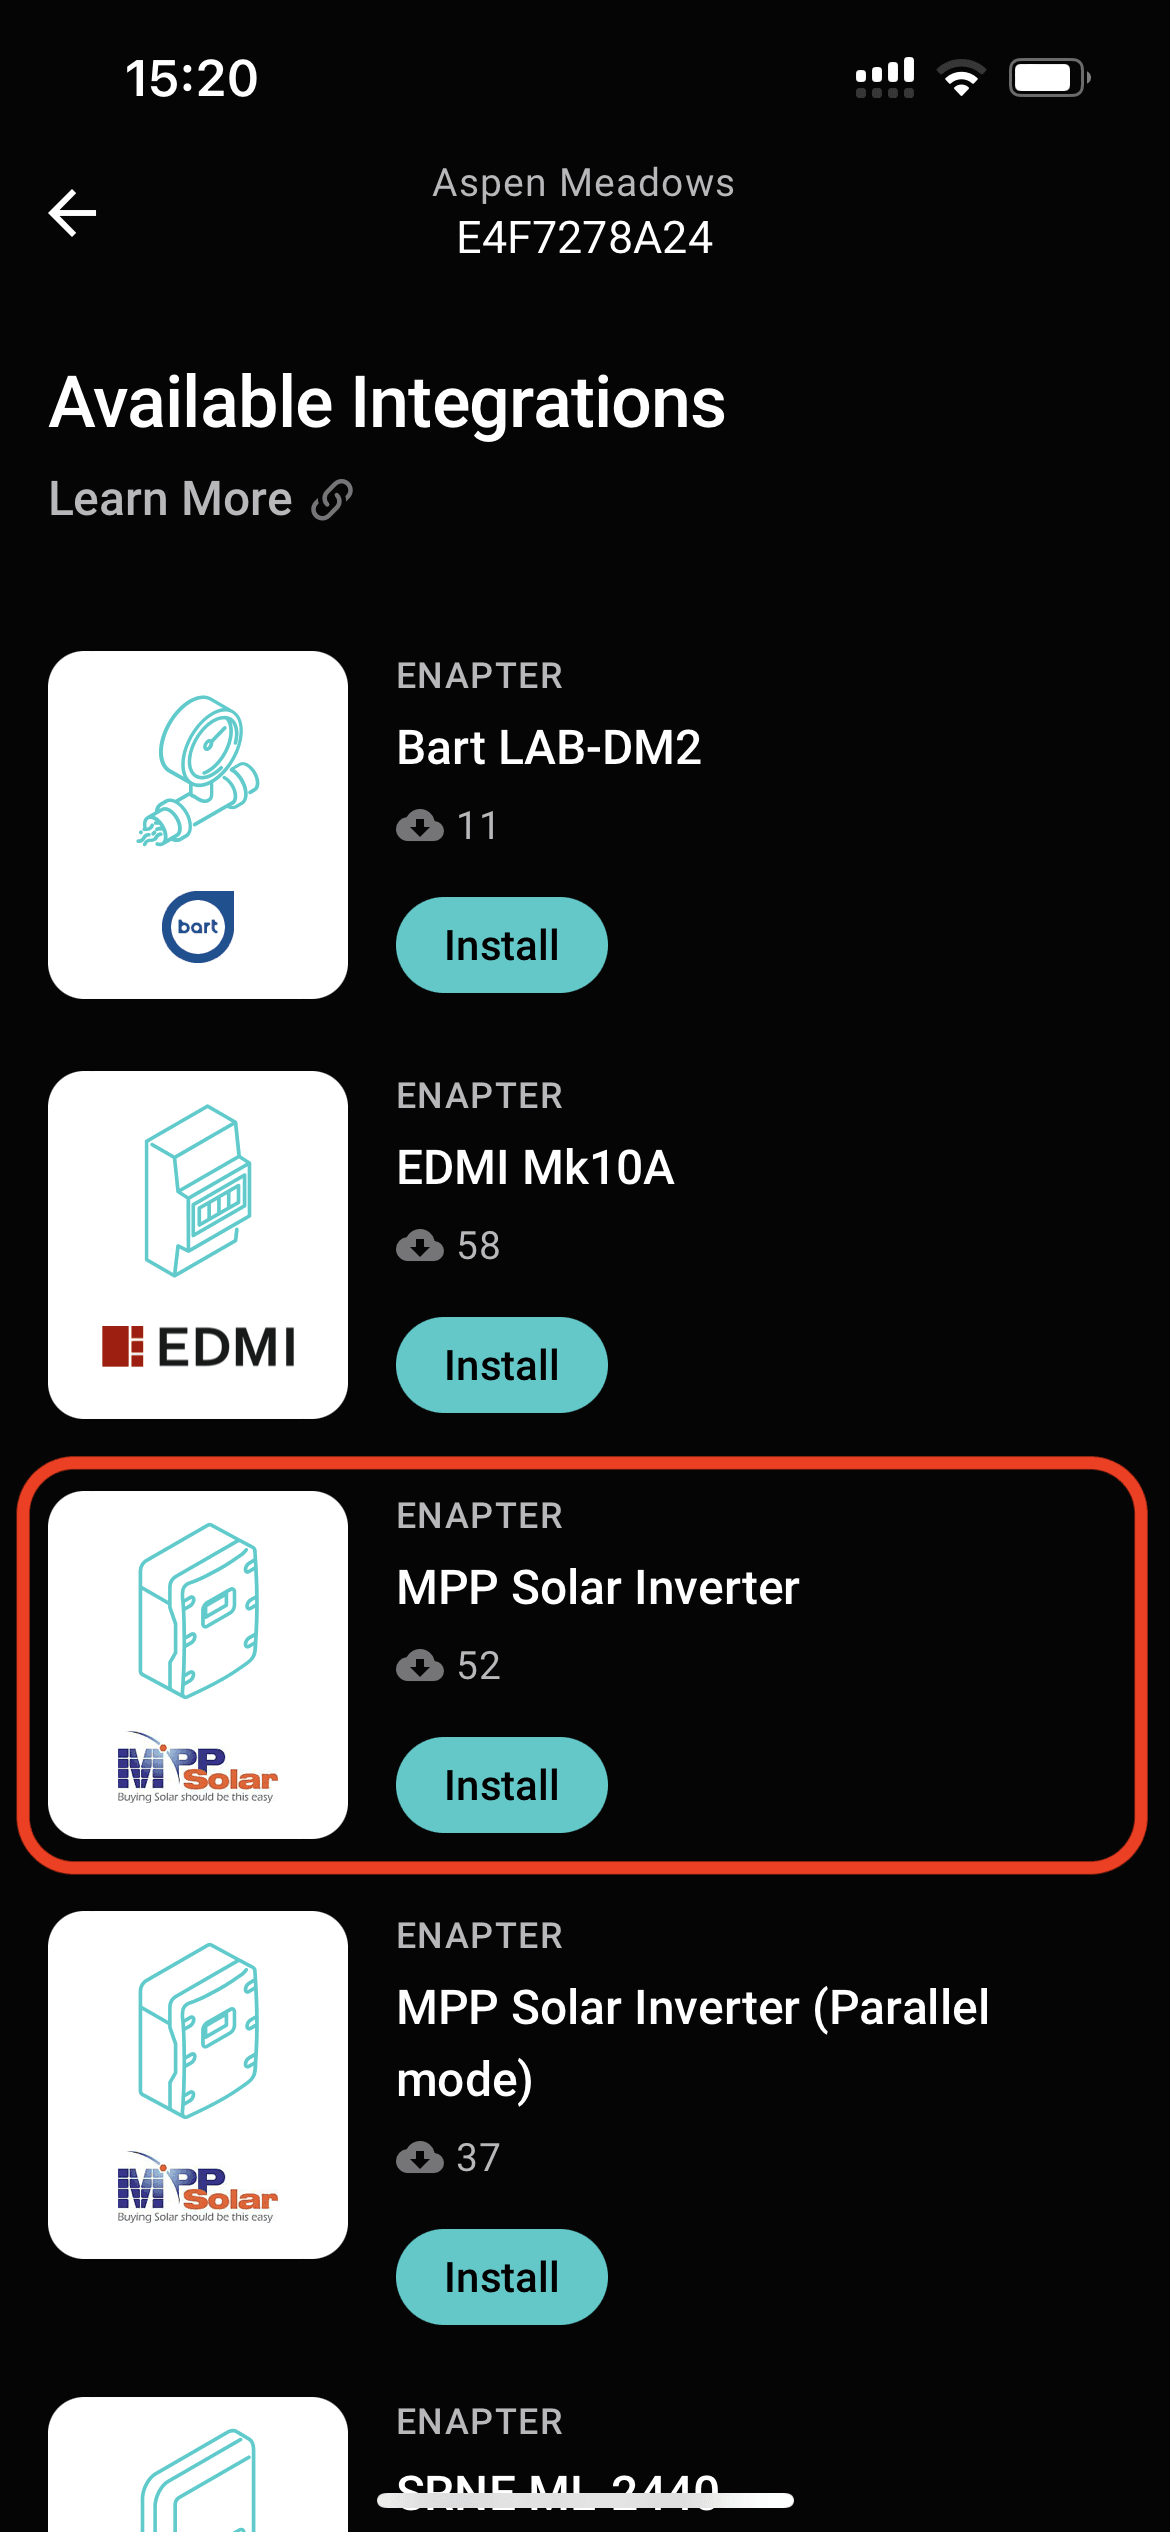
Find MPP Solar Inverter blueprint in the list and press
Install
.
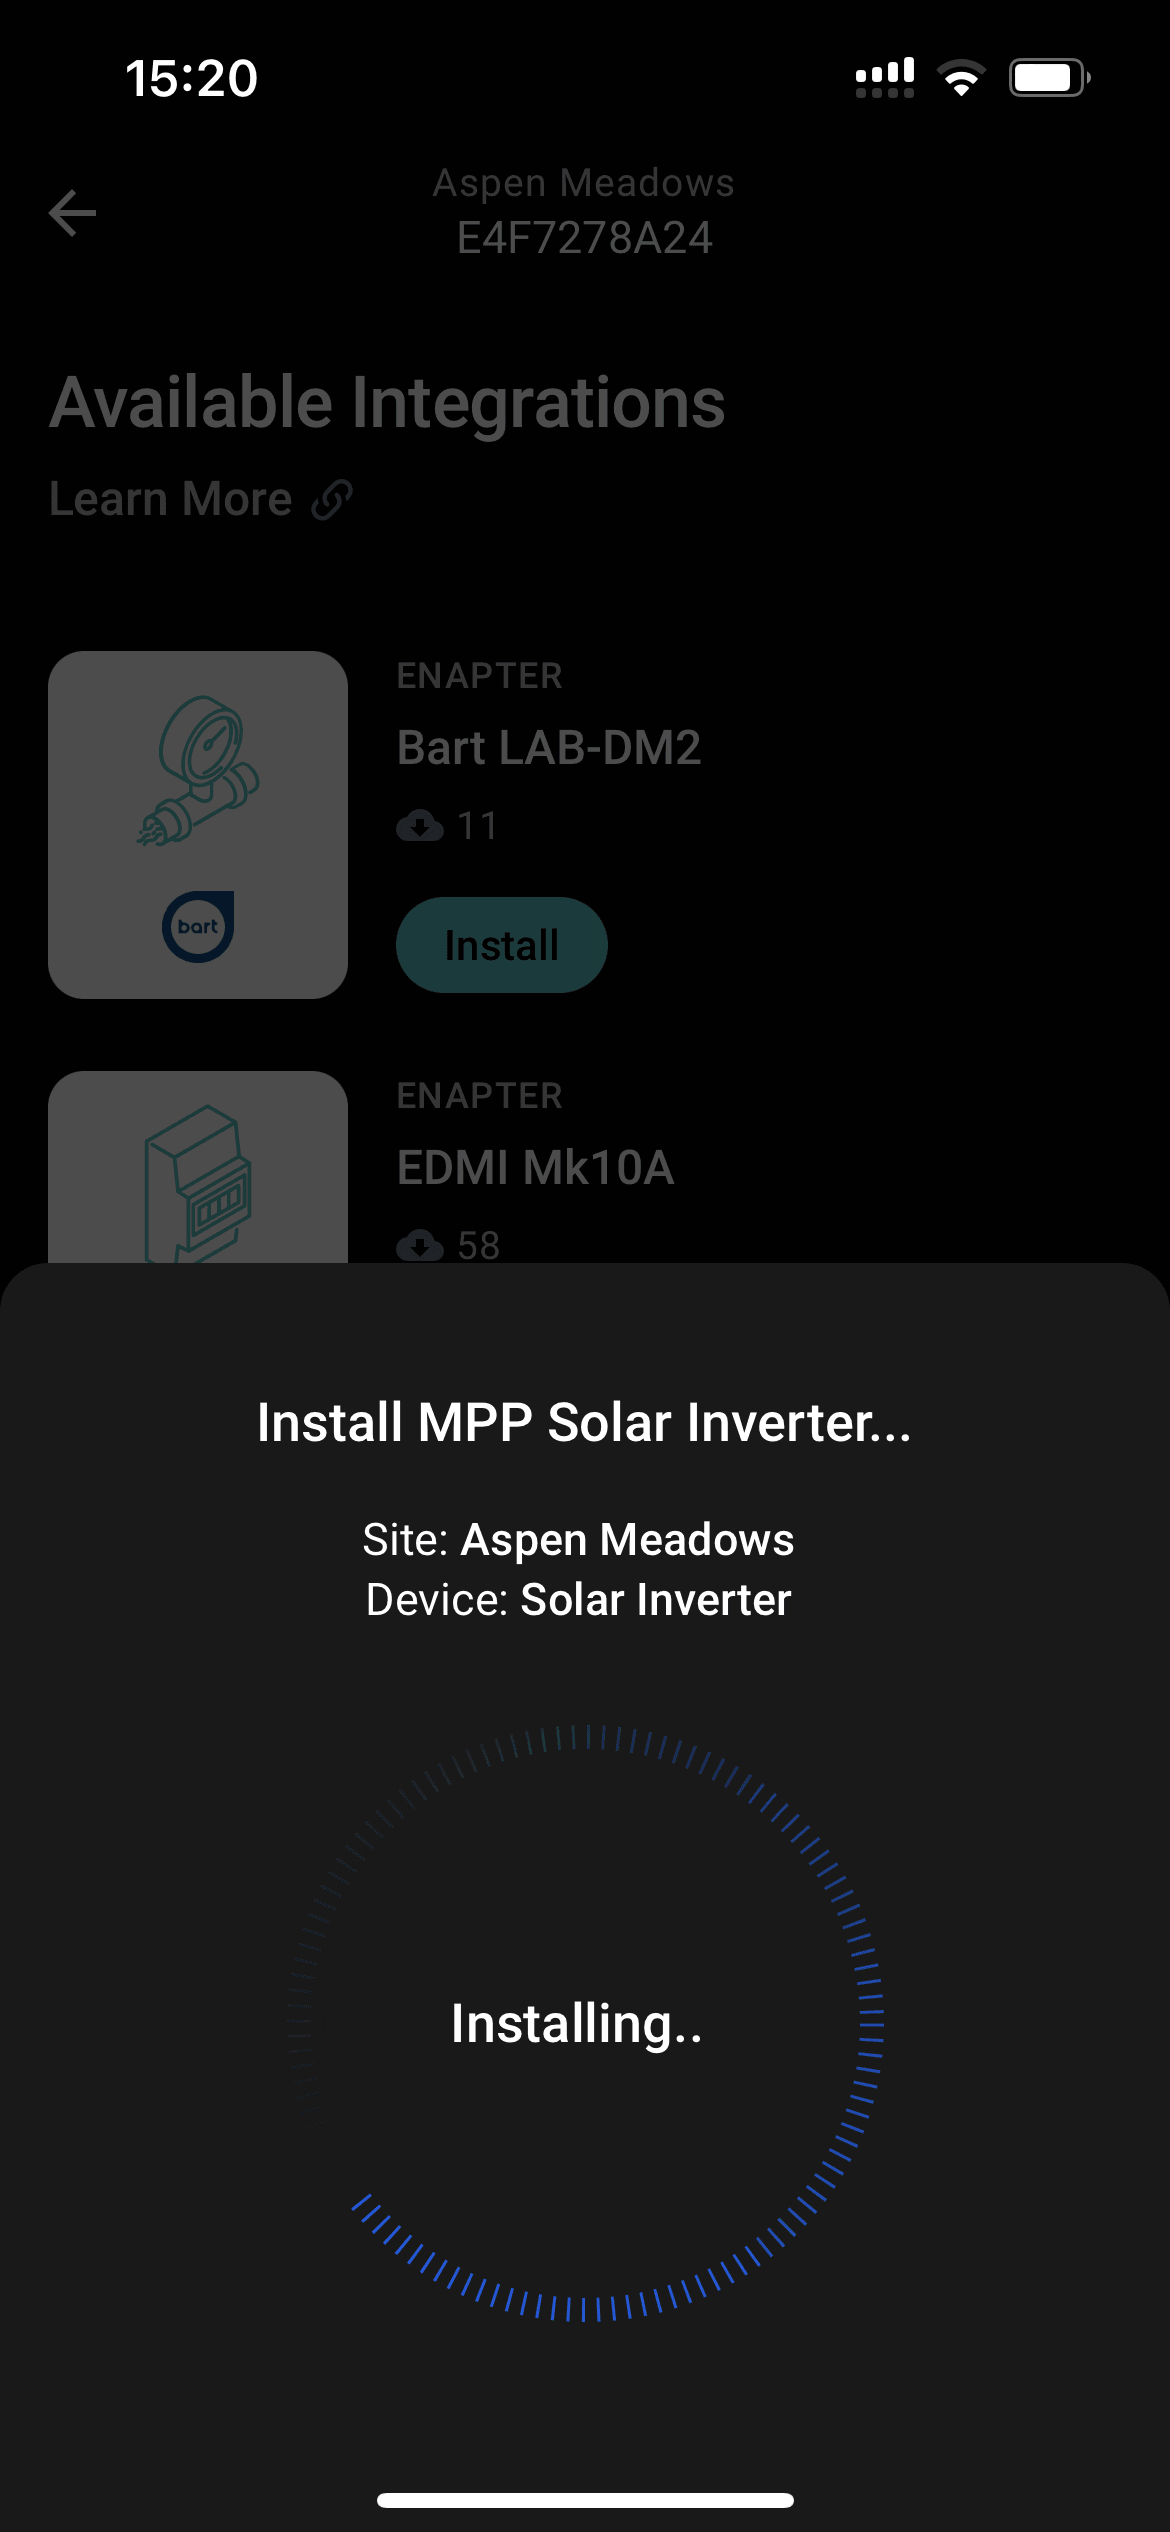
Wait until installation process is finished, normally it takes few seconds.
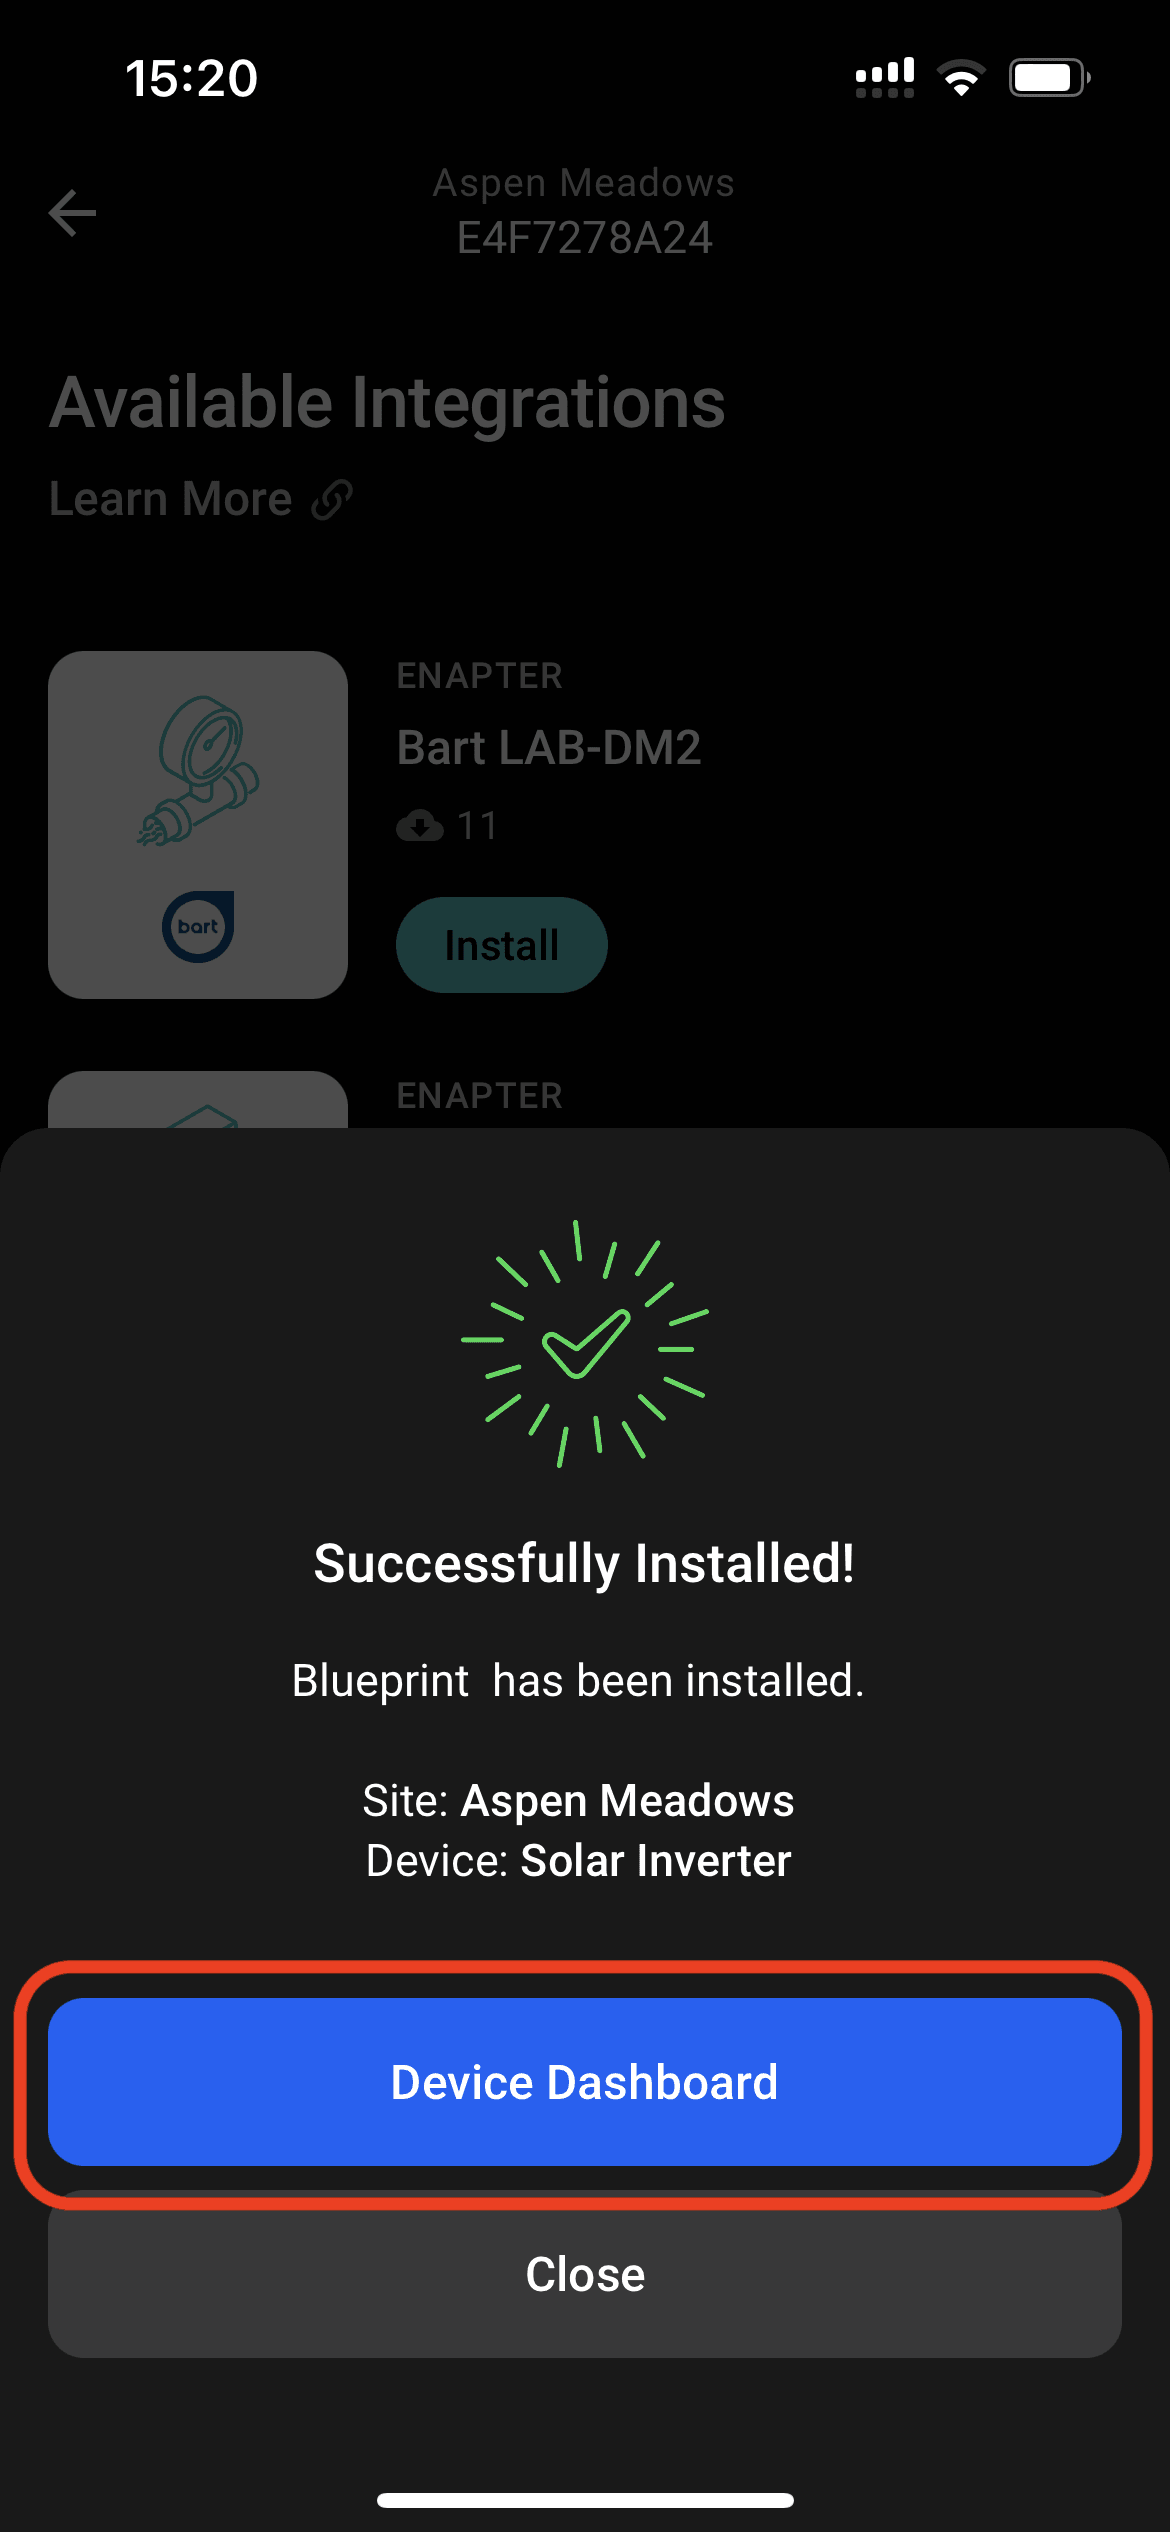
The module configuration is done! Press Open or
Device Dashboard
to go to device screen.
4. Check Inverter Data
ENP-RS232 will start collecting inverter data right away. You will see the readings on the device screen in real-time. All inverter data will be recorded, stored in Enapter Cloud, and kept available for remote access and further analysis.
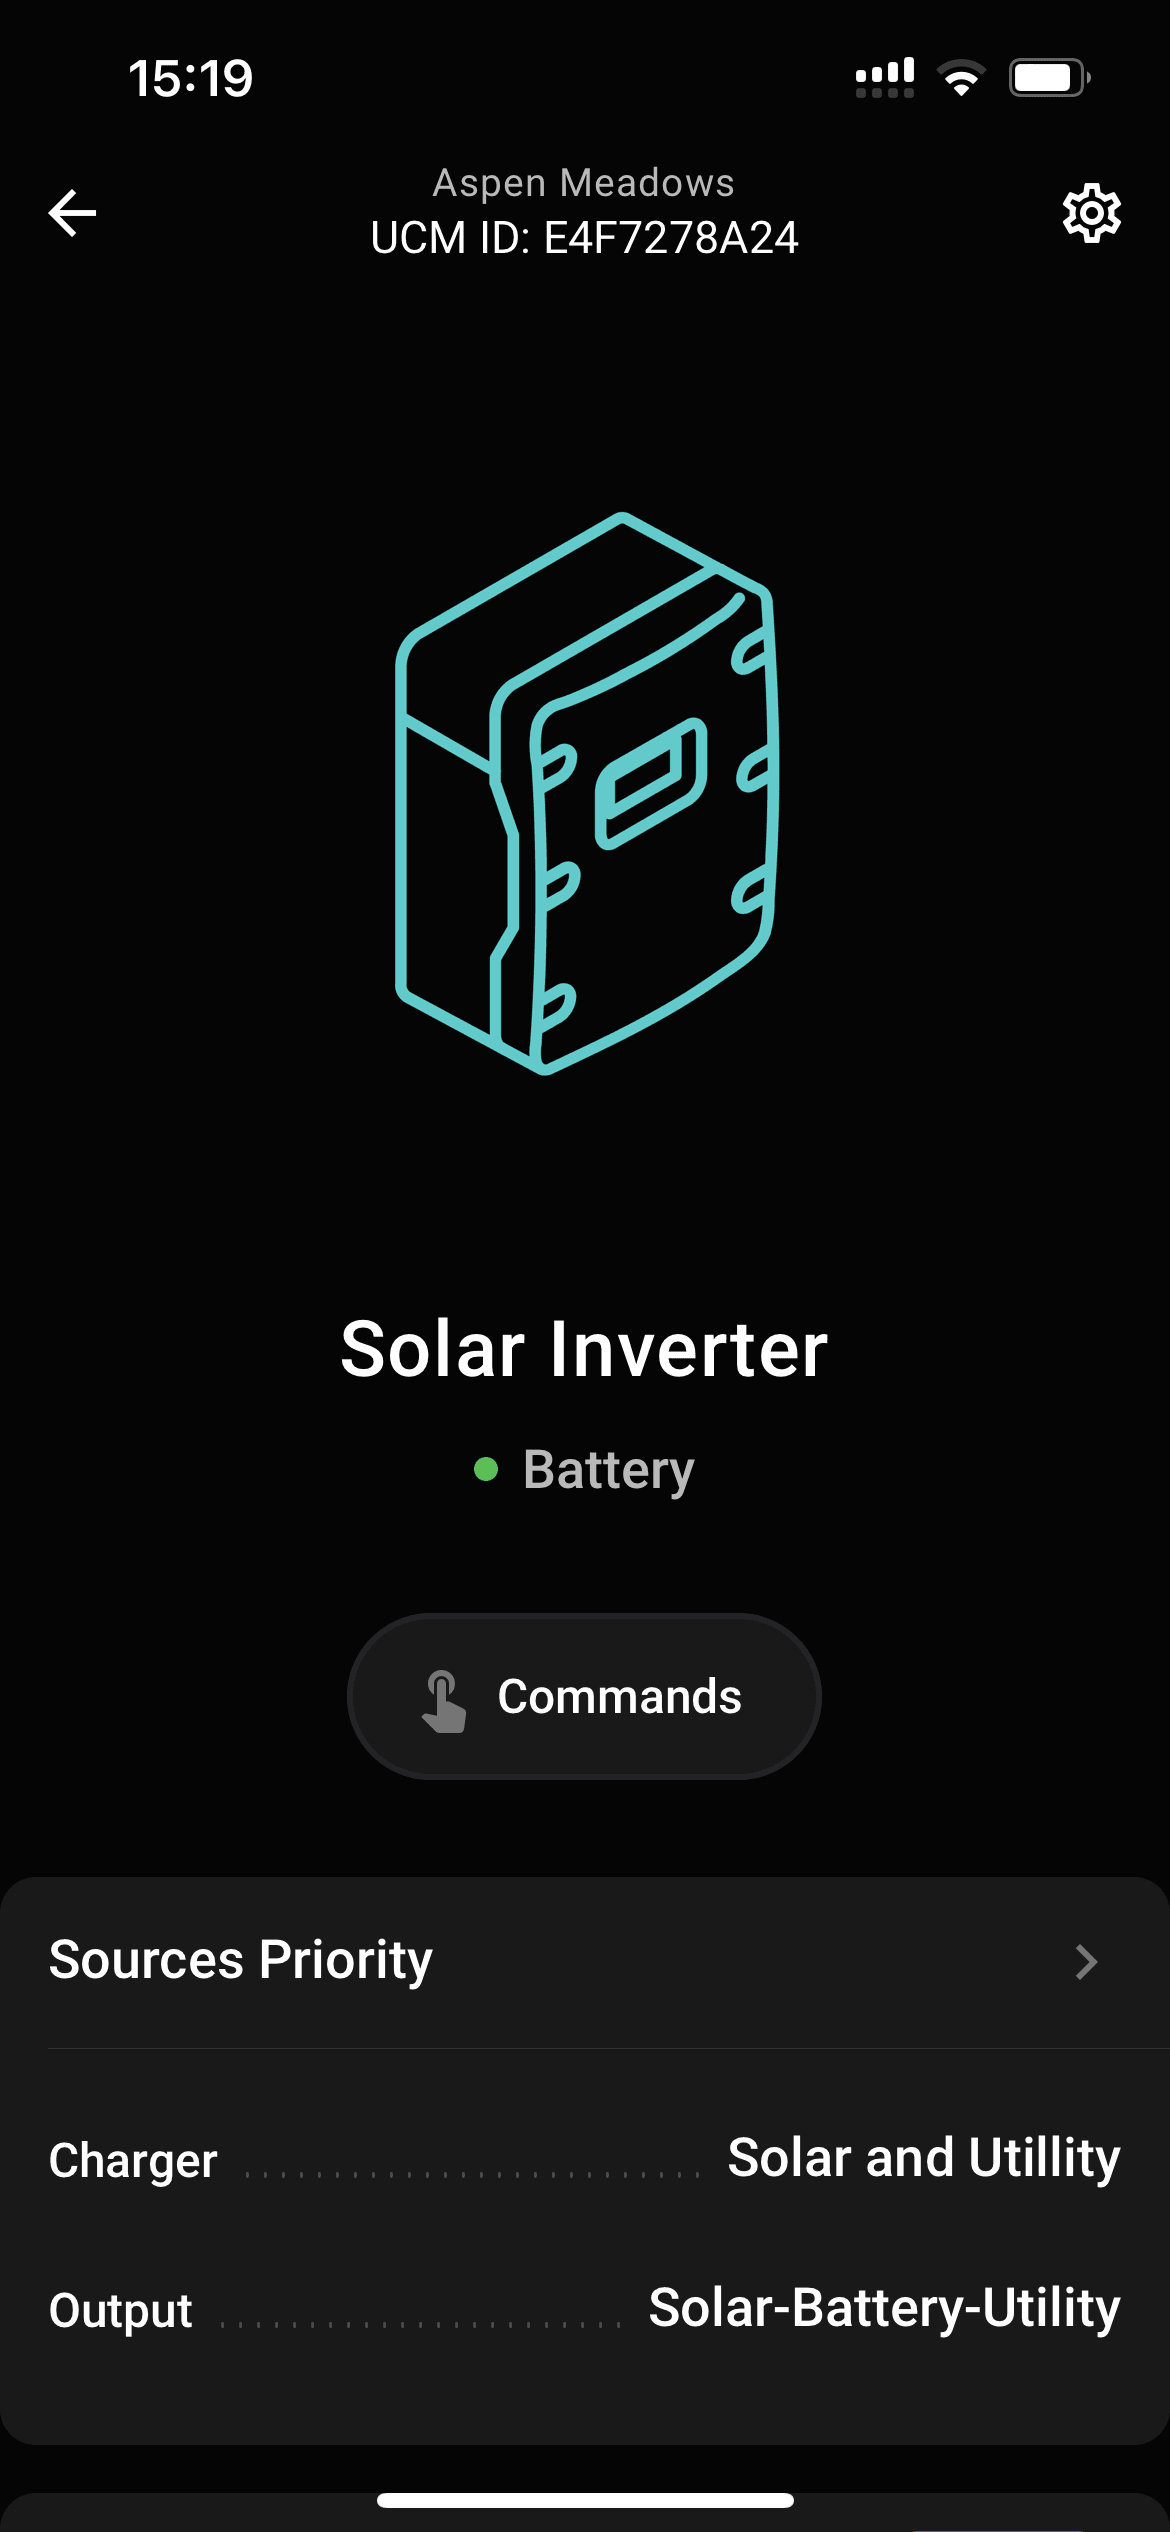
Device screen with current charger priorities.
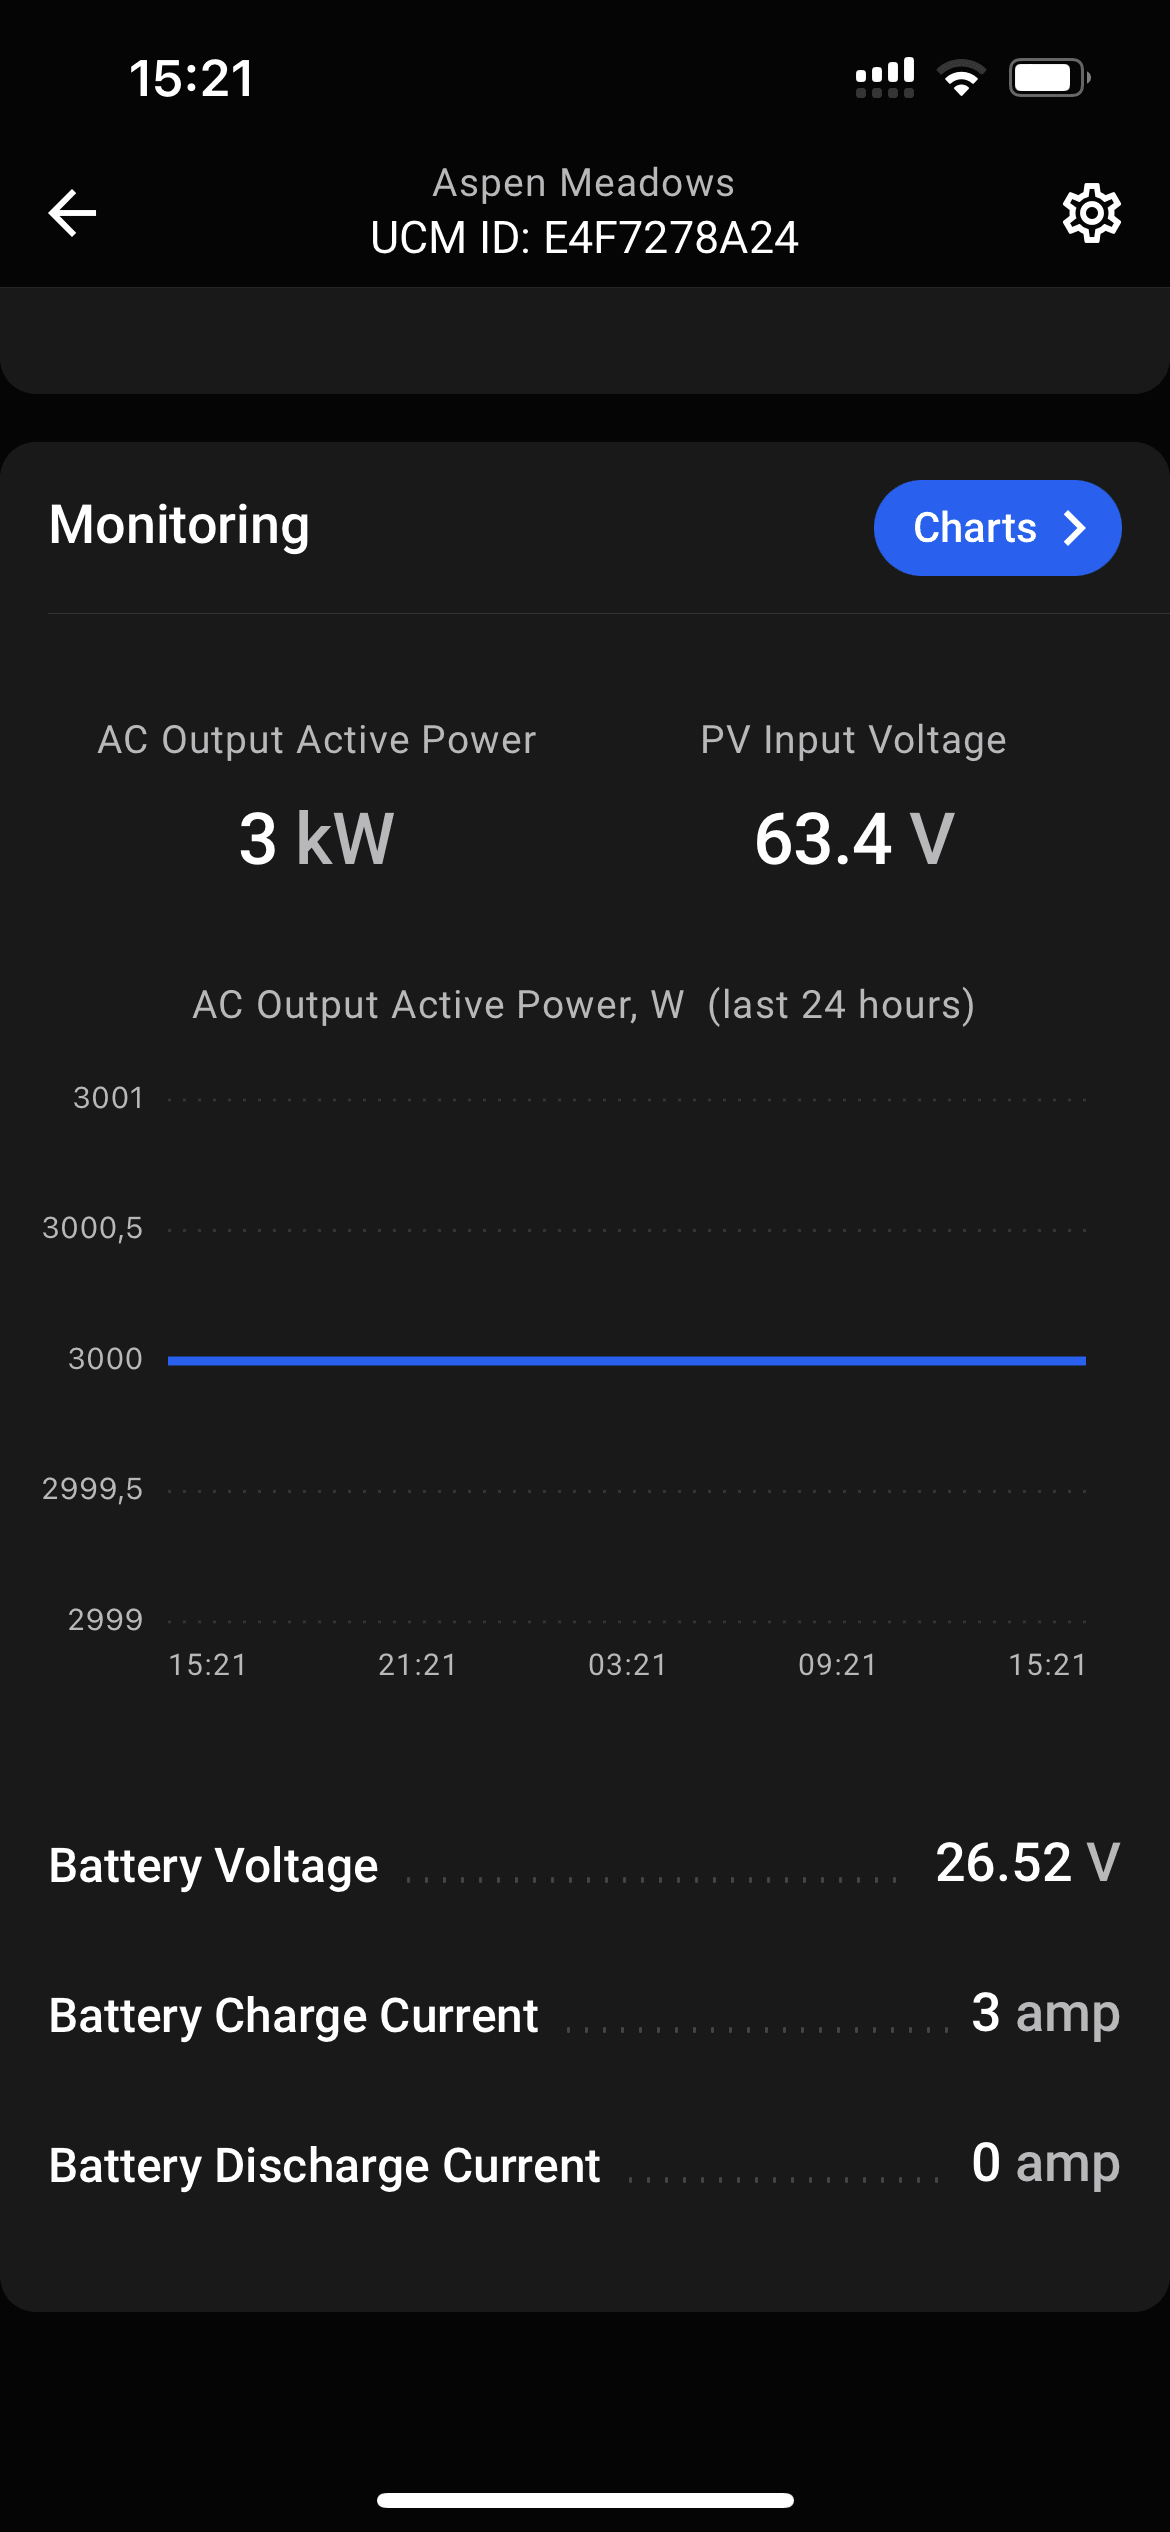
Real-time inverter monitoring data.
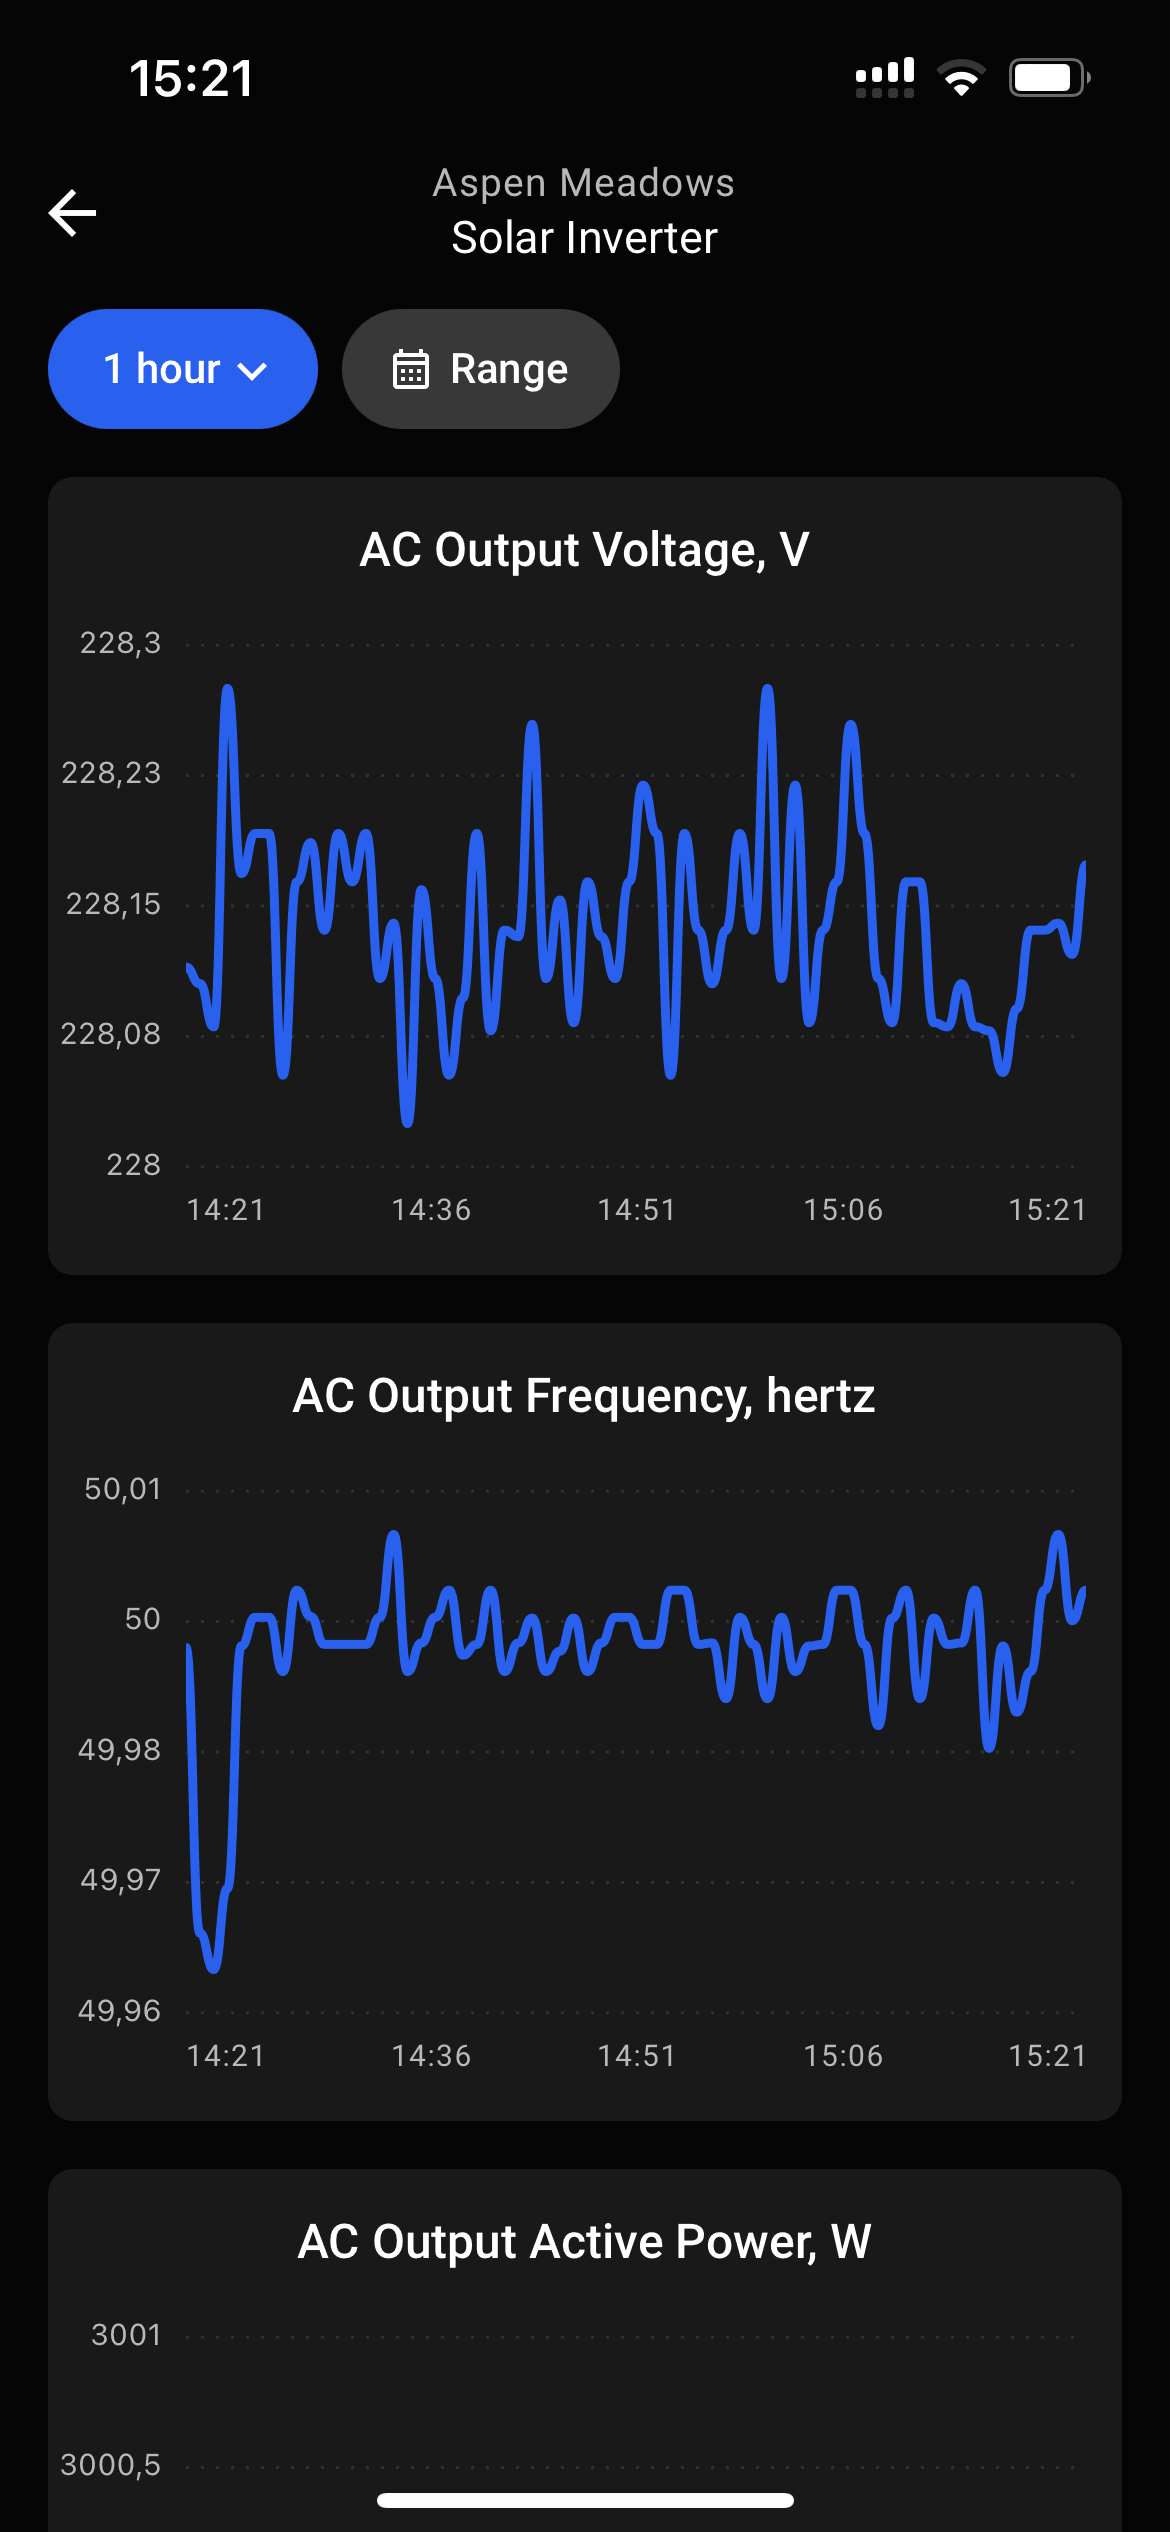
Historical charts with inverter monitoring data.
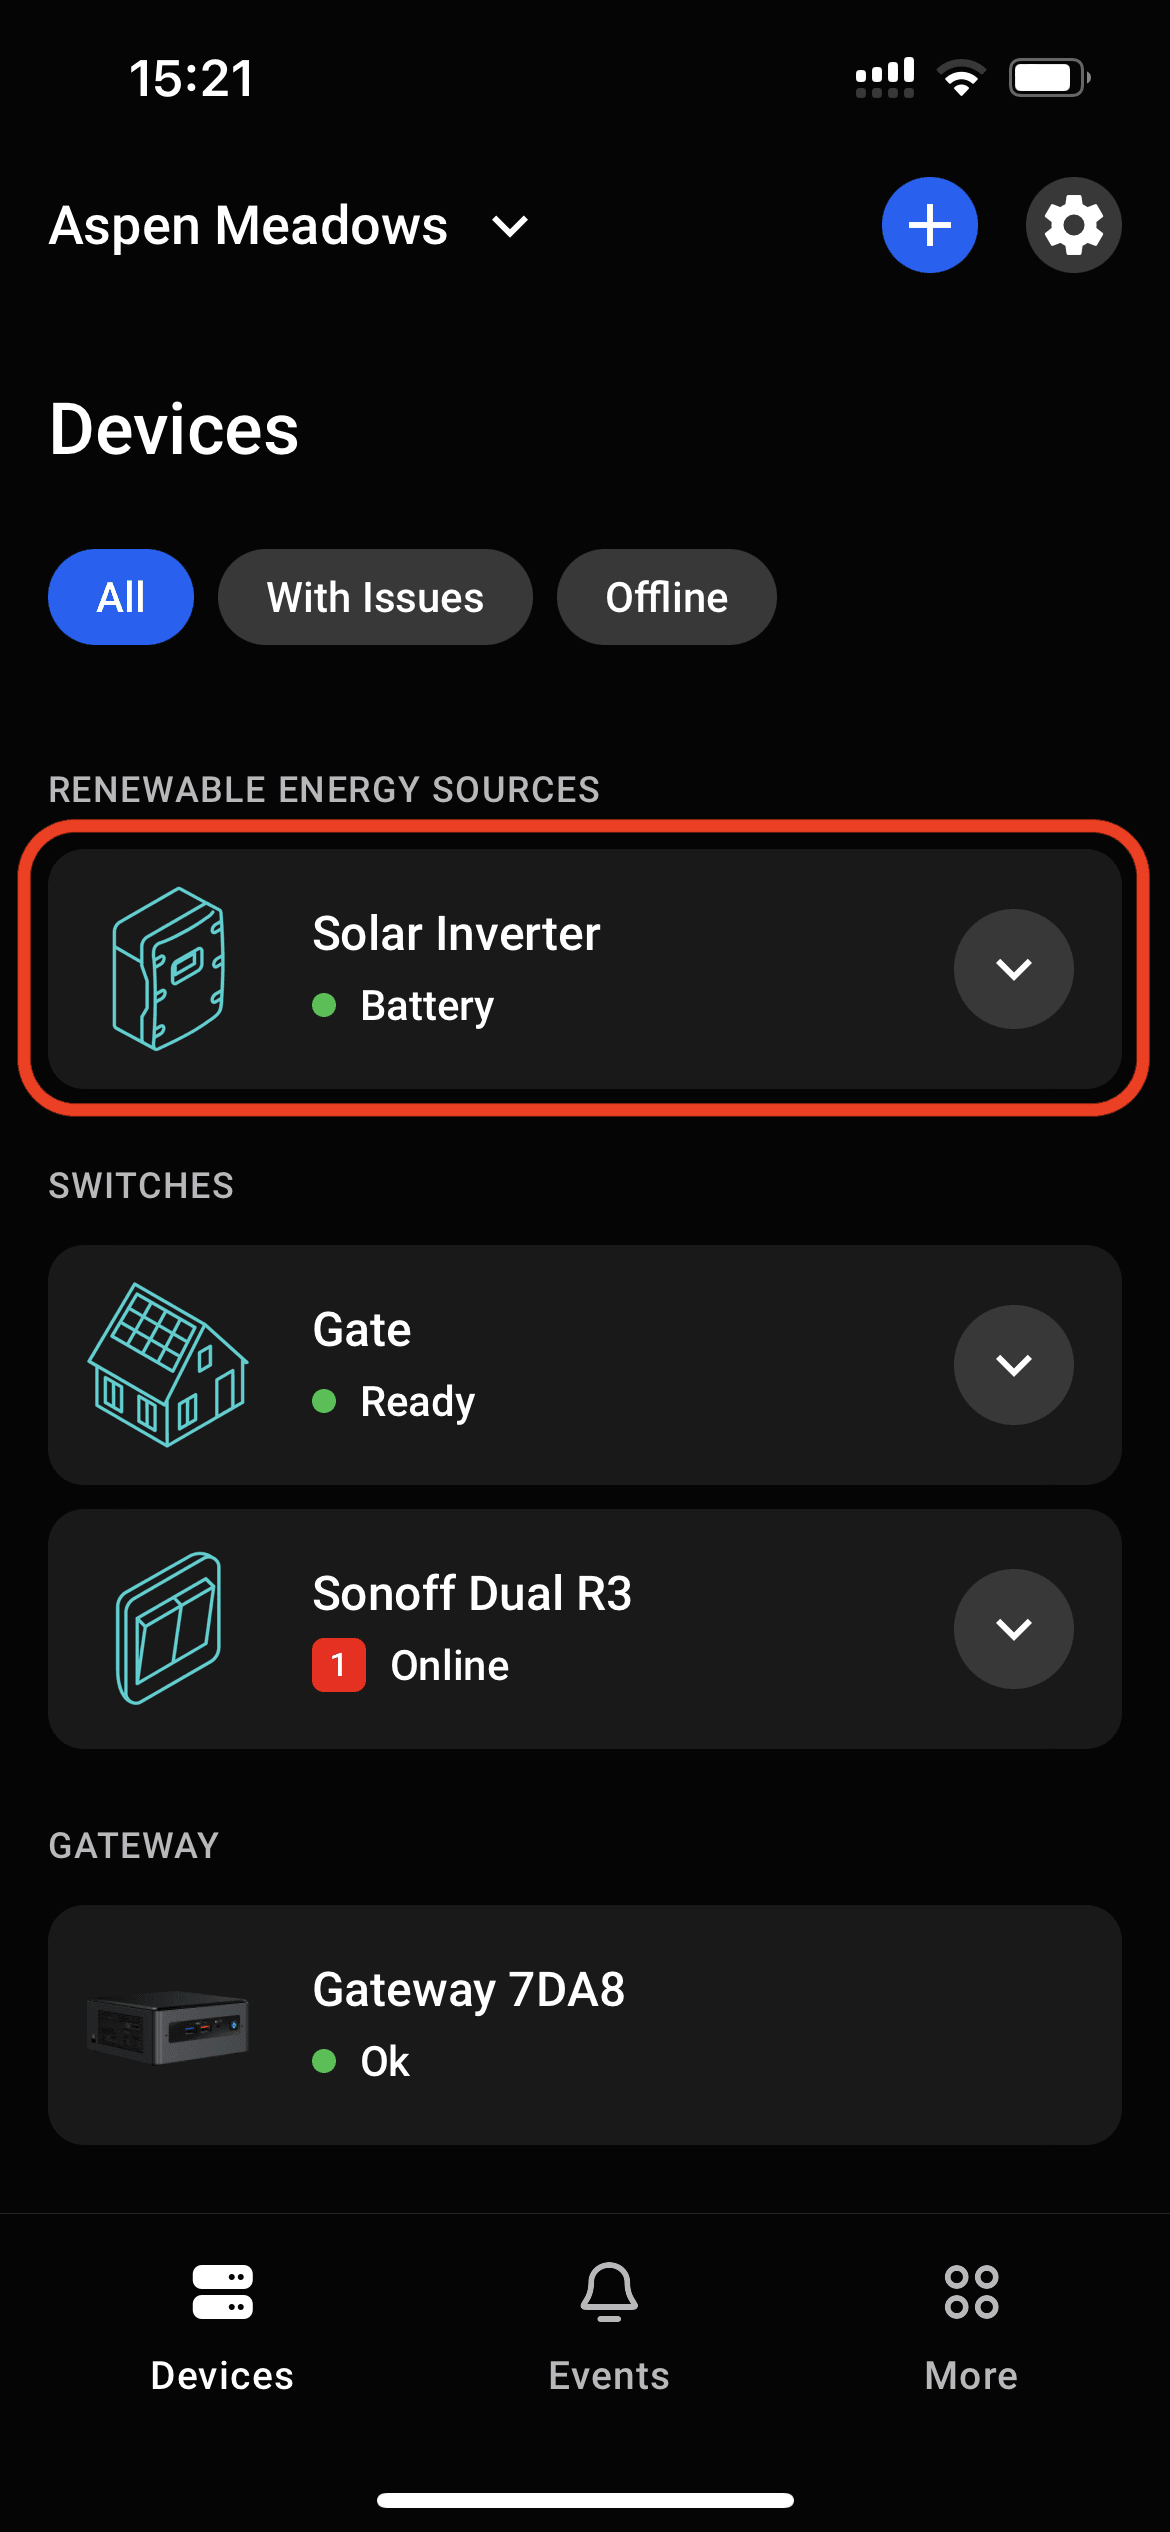
The inverter will appear on the device list on the site screen.
If you are facing any communication problems after finishing the module configuration, check the troubleshooting section.
5. Configure Charging Priority Rules
The blueprint that we uploaded to the communication module is capable of running inverter settings automation rules. You can define voltage range and time frame that will activate one of the following inverter settings:
- Charger source priority — the priority of different power sources for charging the battery:
- Solar first — prioritize using solar power
- Utility first — prioritize using utility power
- Solar and utility — inverter can simultaneously use solar and utility power
- Solar only — use only solar power
- Output source priority — the priority of different power sources for supplying electricity to the load output:
- Solar first — prioritize using solar power
- Utility first — prioritize using utility power
- Solar-battery-utility — utilize a combination of solar power, battery power, and utility power.
The logic will run directly on the ENP-RS232 module and will not require an internet connection. It will also respect the daylight saving time of your site timezone.
- Press
Sources Prioritybutton on the device screen. - Source priorities screen shows current priority settings. Press
Rules. - The list of rules that are active on your device. Press
Add New Rule. - Select the type of rule you'd like to add.
- Select the priority setting you'd like to set when the rule gets triggered.
- Set desired battery voltage range that will trigger the rule.
- Set desired time period that will trigger the rule.
- Preview your rule before sending it to the device.
- The full list of rules that will be uploaded to ENP-RS232 for inverter automation. Press
Apply Changes. - Wait until rules will get updated on ENP-RS232.
- Update is done, now your automation rules are active.
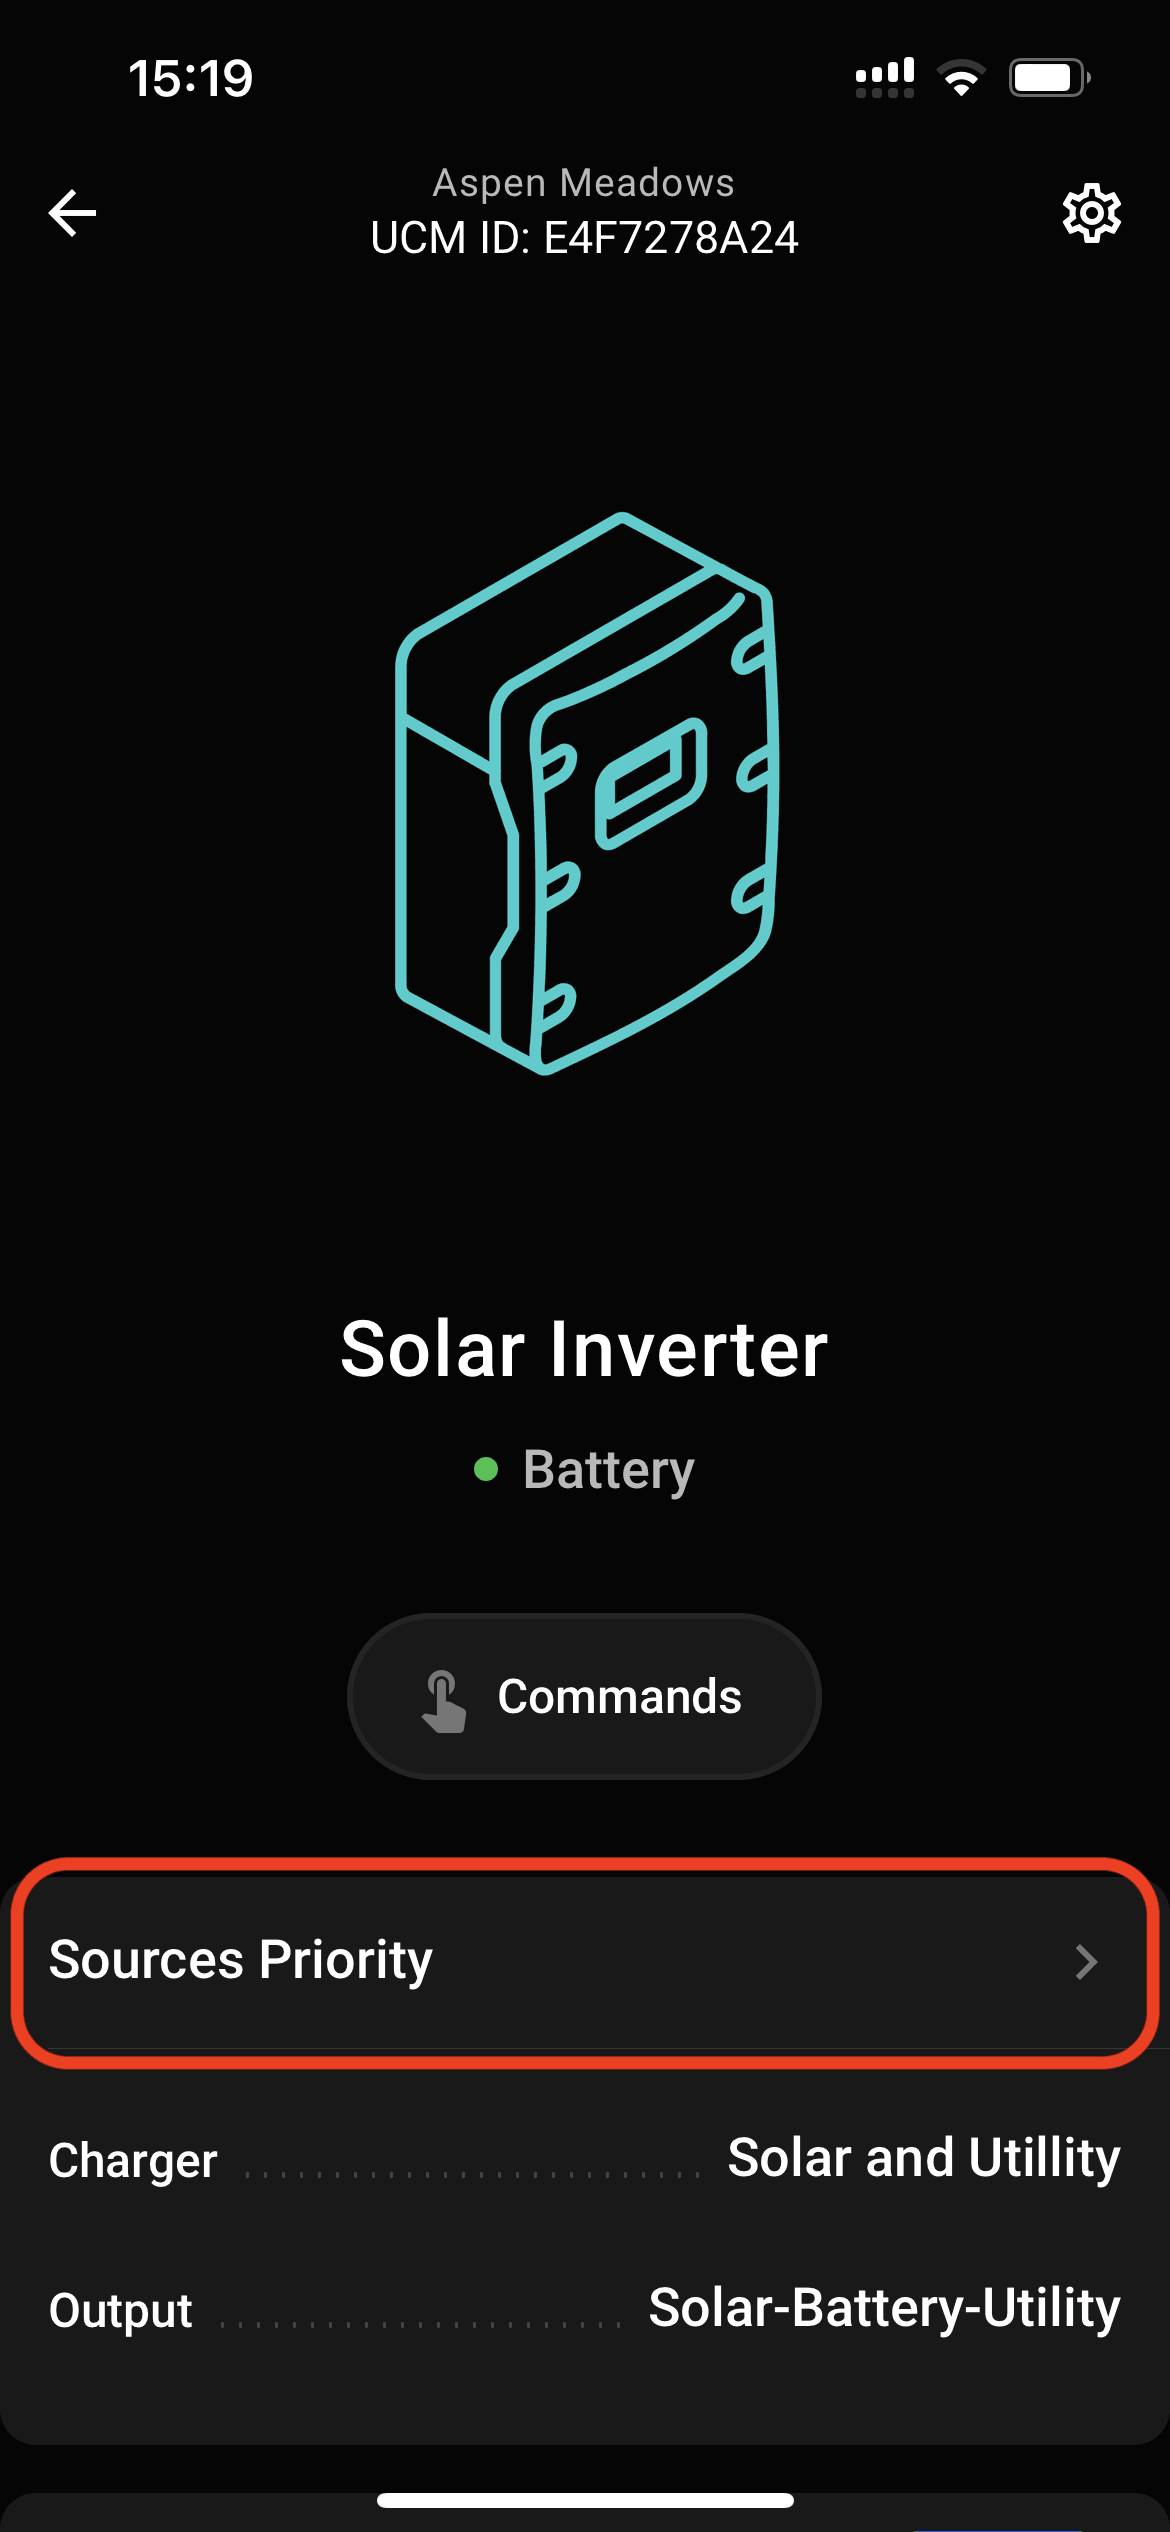
Source priorities screen shows current priority settings. Press
Rules
.
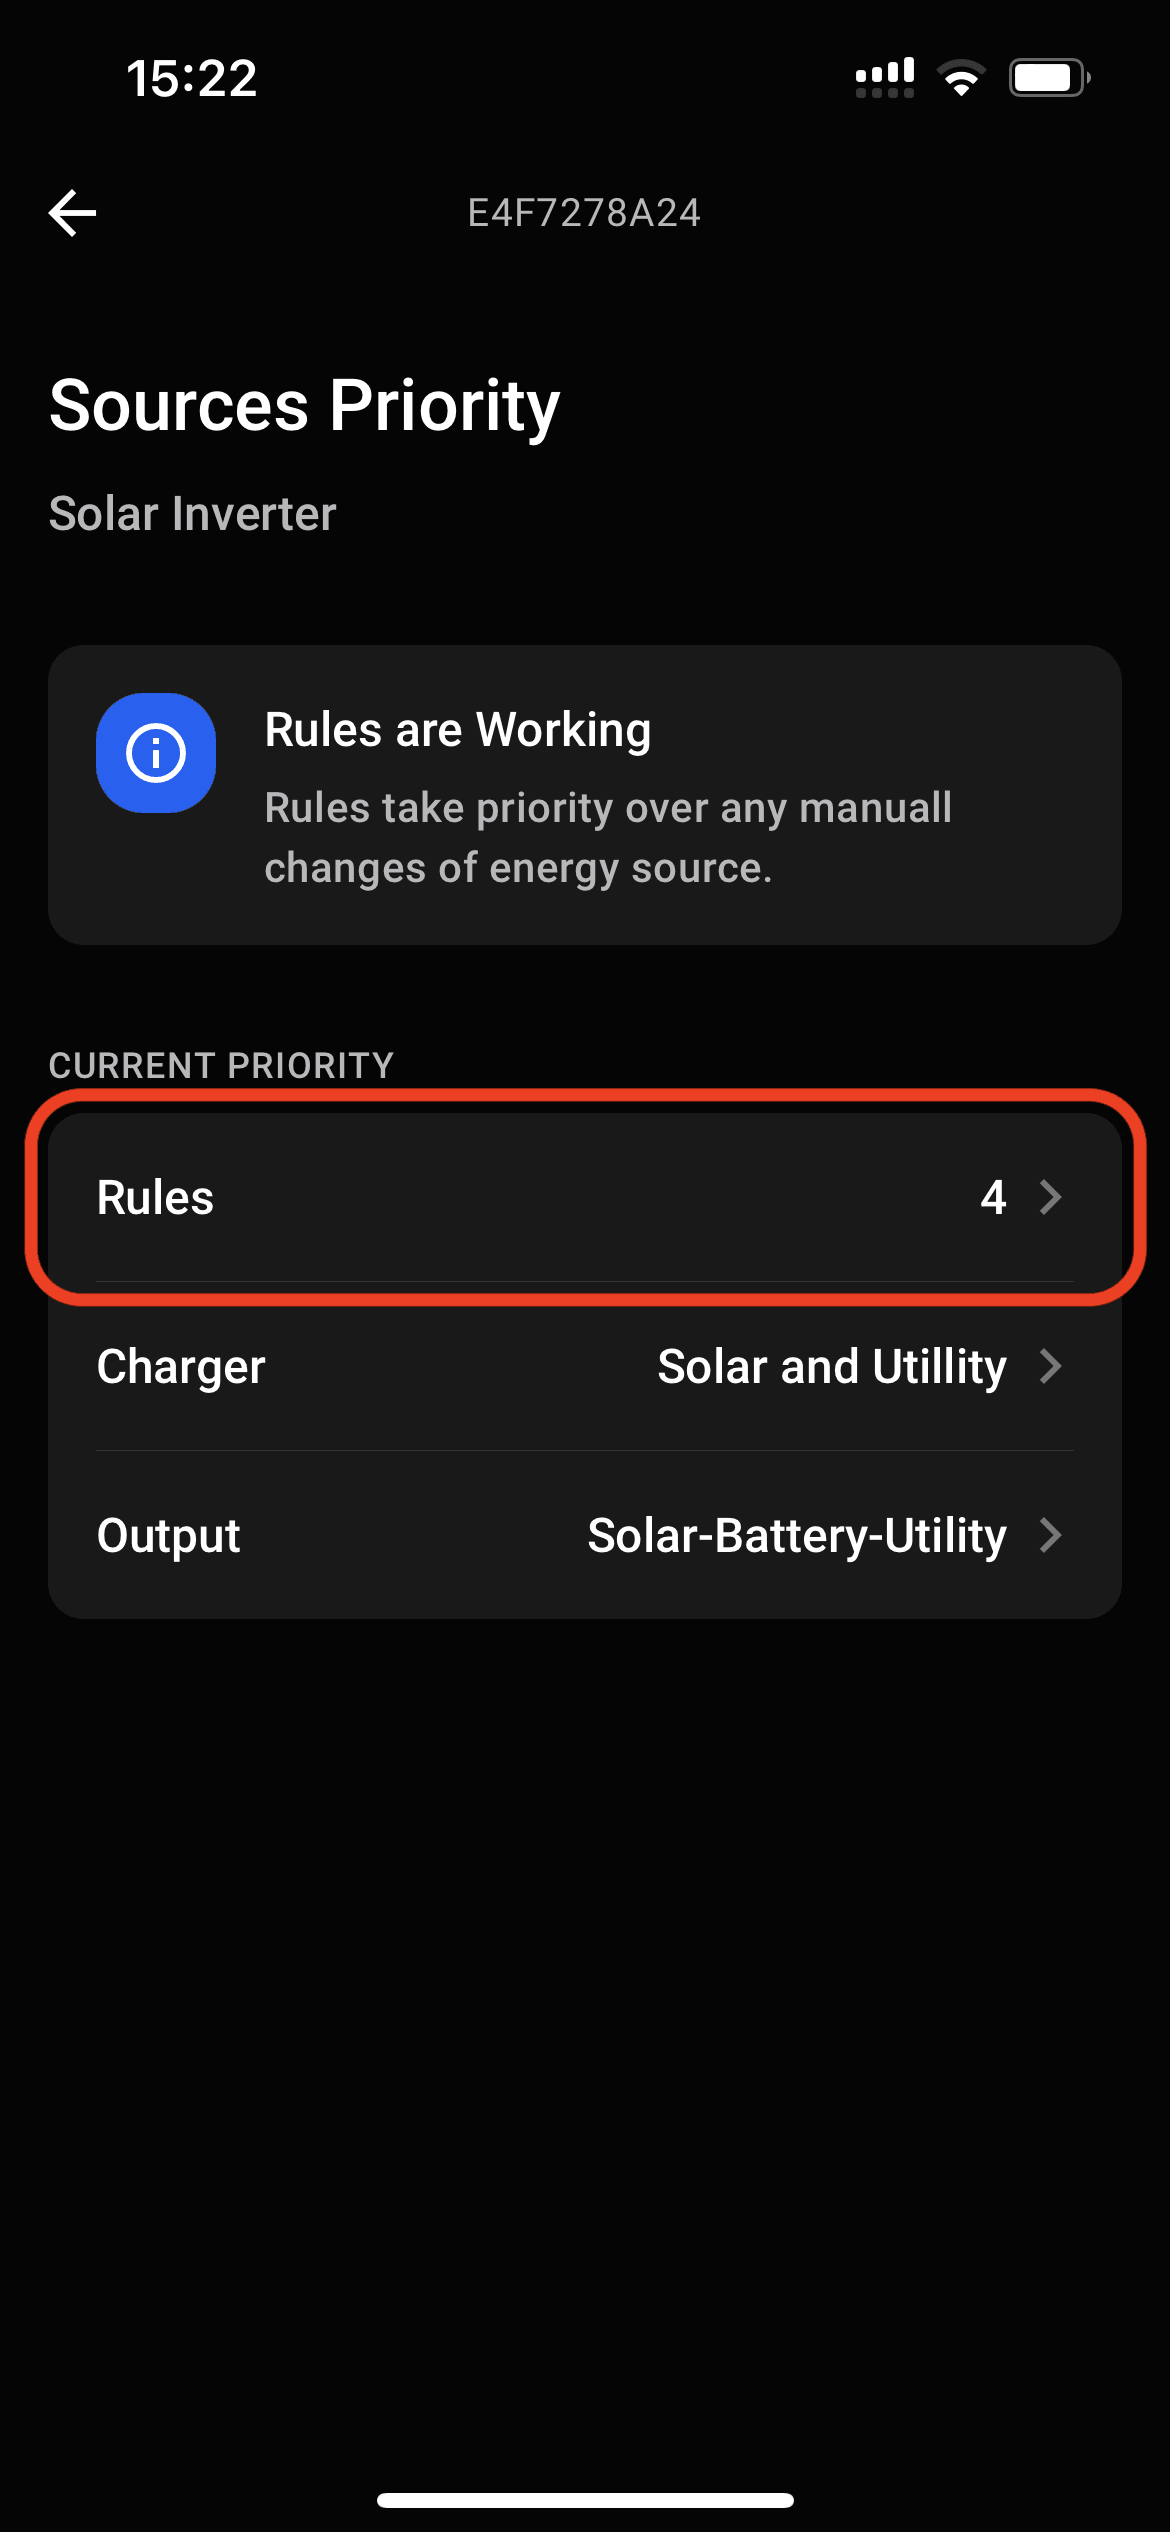
Source priorities screen shows current priority settings. Press
Rules
.
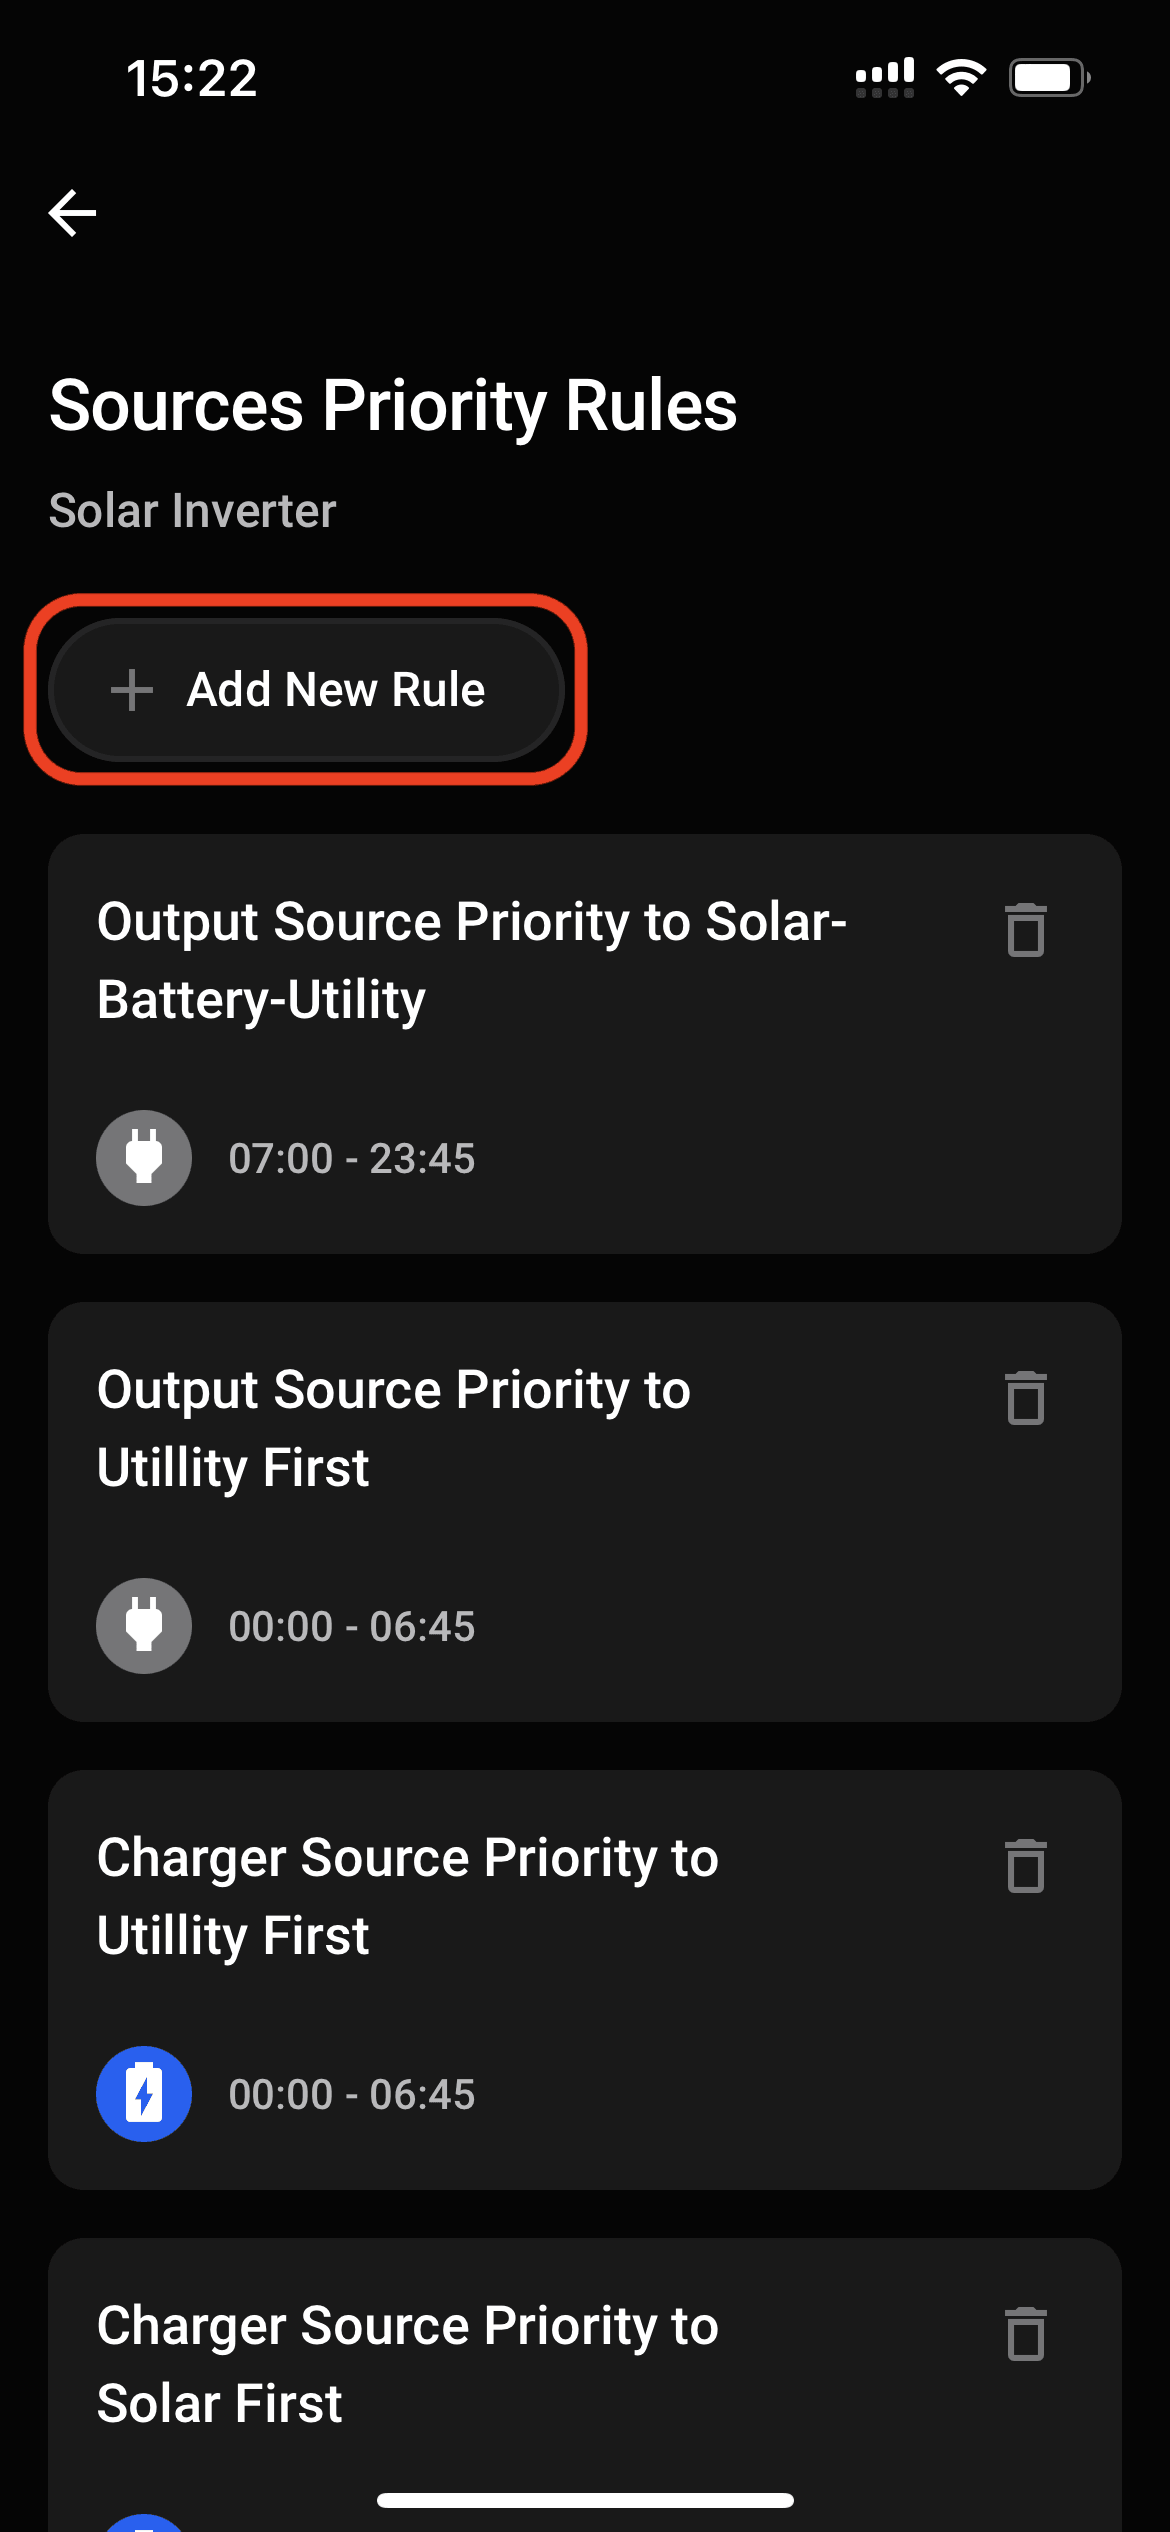
The list of rules that are active on your device. Press
Add New Rule
.
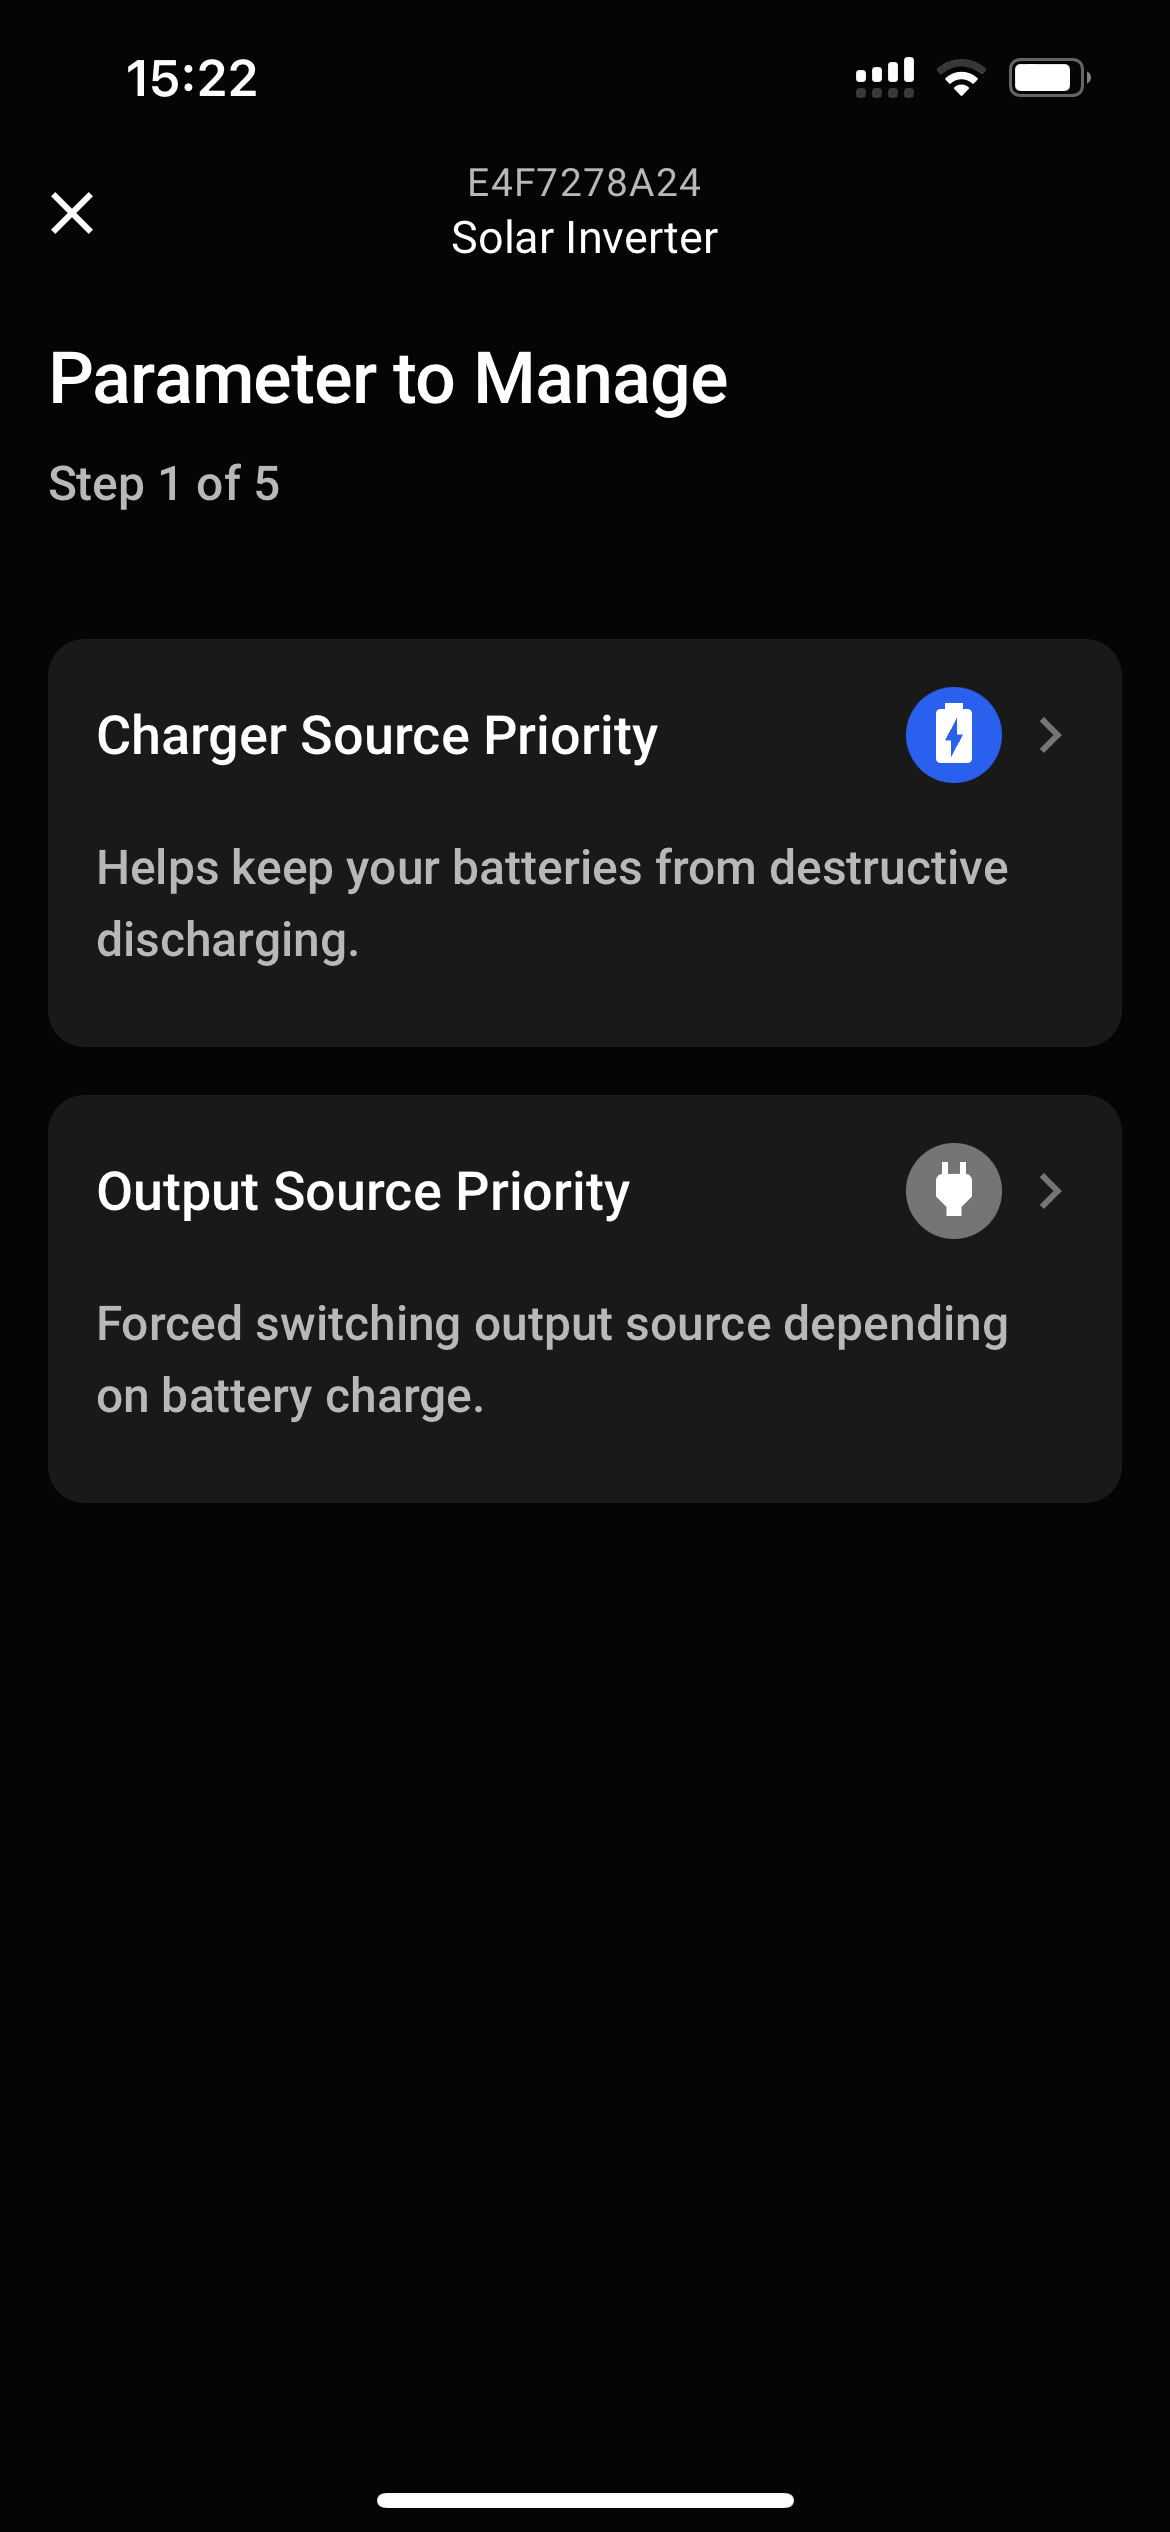
Select the type of rule you'd like to add.
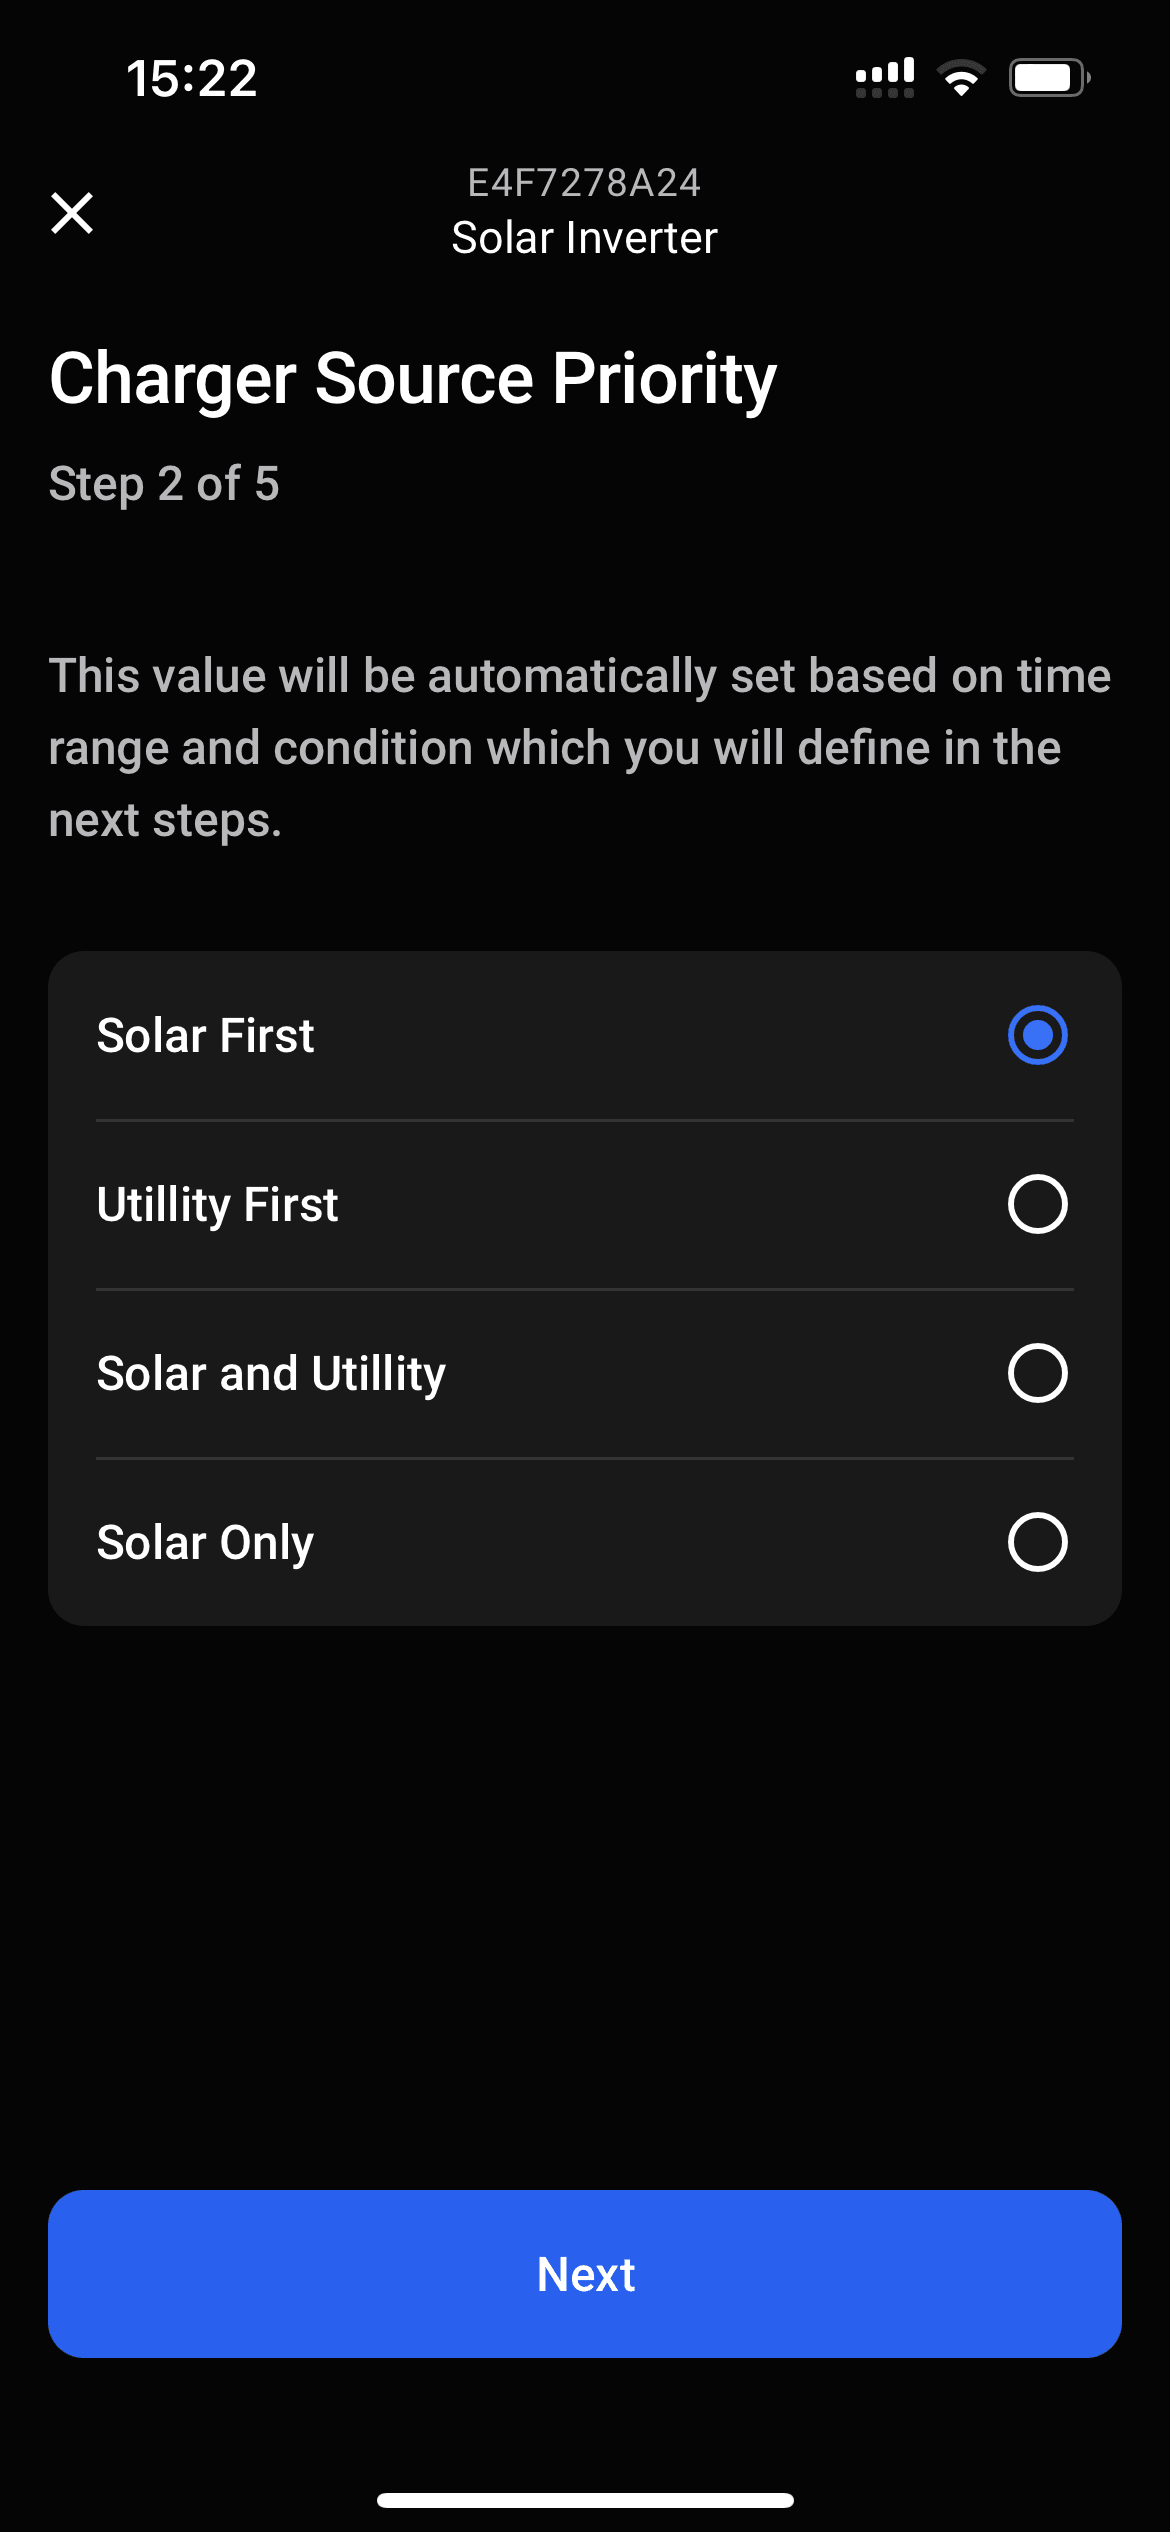
Select the priority setting you'd like to set when the rule gets triggered.
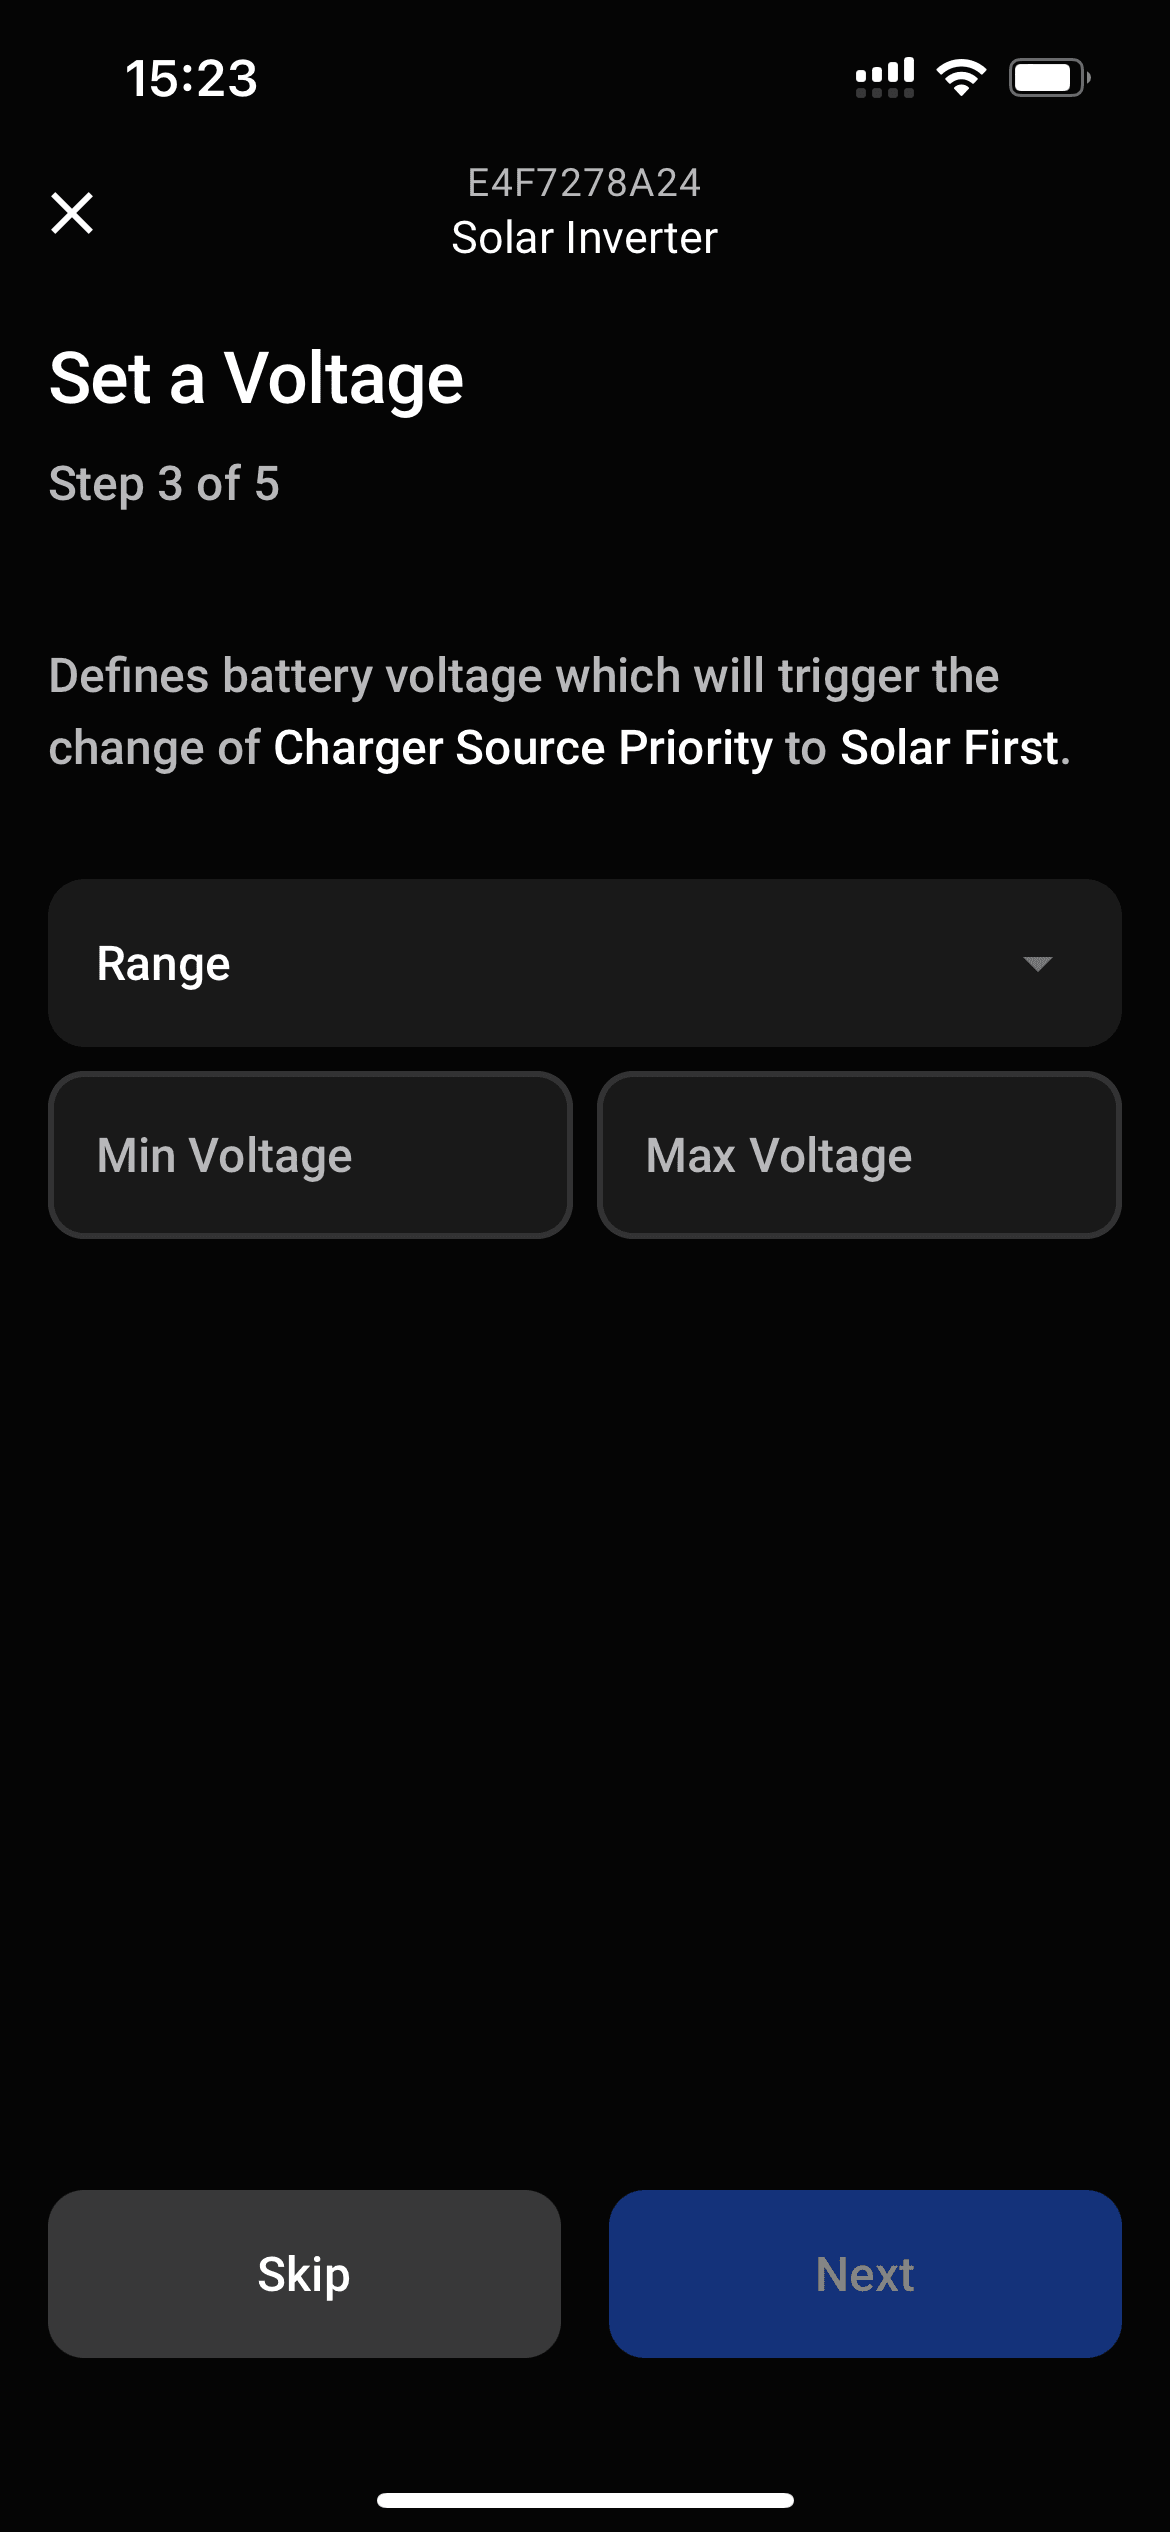
Set desired battery voltage range that will trigger the rule.
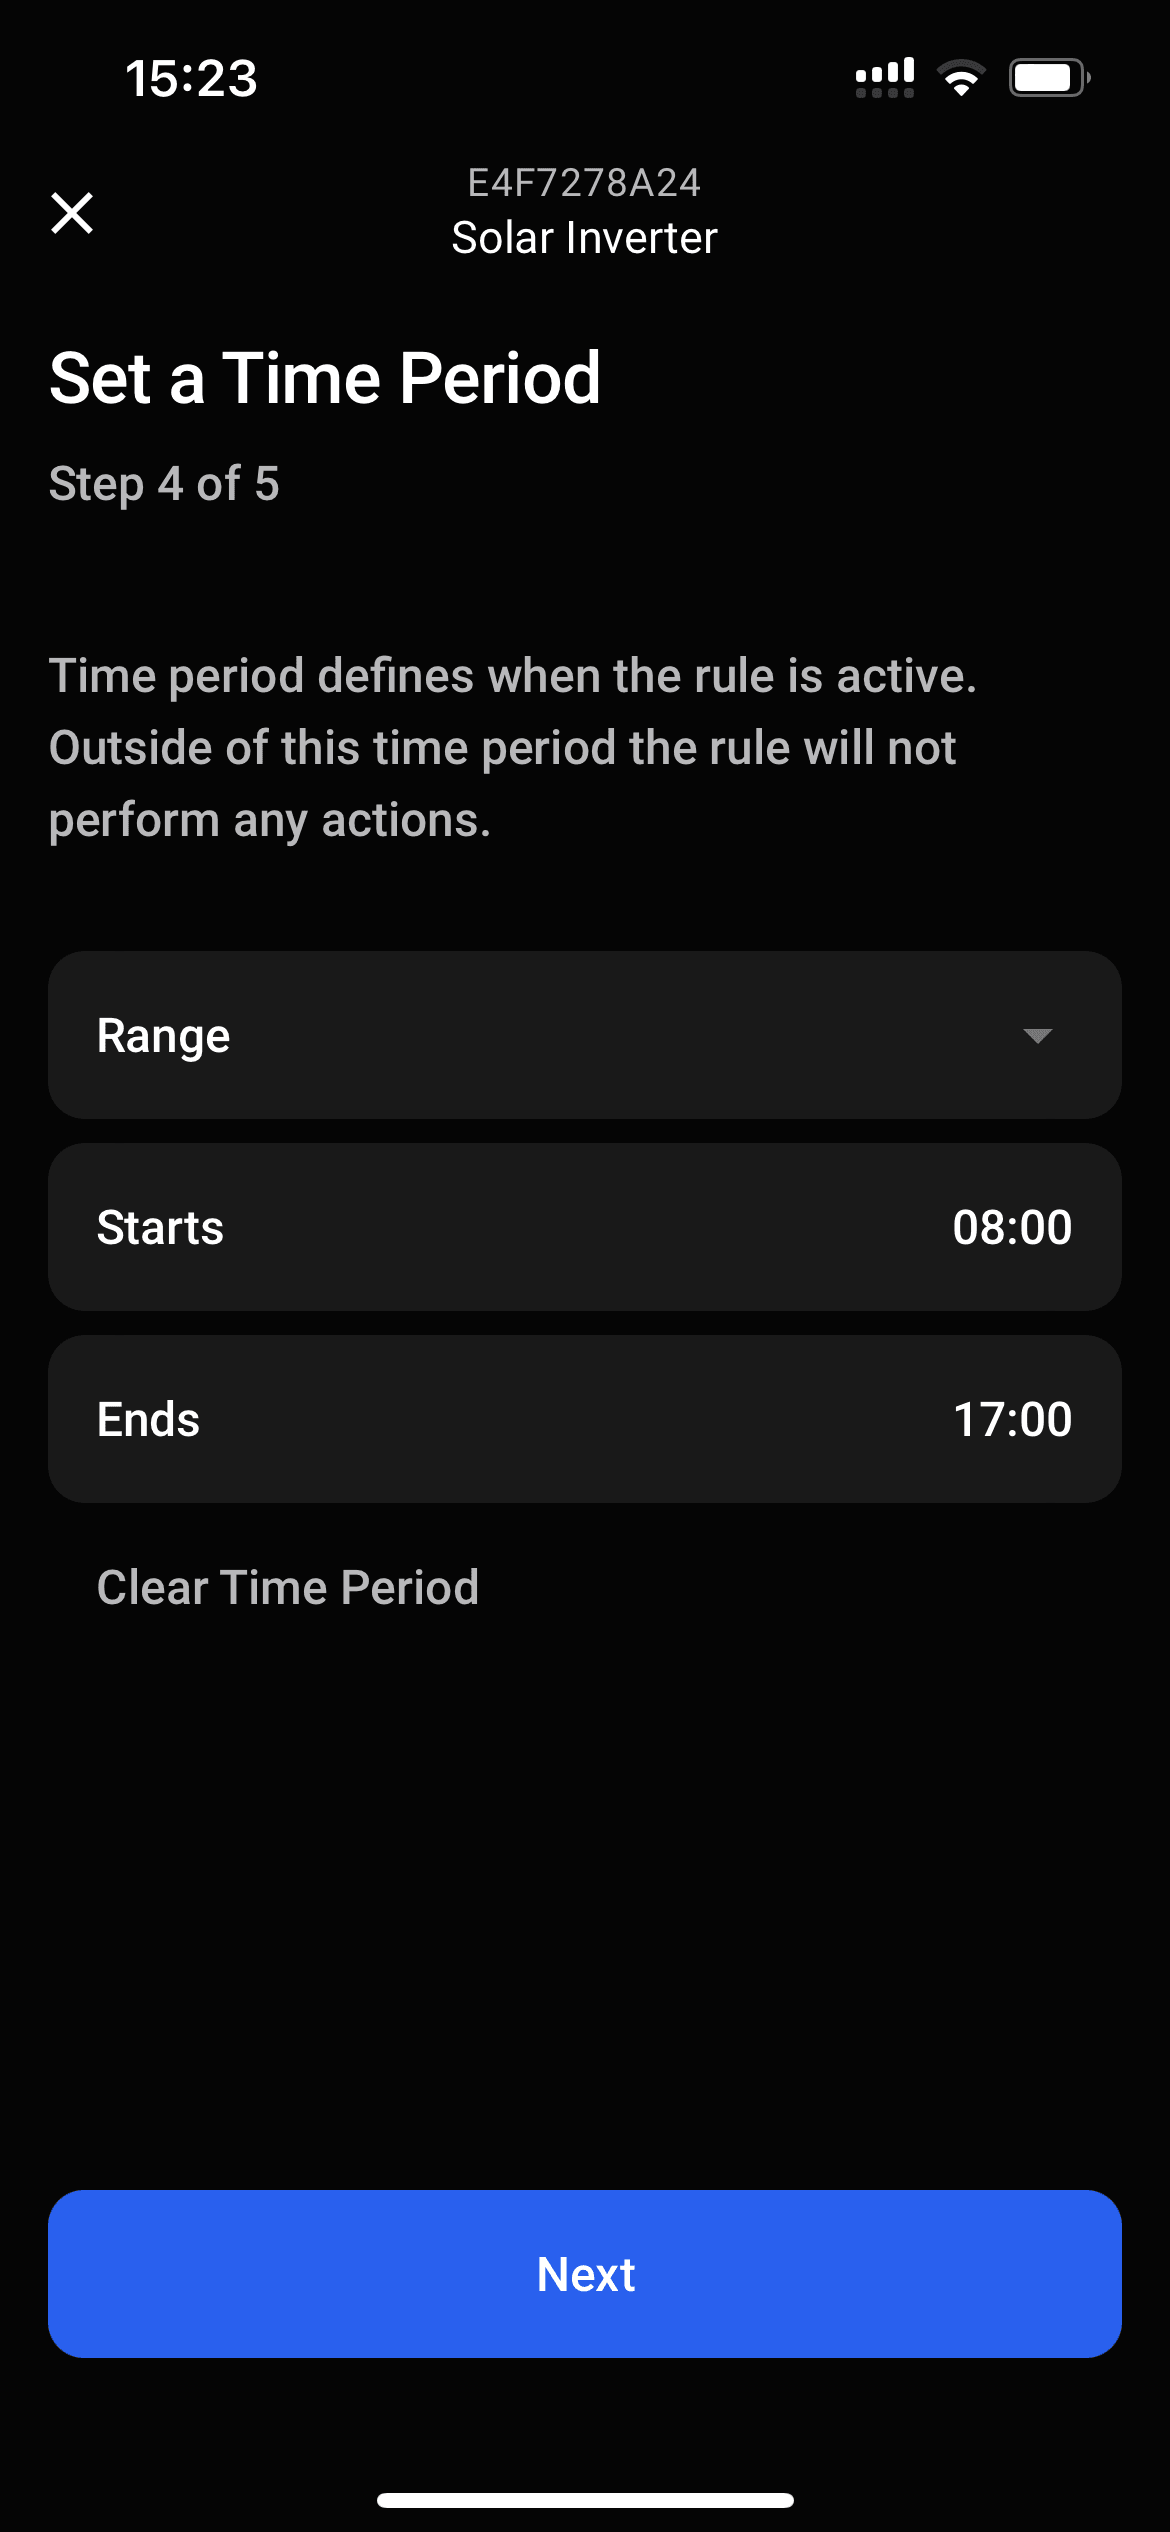
Set desired time period that will trigger the rule.
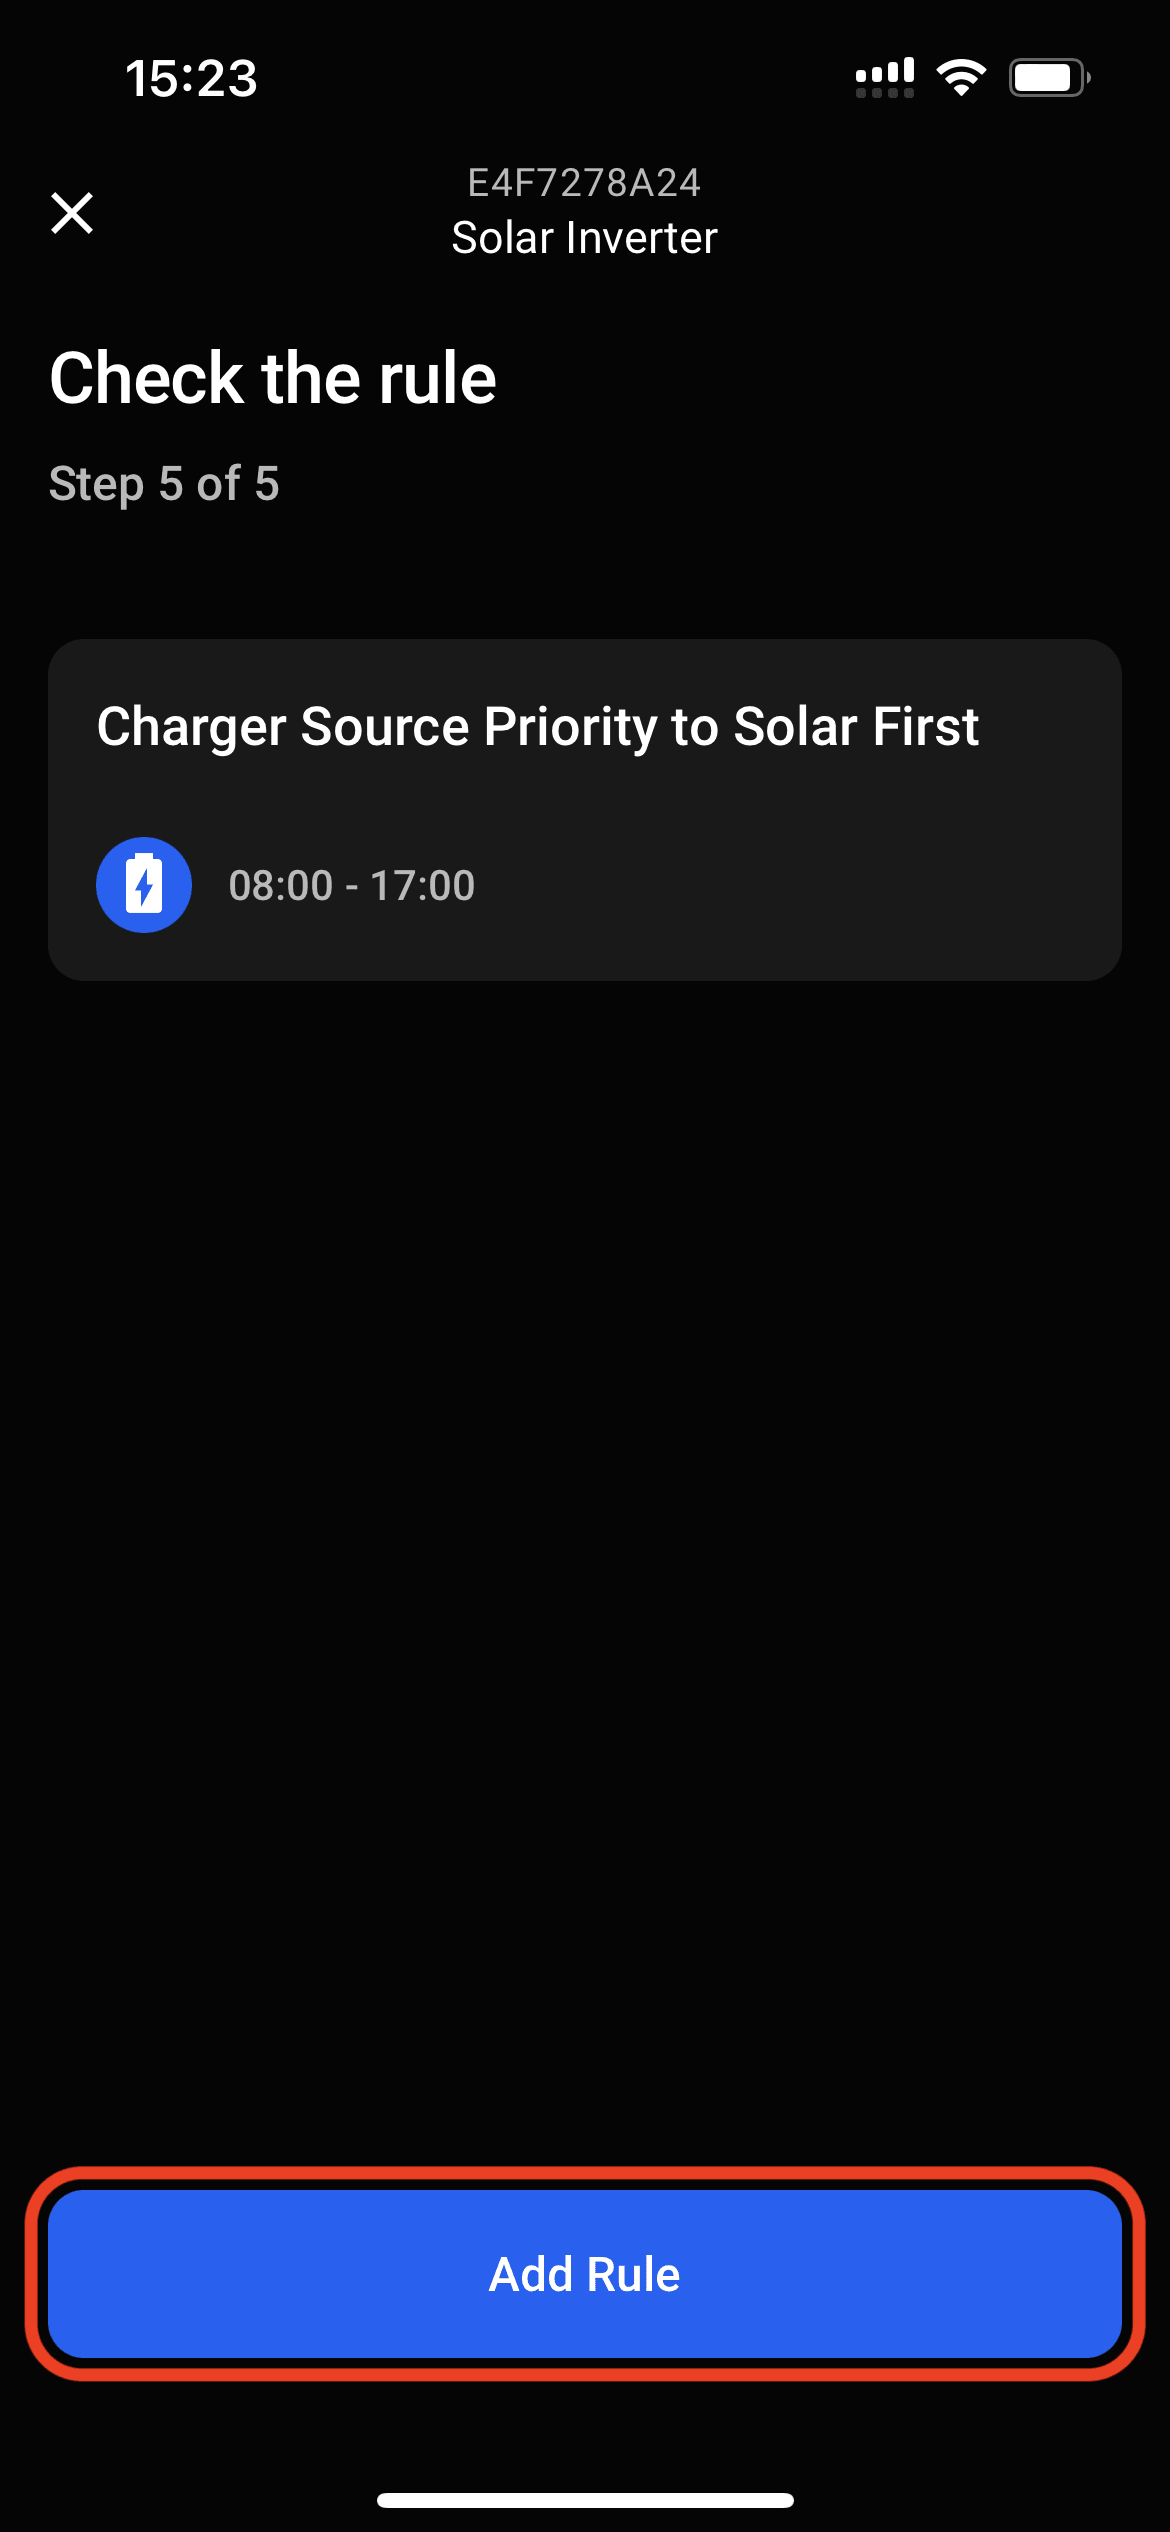
Preview your rule before sending it to the device.
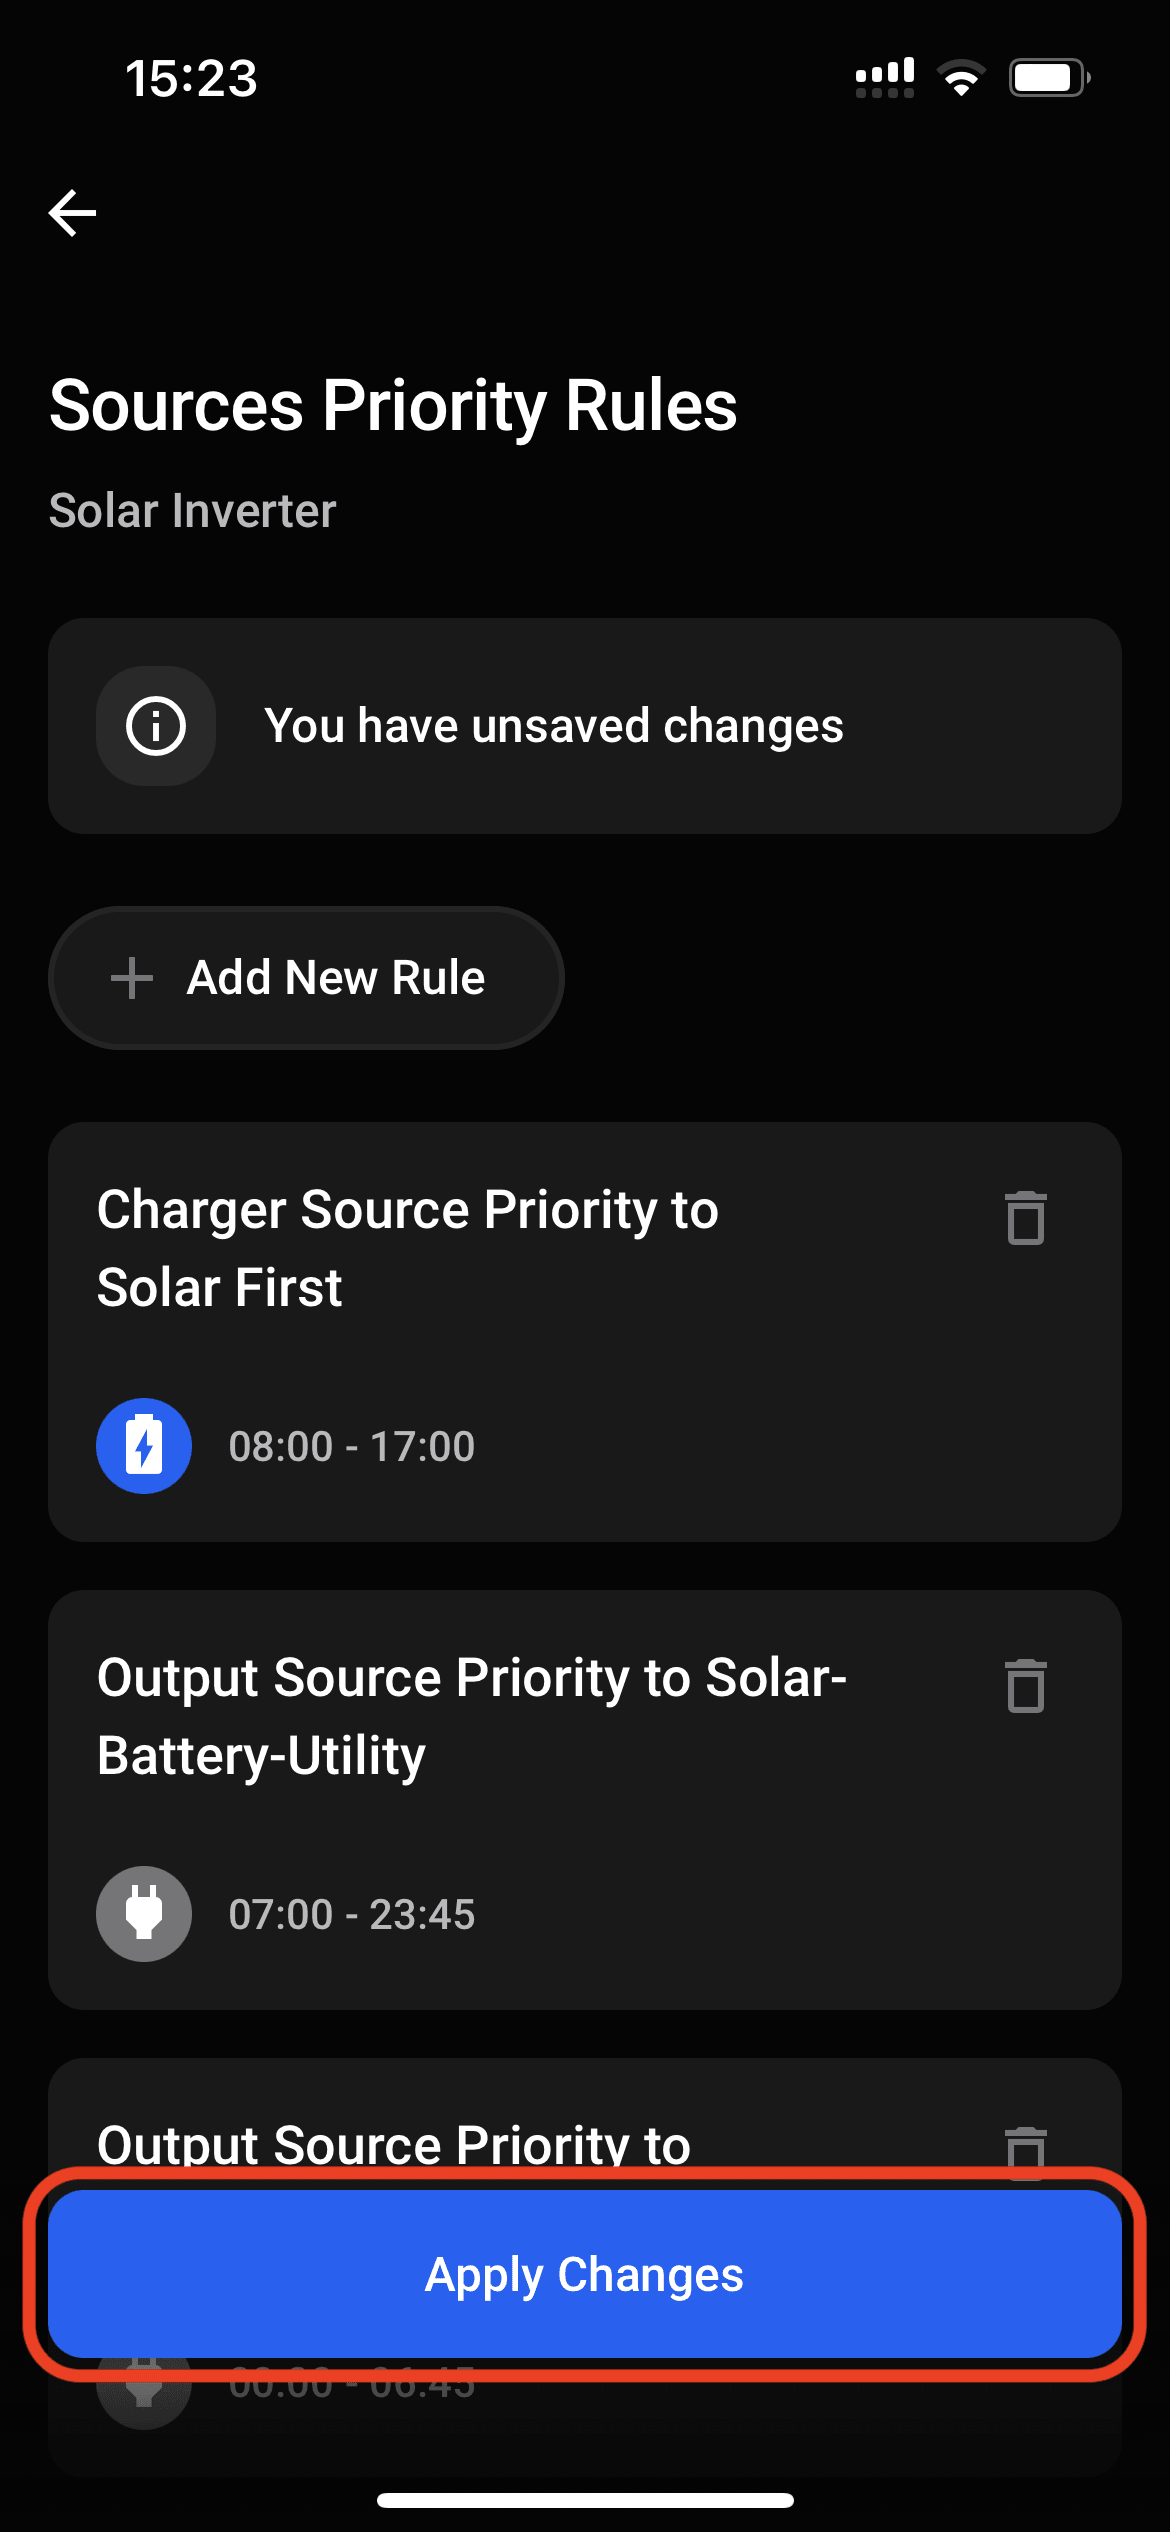
The full list of rules that will be uploaded to ENP-RS232 for inverter automation.
Press Apply Changes.
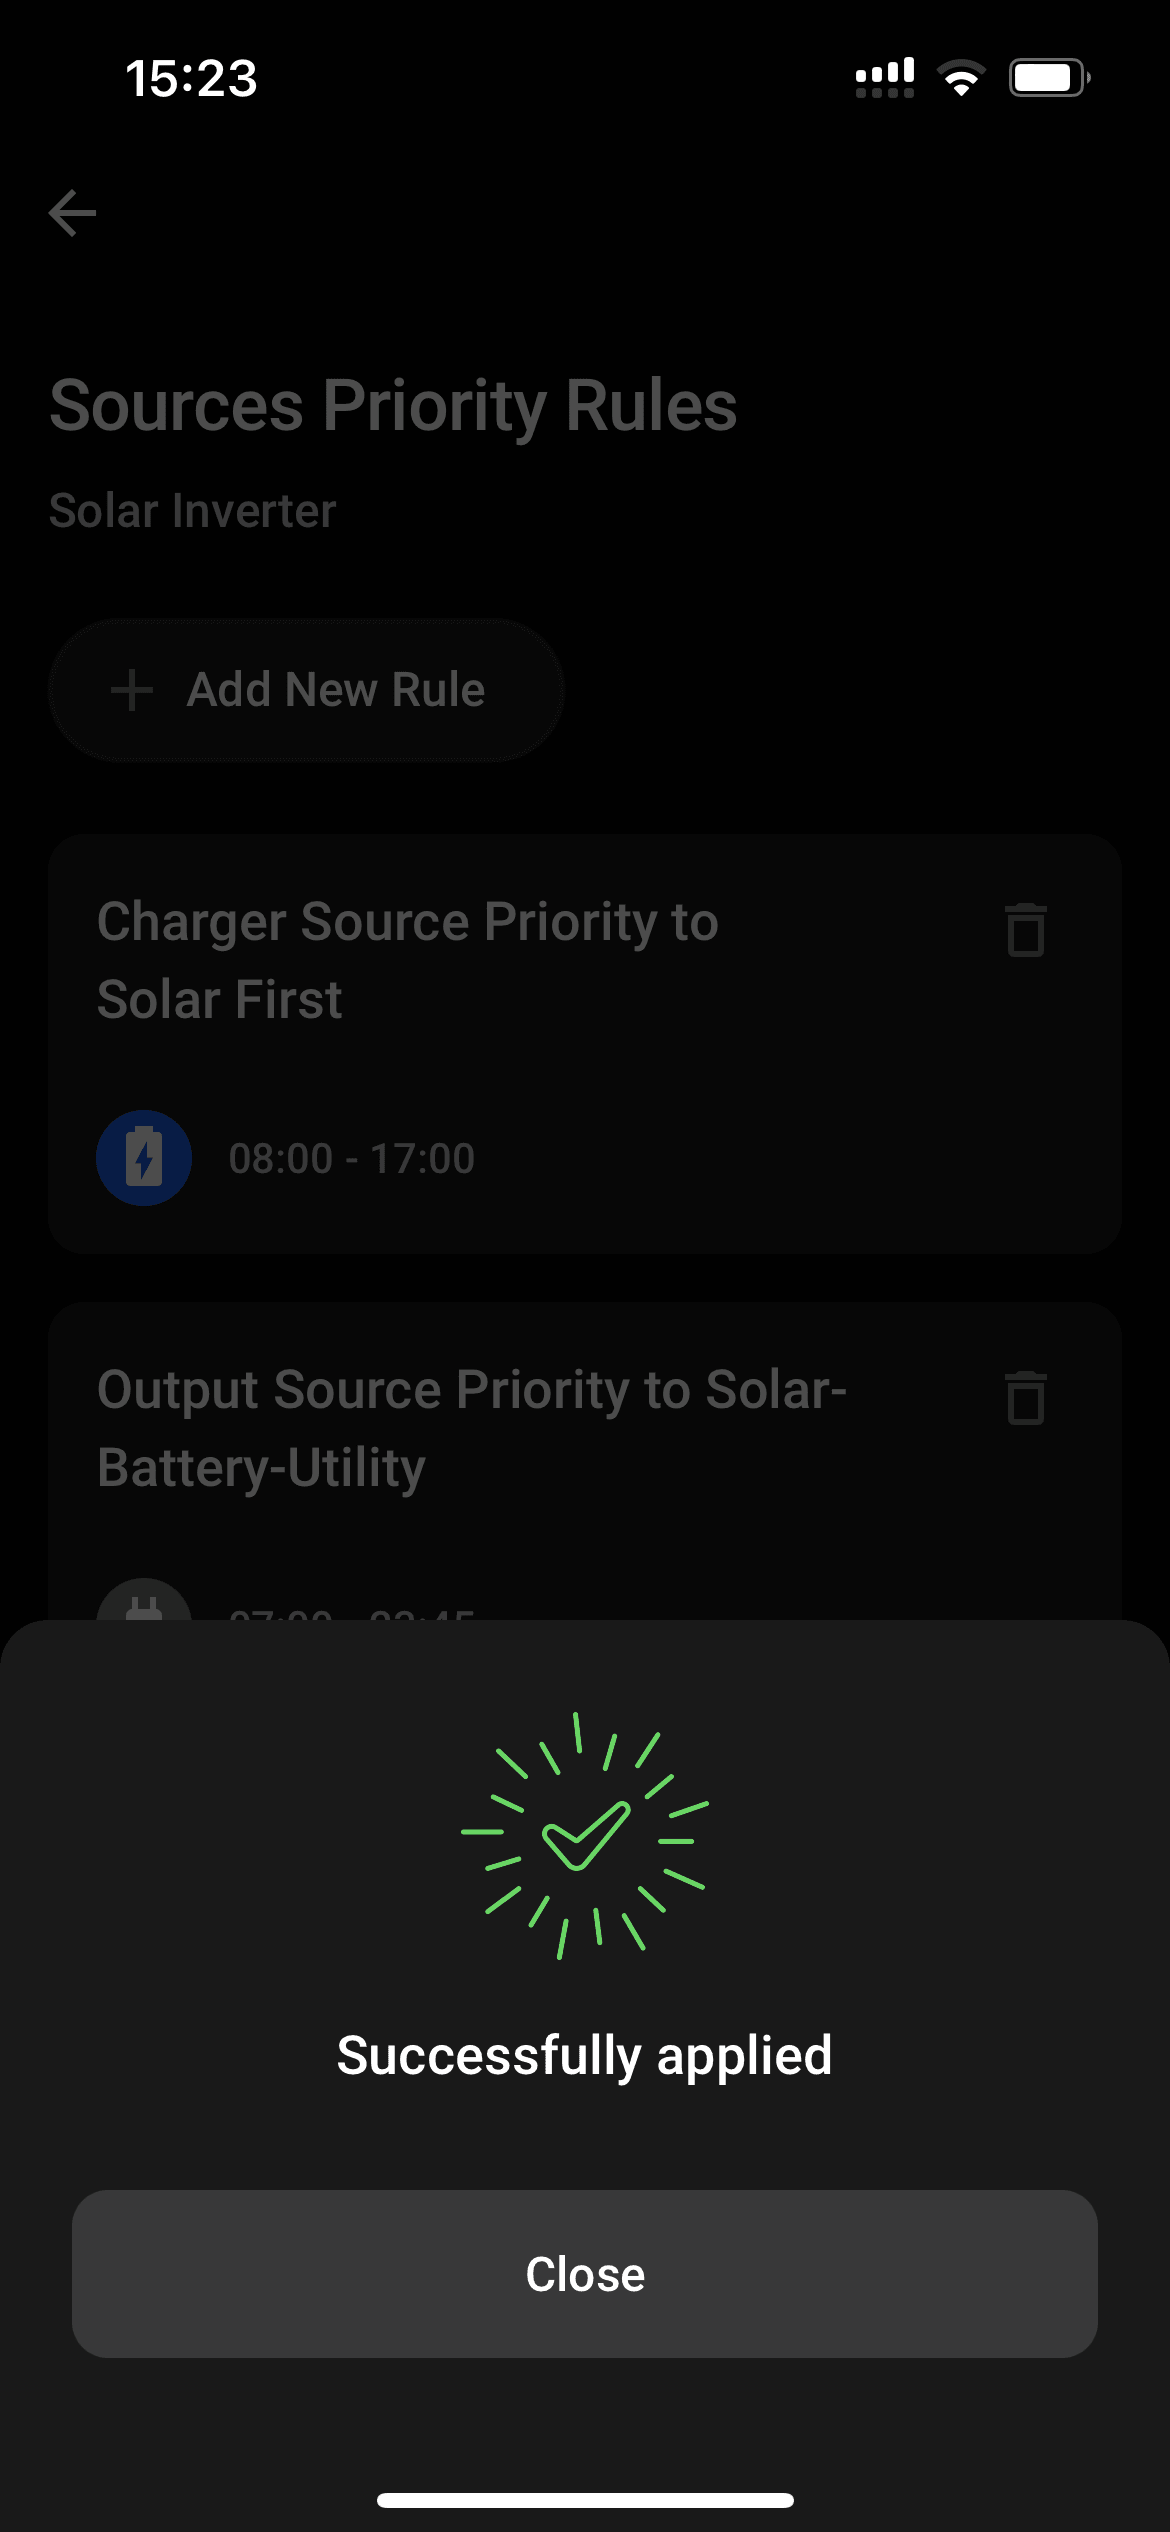
Wait until rules will get updated on ENP-RS232, now your automation rules are active.
💬 Need Help?
Have a question or hit a roadblock? Join the Enapter Discord community to get quick support, exchange ideas, and collaborate with other developers and energy experts.
